Showing posts with label Mint. Show all posts

11 January, 2018

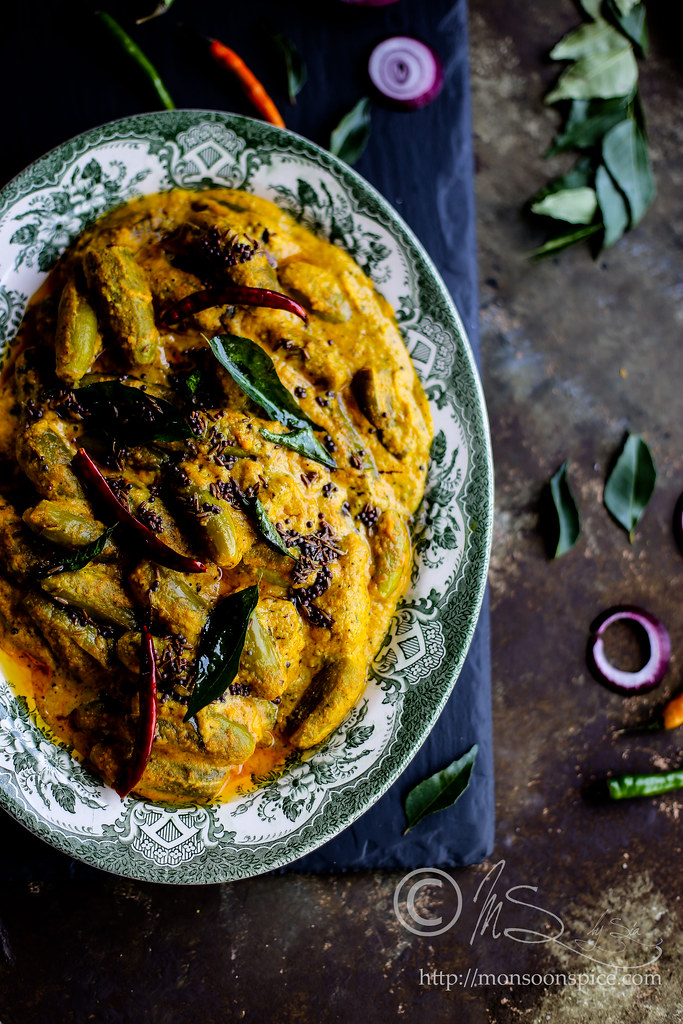
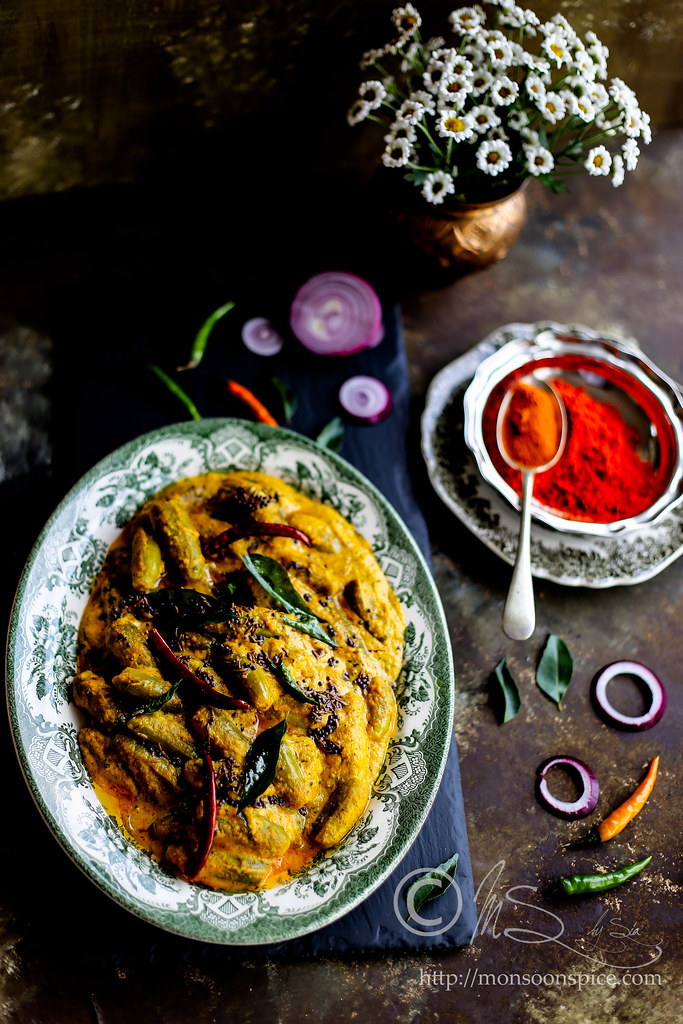
Vegan Tindora Masala Curry | Ivy Gourd in Peanut and Coconut Curry

Learn how to make Vegan Tindora Masala Curry ~ Ivy gourds cooked in a thick and creamy peanut, sesame seeds and dry coconut gravy


Time and time again I am on a self-created mission of learning, developing and sharing recipes which you will never find in any Indian restaurants. These recipes are lovingly created, tweaked and then perfected after many trials and errors by the home cooks and are passed on from one generation to the next with in a family. They are fiercely guarded like some precious treasures and most often, never shared with someone outside their family! So if ever by any chance someone outside the family asks for the recipe, you can be rest assured that only a part of these treasured family recipes will be shared…And oh, half-heartedly! When someone says, “Oh, it’s quite simple you know. You need a handful of this and a spoonful of that. Grind them all and cook with the vegetable!”, you can be sure that the finished dish will never come close to the one you fell in love with. Consider yourself lucky to have had a privilege to taste such family heirlooms and be mindful of their uneasiness to share their family’s secret recipe.


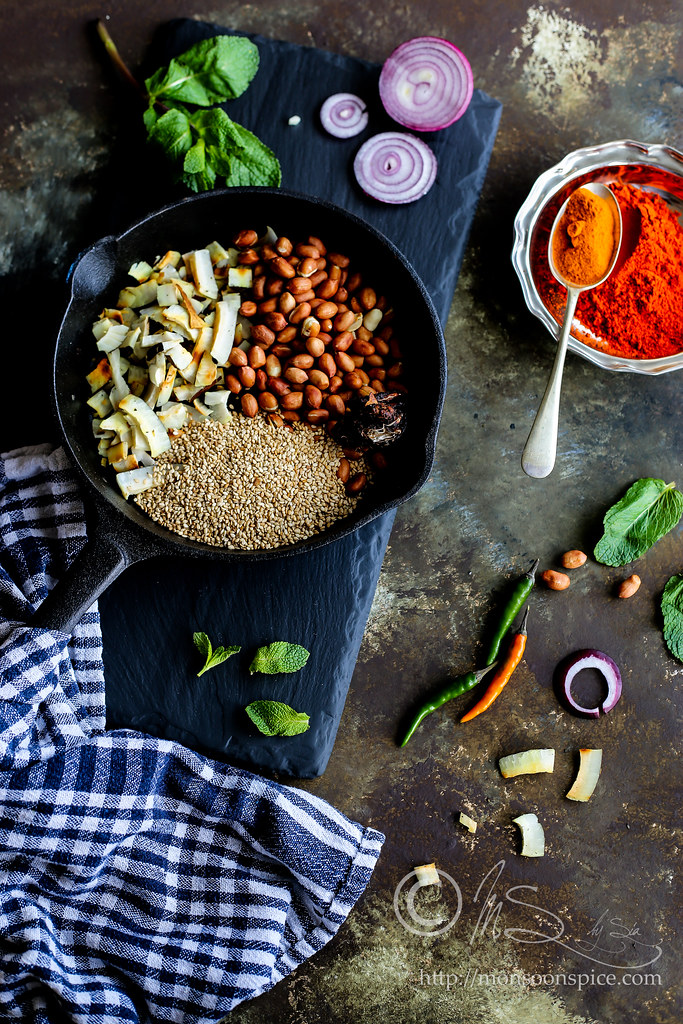
Ingredients for the gravy


A decade ago, I was invited for a lunch by a friend of mine. Students who live in a hostel will know what it means to be invited for a home cooked meals when one has to eat bullet proof roti dipped in watered down red chilli paste with 2-3 chunks of sorry looking vegetables that was passed as a ‘curry’! My friends family were originally from a southern Indian state of Andhra Pradesh (now divided into two states of Andhra Pradesh and Telangana) which was known for their amazing regional food and fiery hot pickles which enslaves your taste buds the moment it touches the tongue. On that particular day, my friends mother had lovingly cooked a festive thali and one dish that made a big impact on my taste memory was the Vegan Tindora Masala Curry where ivy gourds were cooked in a creamy peanut and coconut gravy.

07 July, 2017

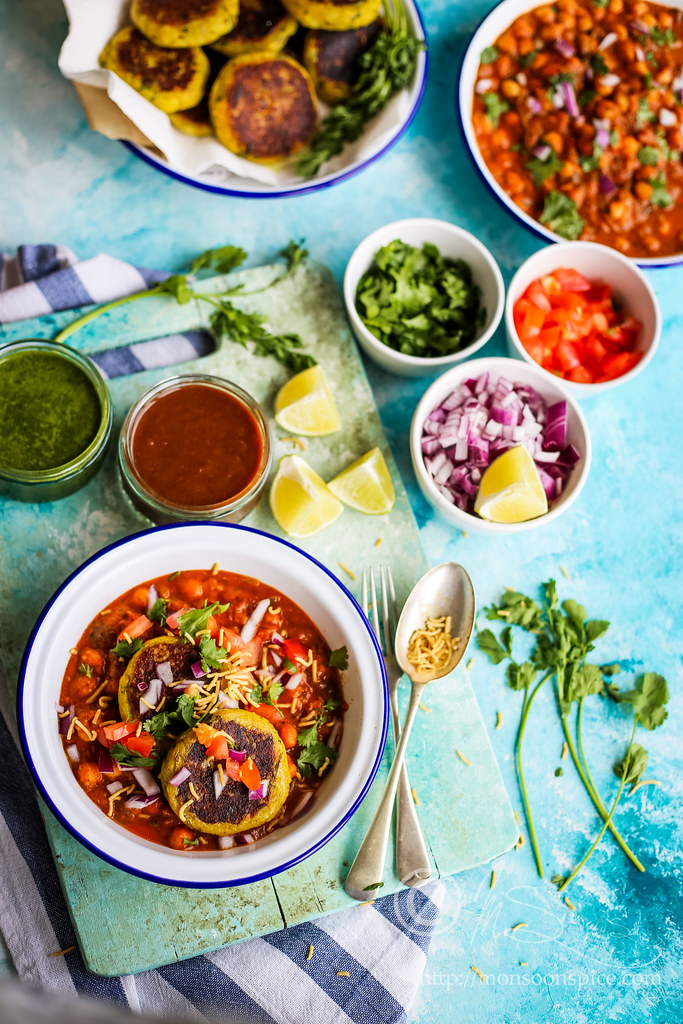
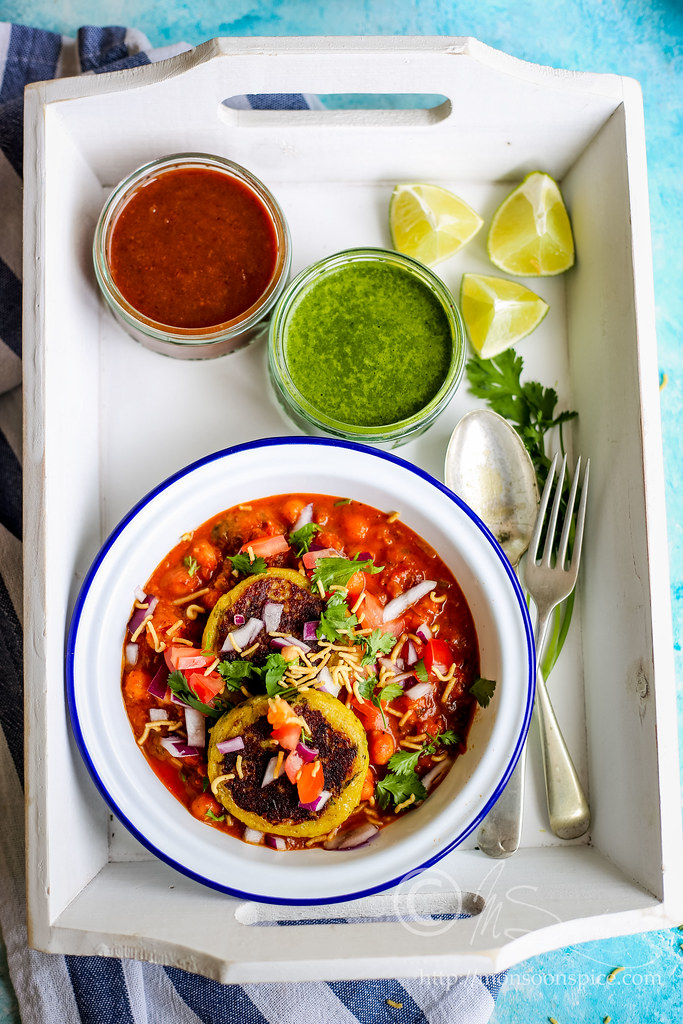
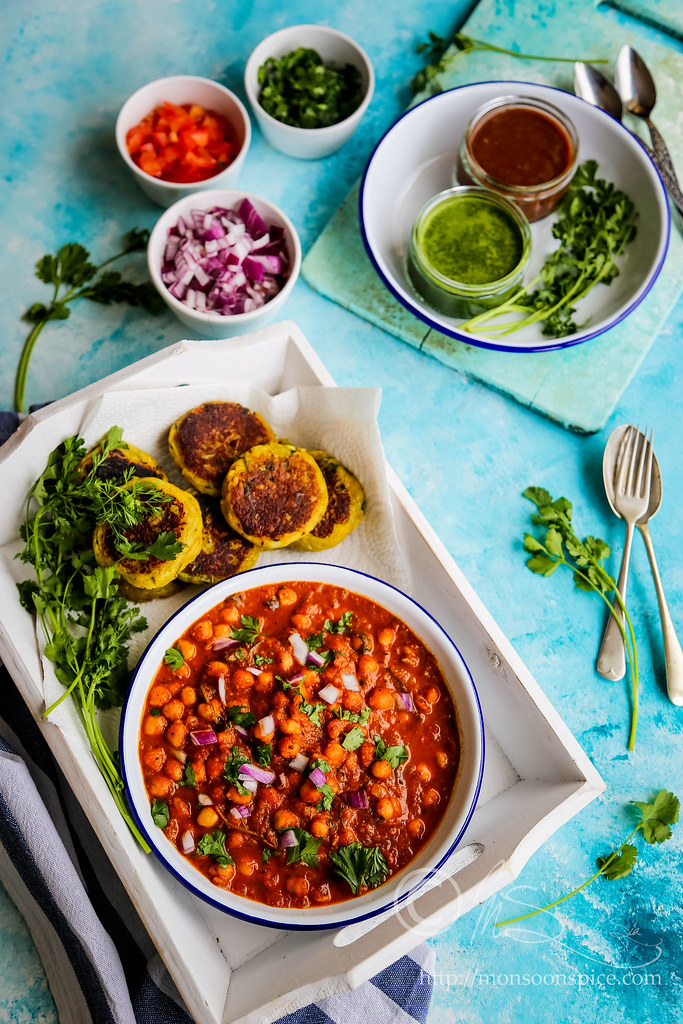
Aloo Tikki-Chole Chaat Recipe | How to Make Aloo Tikki Chole Chaat

Learn how to make Aloo Tikki-Chole Chaat ~ A popular Indian street food of spiced potato patties served with spicy chickpeas curry and assorted sweet date-tamarind chutney and hot mint-coriander chutney and topped with finely chopped onions, tomatoes and sev

Inside a small restaurant with double glazed window you will find several posters of Bollywood stars smiling at you. There are small granite tables with pickle and chutney trays on top and matching red velvet cushioned chairs. Large framed photograph of Guru Nanak is hung just above the cashier’s desk and a small table fan is rotating gently. The aroma of food being cooked inside the kitchen is intoxicating and people are busy savouring plates of Naans, Curries, Chaats, Indian sweets and Kebabs.


Come out of the restaurant you will find women in colourful saris and salwar kameez, men wearing colourful turbans and kurtas, pavement food stalls selling Samosas, Chaats and Jalebi, small shops selling mobile phones and bright fabrics in rainbow colours hanging in shop fronts. Add to this the Bhangra music and sweet smell of incense and spices is in the air. Am I in India?!

22 June, 2017

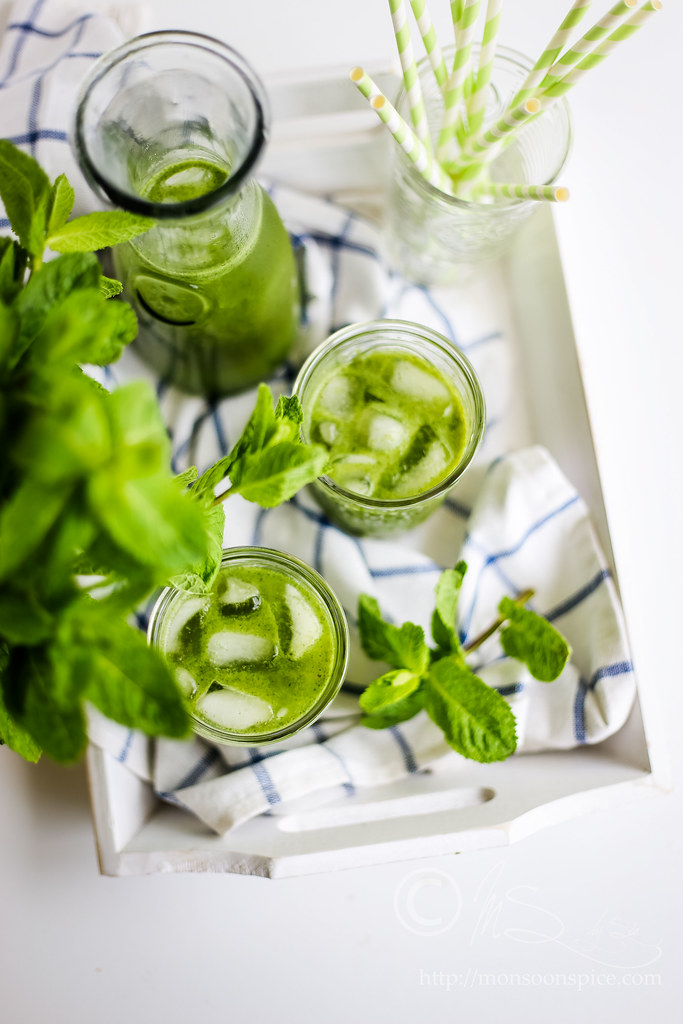
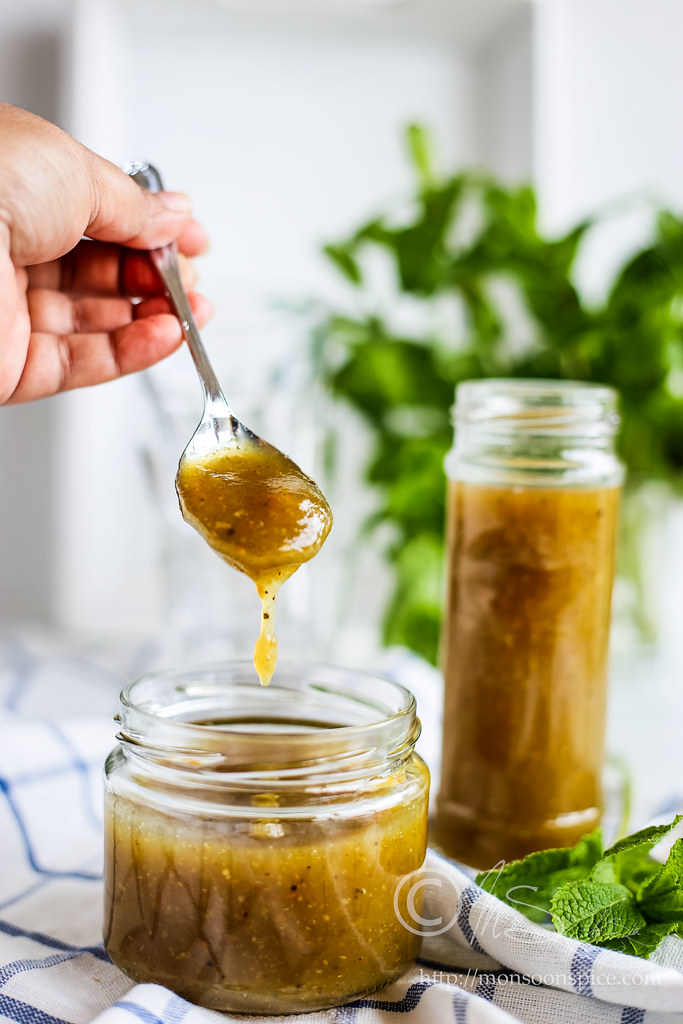
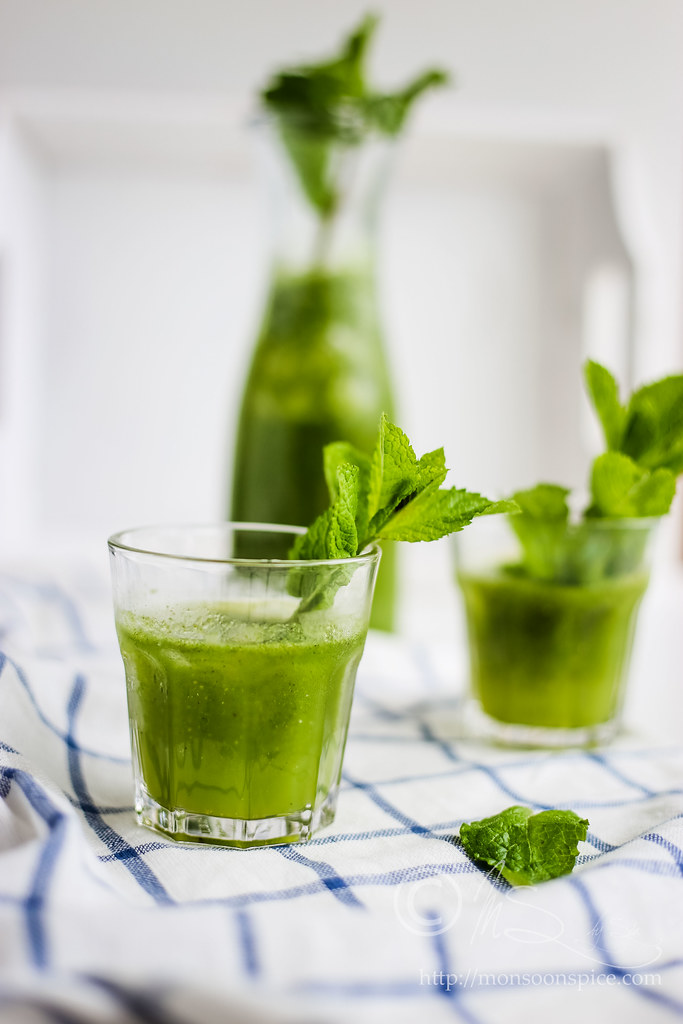
Aam Panna Recipe | Indian Raw Mango Cooler

Learn how to make Aam ka Panna ~ Sweet and sour Indian raw mango cooler flavoured with spices, black salt and mint

It’s officially summer in my neck of woods and for the last two weeks the heatwaves have swept across the nation. I am not very active on social media these days as it will be considered sin to spend time within the four walls. The windows and doors are wide open, and I spend most of my time pottering around the garden, laying on grass and snoozing under the perfect blue skies. My morning walks have become longer as I enjoy the company of mother nature and her children like tweeting birds and wild life, walking in the woodlands under the protective canopy of giant trees. The kitchen is the last place on my mind as simple salads, quick coconut-yogurt based curries and ice creams have officially become our meals and washing them with gallons of water to quench the thirst and to keep the body cool.


It's time like this when I sift through my handwritten recipe diary in search of recipes that has been tried and tested for centuries. The recipes for scorching summer months to keep the body cool due to excess hear from the sun. One such recipe is a very popular raw mango recipe from the northern part of India called Aam Panna, a very refreshing raw mango cooler flavoured with spices and good helping of fresh mint. It is this Aam ka Panna, with its sweet tangy flavor makes it extremely rejuvenating and its health benefits make it a go to drink and a must try recipes for the summers when the mighty mango season arrives. Aam Panna is consumed in the summers as it acts as a coolant, rehydrates body and provides the essential electrolytes lost during the hot weather. A glass of this drink in a summer afternoon can combat fatigue and energize a person.

03 May, 2017

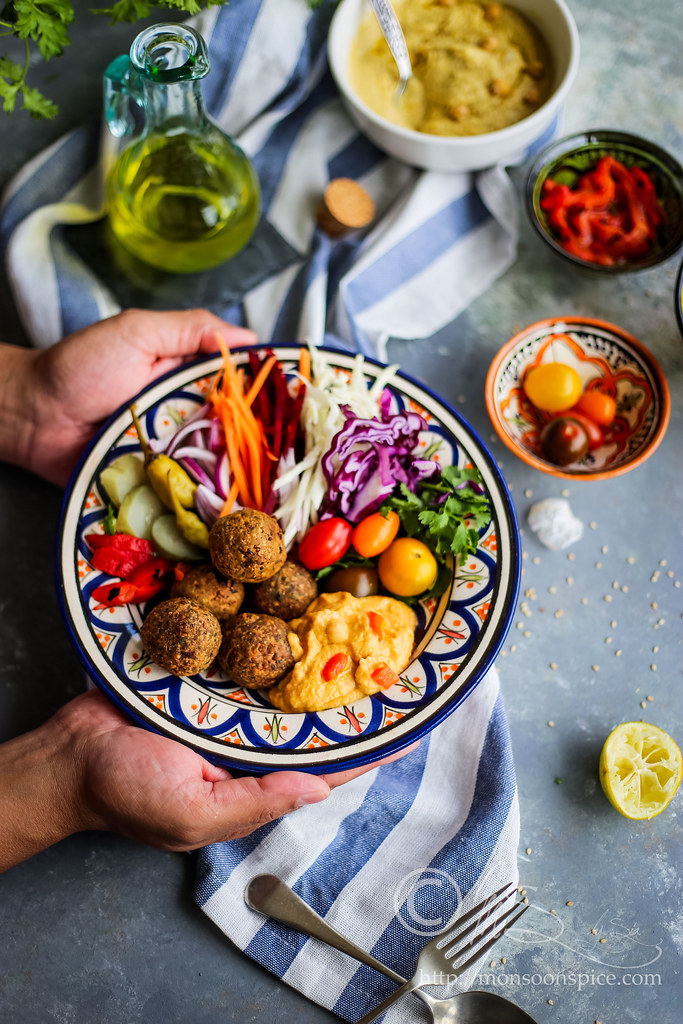
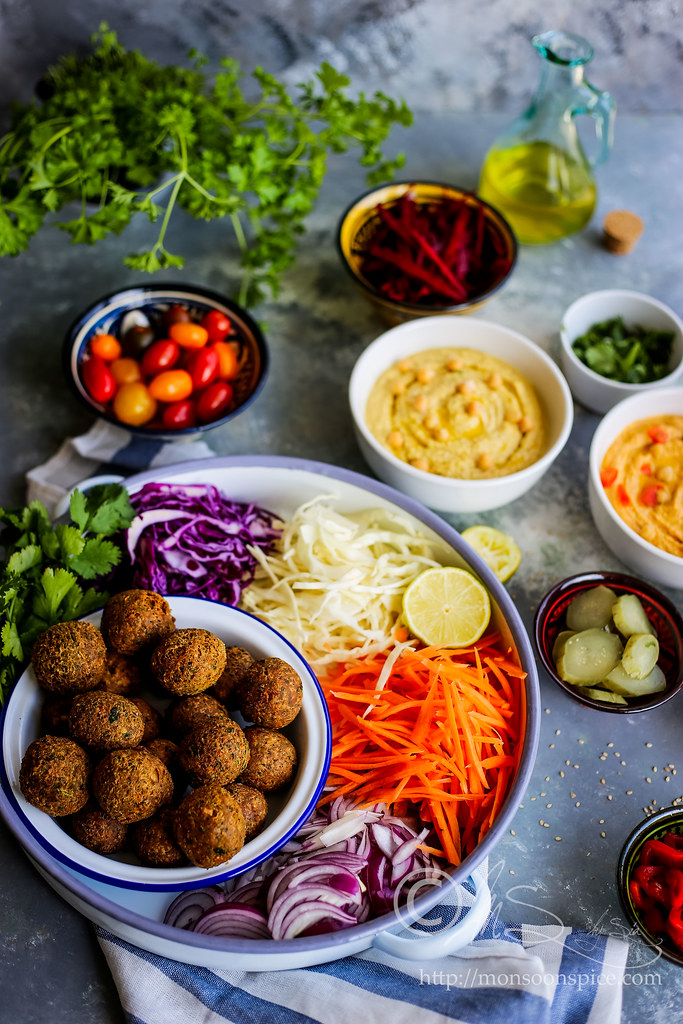
Falafel-Pita Sandwich with Hummus Recipe | Middle Easten Inspired Buddha/Hippie Bowl

Learn how to make Falafel-Pitta Sandwich with Hummus ~ Middle Eastern chickpea fritters flavoured with fresh herbs and spices and chickpea dip

Food has the power to evoke memory, bring people together and to transport us to other places without travelling! Food not only satiates our hunger, but it also satisfies all five senses. Food has that magical power to bridge gaps, blur the borders that divides the countries and its people and above all, it brings joy. And ultimately, food often unites what geo-politics seeks to divide. Take, for example, the history of Falafel; small bite sized fried balls made of chickpeas, herbs and spices, ubiquitous throughout Middle East, is the national dish of Israel.

Middle Easten inspired Buddha Bowl or Hippie Bowl

Middle Eastern Mezze

Despite its strong connection with Israel, the origin of falafel is unknown and controversial. The common theory is that the Falafel originated in Egypt. The history of falafel goes back to the days of the pharaohs and it is believed that the name falafel to come from ‘mefelfel’, an Arabic word for spicy. The Christian Copts, an Egyptian Christian sect, also claim to have invented the ‘ta’amia’, the fava-bean fritter that is parent to the falafel, as a replacement for meat during Lent. Another theory is that falafel invented in Alexandria in Egypt. Since Alexandria is a port city, sailors from all over the world took these delicious little patties home, and eventually falafel became popular fast food all over the Middle East.

27 April, 2017

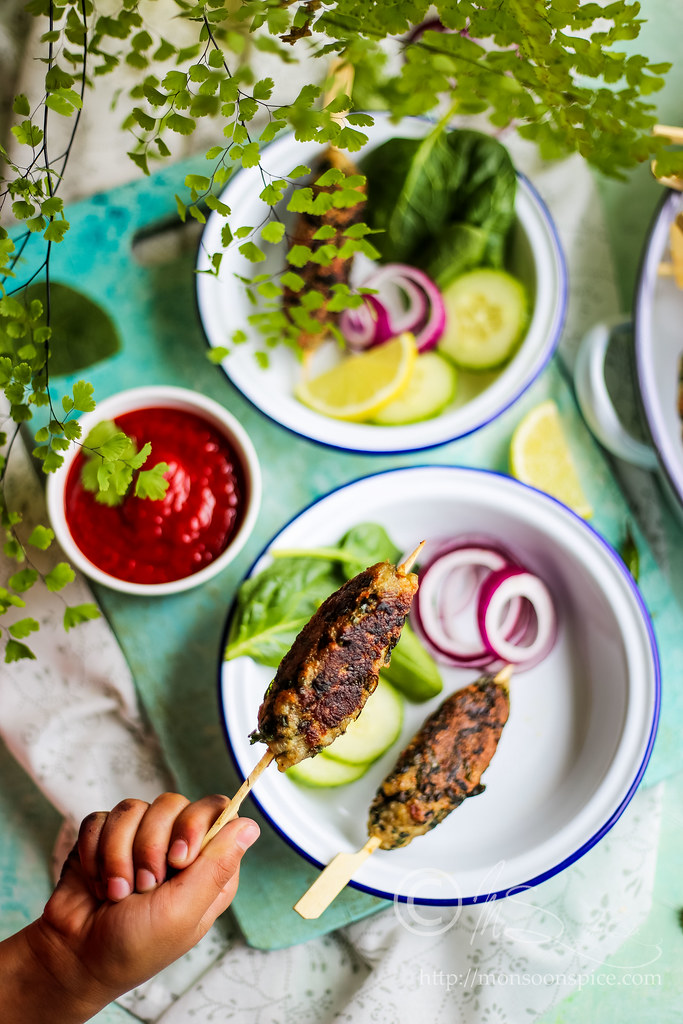
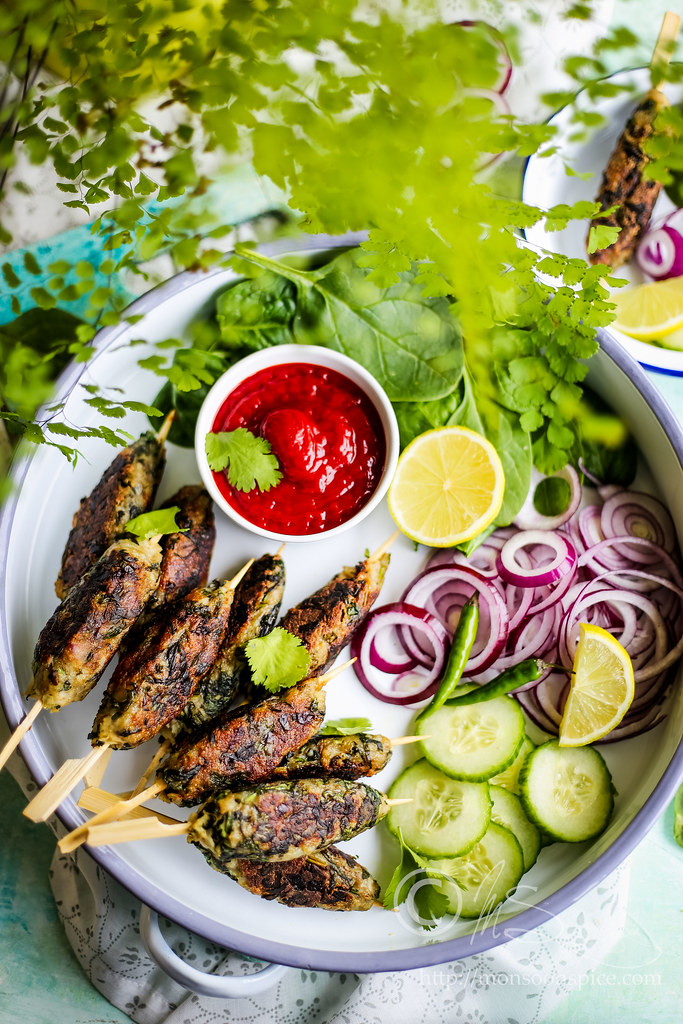
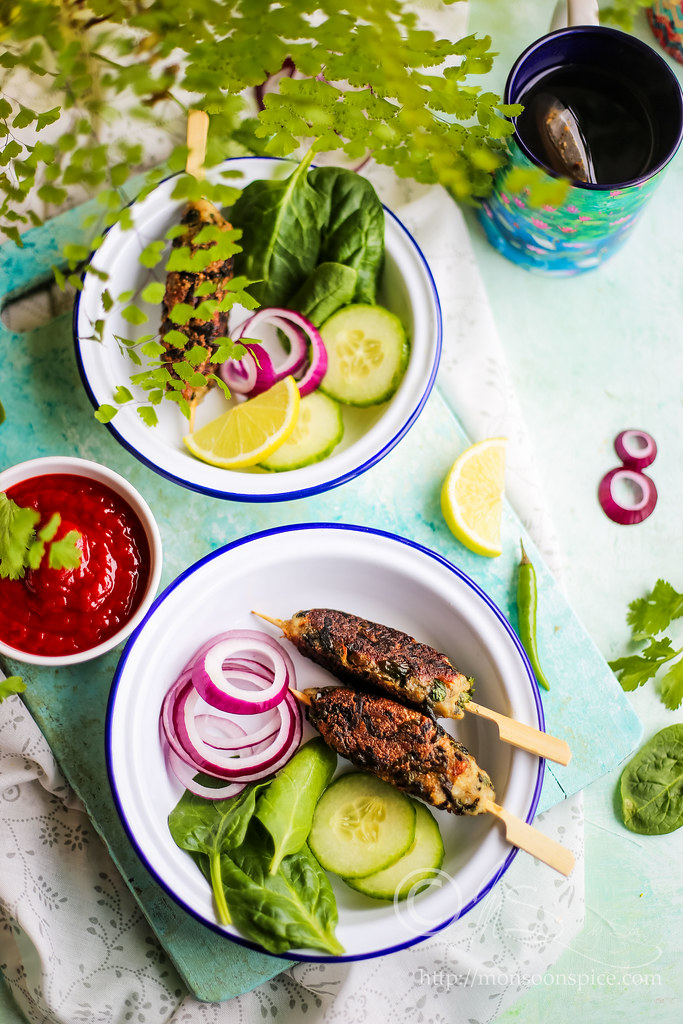
Veg Hara Bhara Kabab Recipe | Simple Vegan Kebab Recipes

Learn how to make Hara Bhara Kabab ~ Mildly spiced Indian vegan spinach and potato kebabs flavoured with fresh herbs and aromatic spices

We made these Hara Bhara Kababs exactly a month ago when LD was recovering from another bout of viral infection. When I say we, it means my 6-year-old and I, mom and son team. Cooking with over enthusiastic kid means fun, but it also means mess! I kid you not. The kitchen will end up looking like a bomb sight with flour covered kitchen floor and counter tops, sauce smeared kitchen cabinets, and a child who is covered with every ingredient that went into that pot or pan of food you are making! Then why teach your kids to cook when it means more of a mess than its worth?! Absolutely. Well, there is not just one, but 101 reasons to introduce our kids to the joys of cooking.


Teaching our kids to cook is one of the most basic life skills we can pass on and most importantly, it gives us the opportunity to teach them valuable lessons. I find him curiously touch, smell and taste the ingredients. This natural inquisitiveness of LD turns into total fascination and then surprise when he watches the dramatic transformation the food goes through in terms of colour, texture and size right before his eyes during cooking and baking. The once firm and hard potatoes turn soft and mushy, the delicate, easy to crack eggs become hard when boiled, the crystals of sugar and salt completely gets dissolved, the fruit is turned to juice and how it becomes one of his favourite treat ice lolly when kept in freezer overnight! If this is not magic, then I don’t know what else is?!

16 February, 2016

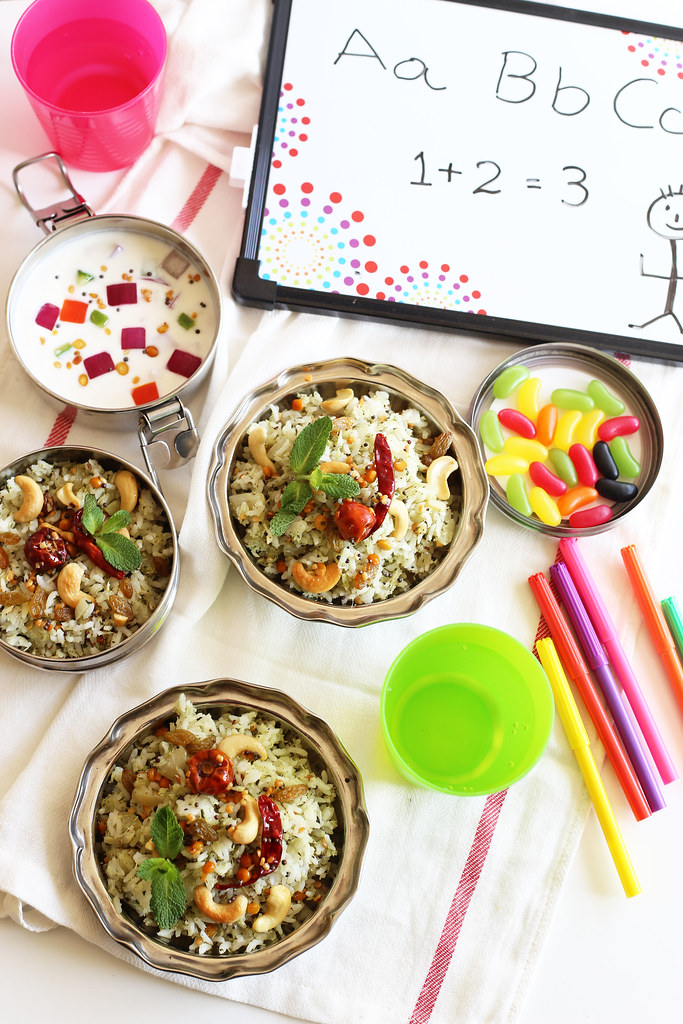
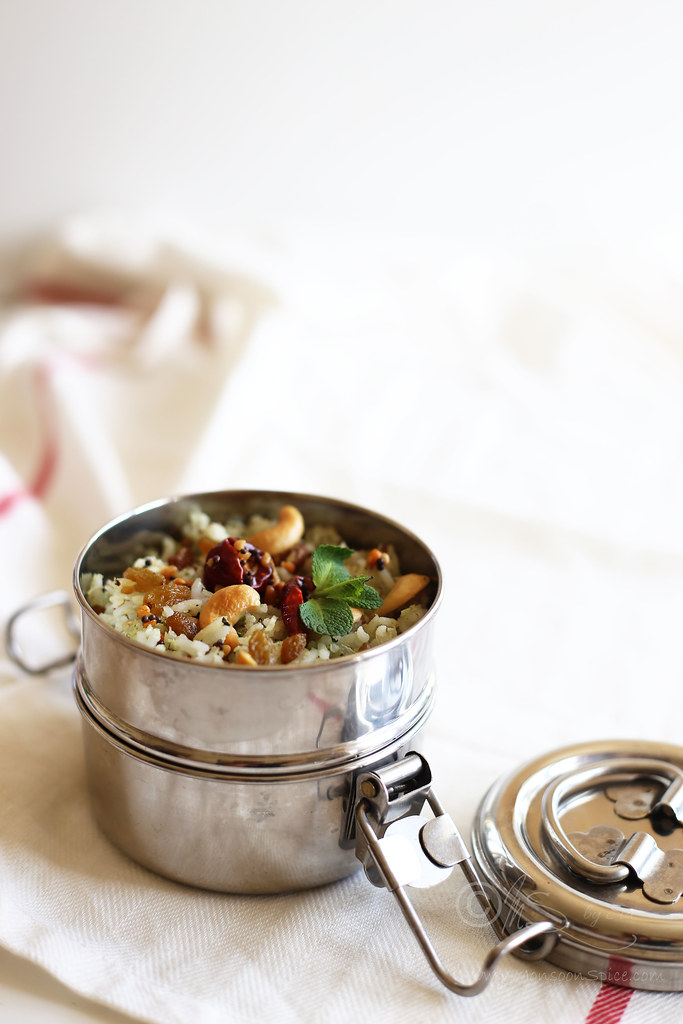
Mint and Coconut Rice Recipe | Simple and Quick Mint Rice Recipes

Learn how to make Mint and Coconut Rice ~ South Indian rice recipe of fresh coconut, mint and lime juice flavoured with generous tempering of crunchy cashew nuts, juicy raisins and aromatic spices

I am not the only one for whom many of life's most intimate details come flooding back at the sight, smell and taste of particular foods. It is not really a big surprise that, while I struggle to remember my mobile phone number or sometimes, rake my brain helplessly to recall my best friends' names, the merest sniff of certain food can bring back memories from the days of my early childhood with frightening clarity and make me walk down the memory lanes with rose-tinted nostalgia. One such dish that is stored safely in my food memory treasure chest is the simple and unassuming Mint and Coconut Rice from my school days drenched in monsoon rains and Amma’s love.


It was the first Monday of June, probably the most dreaded day for any kids in India. It was the day when schools would reopen after two months of fun filled adventurous summer holidays. Dressed in new uniform with shiny new black shoes and socks and cart load of new text books and notes on our bags, we kids would drag ourselves to school half-heartedly wishing it was just a bad dream and anytime the bubble would go pop as soon as we opened our eyes. Unfortunately, it was not the case! The thought of no more sleeping late at night and getting late in the morning, no more picnic lunches in the mango orchards and climbing the mango trees, no more sling shots and biting into raw or juicy stolen mangoes was enough to dampen our spirits. To top it all, on every first day to school it would rain like it never rained before, dampening our uniforms and spirits.

12 June, 2014

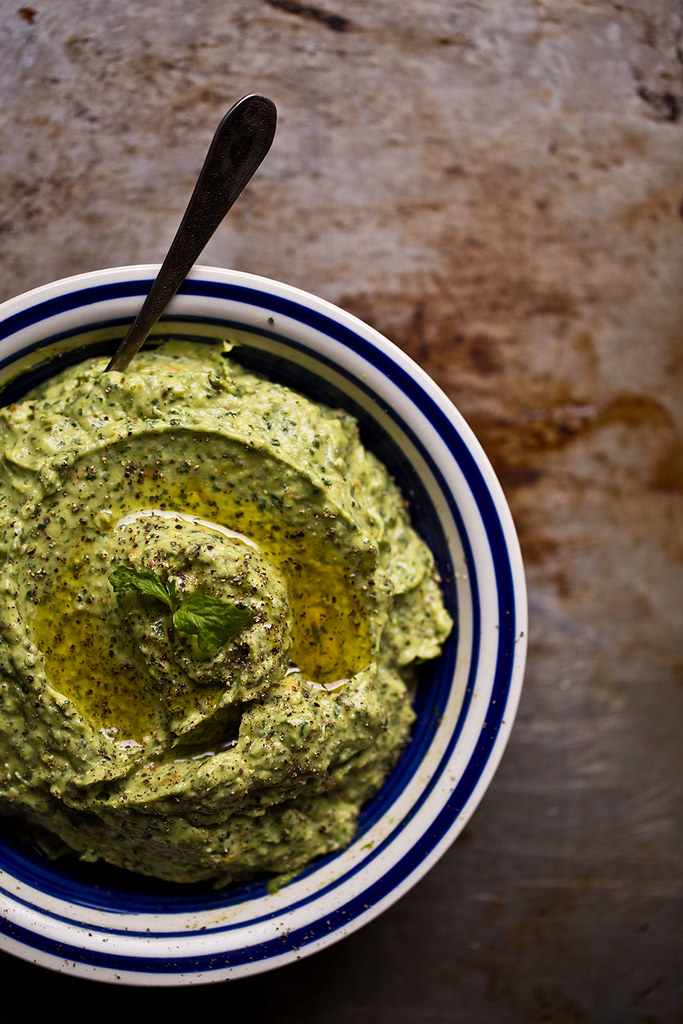
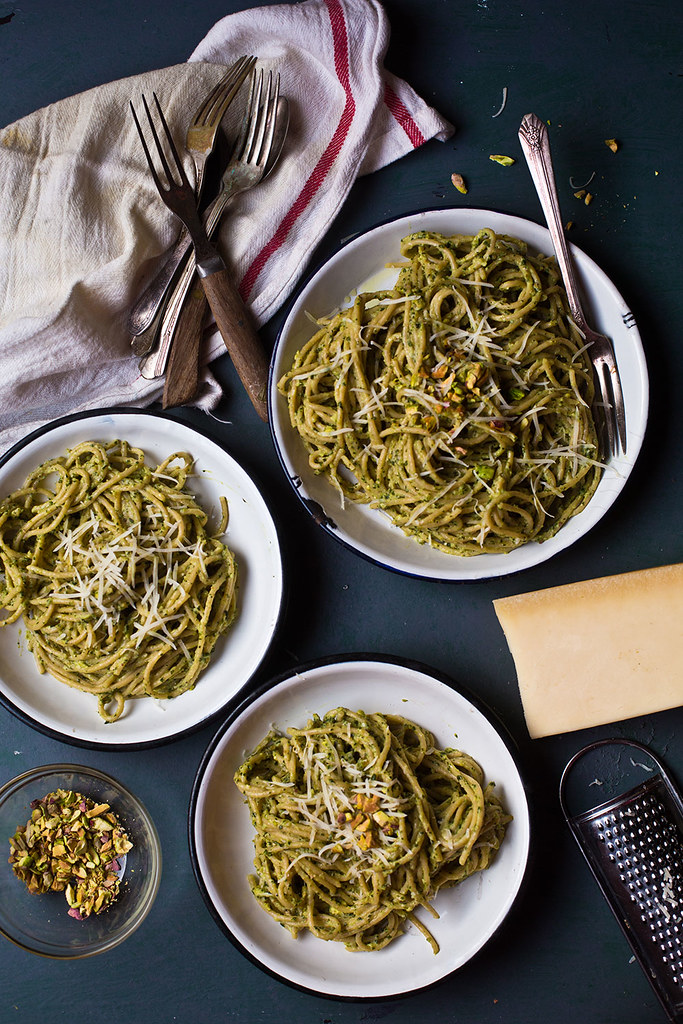
Avocado Mint Pesto Recipe | Guest Post by Prerna of Indian Simmer

Learn how to make Avocado Mint Pesto from Prerna of Indian Simmer
“The most talented people are always the nicest.”
― James Caan

That really holds true for a very talented and gorgeous Prerna behind equally gorgeous blog Indian Simmer. As her food simmers on a stove, she takes you on a beautiful food journey with stunning food photographs and heart-warming anecdotes. Through her lens she magically transforms everyday food into the most beautiful, exotic and exciting visual experience. If you enjoy good writing which makes you walk down the memory lane and nostalgic, then Prerna’s blog is sure to win your heart! Thank you dear Prerna for taking time from your busy schedule to do a guest post. Please make sure to follow her on Facebook page, Twitter and Instagram if you do not want to miss any amazing posts that Prerna churns out!


Thank you Sia for sharing your beautiful space with me today. Monsoon Spice was one of the few Indian food blogs which I literally grew up following as a food blogger so you can imagine my excitement today when I get to share my work on the space.

29 May, 2014

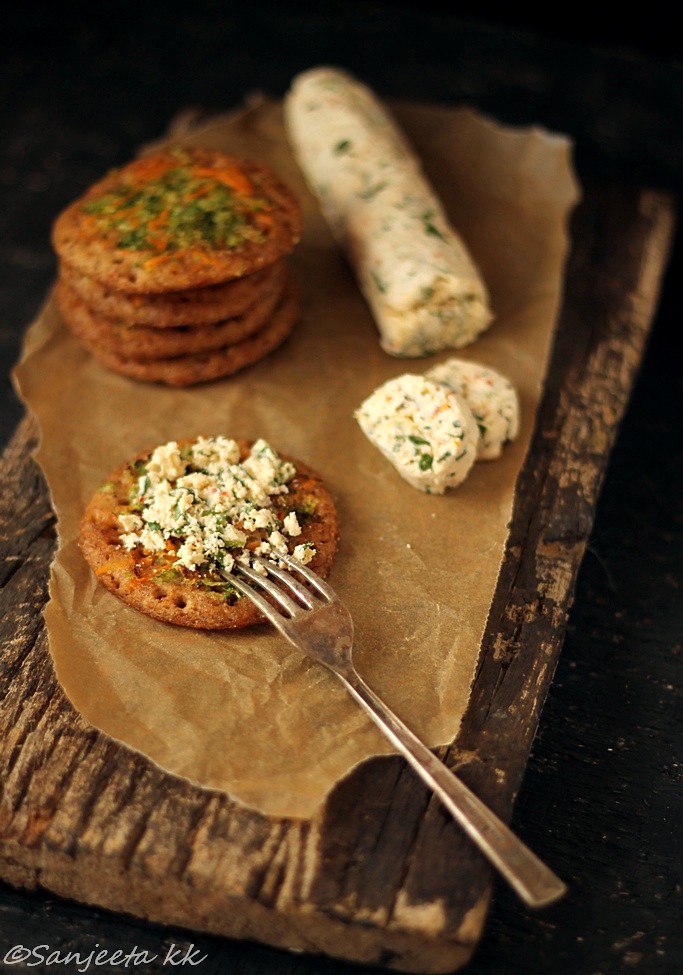
Savory Multi Millet Pancakes with Garlic-Herb Cheese Spread Recipe | Guest Post by Sanjeeta of Lite Bite

Learn how to make Savory Multi Millet Pancakes with Garlic-Herb Cheese Spread Recipe from Sanjeeta of Lite Bite
Cheerfulness is the best promoter of health and is as friendly to the mind as to the body.
~ Joseph Addison
And there is someone who spreads her cheerful personality through her innovative recipes, interesting anecdotes, and beautiful photographs and she is our one woman wonder Sanjeeta of a stunning blog called Lite Bite. True to her blog name, Lite Bite is a treasure trove of healthy recipes and beautifully styled photographs that will leave you in awe! From simple home cooking to fusion cooking, Sanjeeta’s tremendous talent shines through her blog where she easily transforms the not so healthy food into light, delicious and flavourful affair. You can’t help but marvel at her unique recipes that will make you wonder why you didn’t think of cooking it before?! Lite Bites is full of innovative and delicious recipes that demonstrates eating healthy and balanced food doesn’t mean one needs to compromise on taste, flavour and comfort. I feel honoured and privileged to share my virtual kitchen with Sanjeeta today who is going to share another ‘lite bites’ from her amazing recipe repertoire with us. You can follow Sanjeeta on her Facebook page, Twitter, Pinterest and Google+.


Food blogging is the ultimate hobby I could indulge in for hours on end. A captivating hobby turned into a full-time passion now, which fills me with excitement and self-worth every single day. Food blogging gives me endless entertainment, raises curiosity, creates memories and helps connect with wonderful online friends to grow together.

For many people, food is just fuel for body and an everyday comfort to celebrate life. To a food blogger ‘food is a subject’ which they seek to understand and explore. They don’t just eat good food but are inspired by it and visualize many forms of art in it. They take food to a different altitude.

17 July, 2013

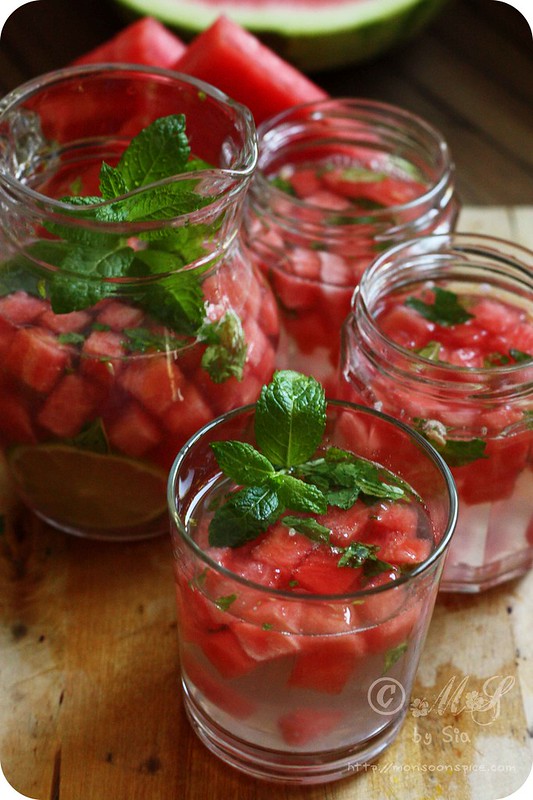
Watermelon-Mint Limeade Recipe | Simple and Easy Summer Drinks Recipe

How to make Watermelon-Mint Limeade ~ Refreshing simple and quick summer drink made using watermelon, fresh mint and lime juice

Do you believe in miracles?
Do you want to hear some shocking news?
Psst... We are expecting heat waves here in the United Kingdom!!! There... I said it! ;)

02 March, 2009

Poolish Focaccia: My Story about... "Doing It"!

Poolish Focaccia

“Should I do it today?” she thought to herself. “May be it’s not a good idea. What if I am misunderstood? What if everything goes wrong? Will I be able to show my face to him if I don’t succeed? What will he think of me? What if he thinks I ruined his reputation? What will his people say?” She was left alone to fight her own battle.

“No, I can’t shy away from him anymore” she said loudly. It was at that moment she decided enough is enough. She was tired of longing for him, tired of waiting and watching and wanting. She knew she has to do something about it right then to stay sane! She couldn’t remember the last time she attempted something as brave as this. It felt like it was in another lifetime, in another world. Yes, not in this life and she had to do something about it.

She took a deep breath and got up from where she was sitting. She felt a shiver run down her spine and also adrenaline kicking her blood stream at the same time. She felt light headed and exhilarated at the thought of ‘doing it’ with him which surprised her nevertheless. Wasn’t she supposed to feel nervous and scared for doing it for the first time?

Then she took small steps in the beginning, almost hesitatingly. Then she remembered the anguish and pain of not ‘doing it’ and she didn’t want to live regretting for not ‘doing it’ life long. Her tentative steps increased their pace and with in few minutes she was standing facing his parents’ door. She took a deep breath and opened their door bracing her self for any challenge she might have to face.

Then she saw them, sitting quietly and giving her hard and cold stare. She could feel uncertainty creep her thoughts. She could see the rejection in their eyes and she wanted to give up everything and run back to her sanctuary to lick her wounds in her safe domain. But going back was not an option. She had faced rejection from their all her life and she had had enough of it and this was her ultimate revenge for making her suffer all this time.

Half in doubt, she slowly extended her hands towards them. She could hear her heart beating fast and small drops of sweat forming on her forehead. Once she touched them, she felt they were not as bad as she thought them to be. Surprisingly, the feeling was mutual and with in no time they could feel the sweet bond forming among themselves and they set the house literally on fire.

It may have taken quite sometime for her to at last meet him but the long journey she had to make was all worth in the end. And as they say, all’s well that ends well. She had ultimately conquered her fear and ‘did it’. The success tastes better and means lot when you wrap your fear in confidence and move forward with determination. Her story of ‘doing it’ also had a very happy end. Just like fairy tales…

And that’s how ‘did it’, my friends. I baked bread!

I baked bread from scratch. And boy!!! Does it make you feel high! I followed Lolo’s Poolish Focaccia and Poolish from scratch. It is not exactly a complex recipe to follow but it does test your patience as it takes 2 days. First day you prepare the poolish which needs you to mixing the flour, water and yeast and letting it rest overnight to ferment. And on second day the dough and herb oil is prepared for the focaccia. I have almost followed Lolo’s recipe to T. I lost all the step-by-step photos I had taken among thousands of other photographs (Arrgh.!!!...). So goto Lolo's blog for step by step gorgeous photos which are visual treats Without wasting much of your precious time, let me give detailed instructions for making your own Poolish Focaccia.

Day One: I followed Lolo’s instructions and made poolish on the night before baking. She did mention that you can make focaccia without this step but as it was the first time I tried baking bread, I didn’t want to leave option of getting perfect one. You don’t need to be a rocket scientist to make poolish. All you need is little time and the following ingredients.
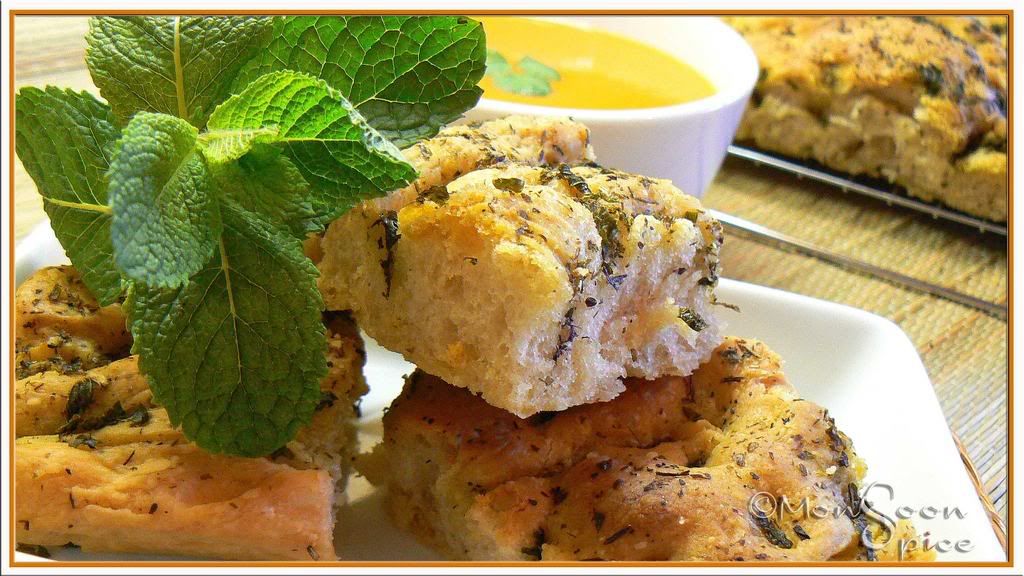
Poolish Focaccia

Photobucket Print This Recipe
Poolish
Prep Time: 10 mins
Cooking Time: -
Makes: About 2-
2 ½ cups of Poolish

Ingredients:
2 ½ Cups Unbleached Bread Flour
1½ Cups Water, at room temperature
¼ tsp Instant Yeast (I cheated and used good ½ tsp yeast ;)
Method:
Take wide mixing bowl and add all the ingredients. With a help of a wooden spoon combine them to form a sticky and smooth mass which looked like a pancake batter. Cover it with a cling film or plastic wrapper tightly and leave it for the yeast to kick in.
Now either you can leave it out all night or store it in refrigerator after 4 hours. Since I had no plan of waking up at 2 in the night, I left it outside all night. This way my poolish was nicely and steadily fermented and it was bubbly, sticky and little stinky too ;)

Day Two: This was the D-day. I had to make dough and herb oil for focaccia. I could feel butterflies in my belli. But Lolo’s instructions assured me enough to plunge into baking spree. So this day I had to combine the poolish prepared last night with some extra flour to make dough for focaccia. And then I was all set to make very fragrant herb oil. The whole process of making the dough was simple enough than I thought it to be. All I had to do is mix the poolish with more flour, water, oil, yeast (the beast;) and of course salt. Yup, simple and straight forward. But then I felt I was back in acrobatics class when I had to fold the dough 3 times (standing in odd positions, and making all sorts of face), and had to wait for the dough to rise between every foldings. Once the dough has risen, I had to transfer it onto a baking sheet (thank god, no was there to watch me in awkward positions ;) and shape it to fill the whole of baking sheet. Then again leave to for its final rise before baking it. Over all it took 4-5 hours (I told you so, you need good amount of patience), but most of it was the rising time between every fold. I can see you yawning there. Hello… Wake up… Time to make Poolish Focaccia.
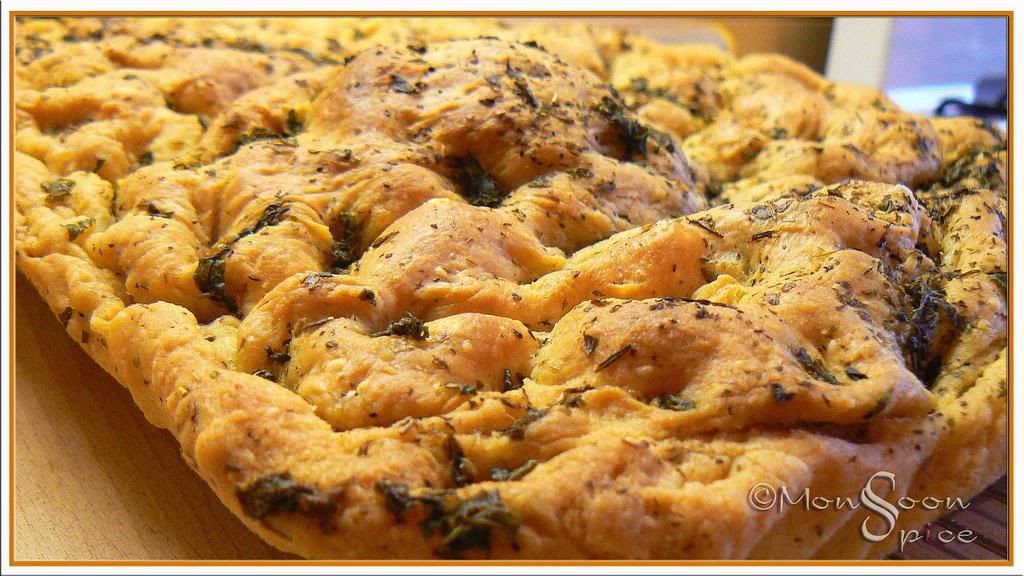
Poolish Focaccia

Photobucket Print This Recipe
Poolish Focaccia
Prep Time: 15 mins- 5 hours (Including Resting & Rising time)
Baking Time: 20-25 mins
Serves: 6-10
Recipe Source: Vegan Yum Yum

Ingredients:
3 Cups Poolish
2 2/3 Cups Unbleached Bread Flour
1½ tsp Instant Yeast
6 tbsp Olive Oil (I used good extra virgin Olive oil)
¾ Cup lukewarm Water
½ Cup Herb Oil (recipe follows)
2 tsp Salt or to taste

For Herb Oil:
1 Cup Olive Oil, little warmed (I used good extra virgin Olive Oil)
½ Cup freshly chopped or 2-3 tbsp Dried Herbs of your choice or combination of fresh and dried ( I used fresh mint and basil and dried mixed herbs and rosemary)
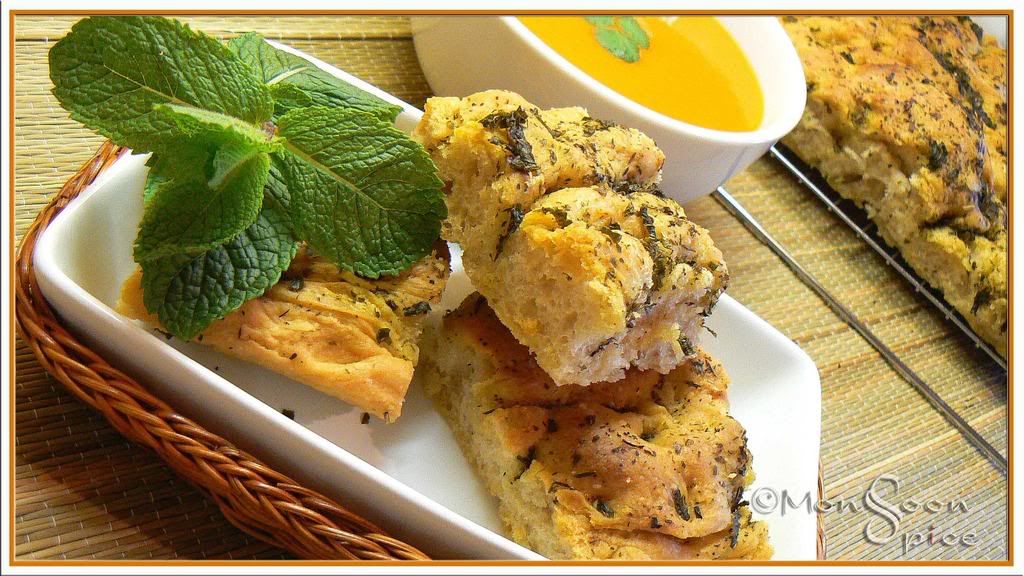
Poolish Focaccia

Method:
If you have refrigerated your poolish, make sure that it is kept outside for at least one hour to come down to room temperature. Once it is warmed enough, proceed to make the dough.
Take a large mixing bowl and mix in the flour, salt and yeast. Now add the poolish along with water and oil given in ingredient list.
If you are using all those muscle power like me, then be prepared for good 10-15 minutes of mixing and kneading. You need to get smooth and sticky dough. So start mixing and beating the dough till your arm aches and mind goes bonkers! The dough will be very sticky and it will stick to the mixing bowl like clinging baby to his/her mother. Since I don’t have machine I can’t really tell you how to do it. So please head over to Lolo’s website for further instruction on using machine to make the dough.
Next thing is to stretch and fold the dough. Use your work surface for this step by dusting it well with flour. Please be little generous with the flour (not too much also) if you don’t want to end up scraping your work surface for next one hour. Now scrape the dough from mixing bowl and dump it on the bed of flour. Sprinkle the top of the dough with flour.
Start patting the dough to get a rectangle shape. Lolo says patting the dough serves three purposes: one it pushes the dough into a rectangle shape, distributes the flour and also removes the excess flour. Let the dough rest for 5 minutes (and you too, but remember just 5 mins OK?)
After 5 minutes, you’ll need to fold the dough like letter. That is in equal 3 parts. First pick up one side of the dough (it will stretch a lot and make you wonder how many strong words you know ;) Be quick when you fold the sides of the rectangle because the quicker the movement, the easier it will be. Repeat with the other side of the dough. You will end up having small rectangle with folds that looks like folded letter. This is your first fold and remember, we have 2 more folds to come after this. Every time you fold, the dimension of the dough should remain equal. Did you just ask how? Well, after the first fold, you will be stretching the dough out and then folding it back again. Hence, you are not folding the dough into smaller rectangles, but stretching it out and folding it back to make equal sized rectangles. Confused? Don’t worry. You will understand it as we proceed.
Next, brush or spray the dough with oil, cover it in plastic warp and let it sit for half an hour. And then you’ll fold the dough again, brush it with oil, cover it with plastic wrap and let it rest for 30 minutes and then fold it again for the third and final time. Each time you fold, it becomes easier to handle the dough. And every time you fold, make sure that you are folding it in the opposite direction than the last. For example, for the first time if you have folded it from left to right, the next time you will fold it from top to bottom.
After the third fold, let the dough rest, covered with plastic warp, for one hour. The dough will rise at this time, but not necessarily double in size.
While the dough rests, we can proceed to make Herb Oil. It’s very simple and straight forward. Warm the olive oil and mix in all fresh or dried herbs or combination of both. Turn off the heat and let these aromatic herbs infuse the oil.
Now it’s the time to prepare your baking tray for baking Focaccia. Take 17” x 12” baking pan with sides and place a layer of parchment sheet. Spray oil on the baking sheet. Carefully transfer the dough from the counter to the baking sheet, try to maintain the rectangle shape. Don’t worry if the dough stretches little bit as the dough is quite soft and unwieldy.
Pour about ¼ cup of Herb Oil that you had prepared earlier on the top of dough. Now it’s the time for some fun. Using only your finger tips begin to press the dough to distribute the oil and flatten the dough out. The dough will begin to spread out in the pan. The aim is to spread the dough evenly, so that it fills the pan. But don’t worry too much if it doesn’t happen as the dough will gradually spread out in the pan after final rise. And important thing to remember is to use just your fingertips to spread the dough and not your fingers or palm. And also you want to keep the majority of air bubbles that forms on the dough which otherwise will not happen if you use your palm and knead it and destroy all your hard work.
Please make sure that the dough is completely covered in oil. Next cover and let the dough rise for two hours. I promise you, this is the final rise. By the end of two hours, the dough will be very puffy with bubbles and have had filled the pan. Close to the end of this final rise, preheat the oven to 500 deg F. make sure that the rack is placed in the centre.
While the oven is getting heated, add another 1/4 cup, or more, of the herb oil. Spread the dough out to its final size using the same fingertip technique that we had used. It’s a pretty sight to see all those bubbles but restrain your self from pinching them. You want a uniform distribution of bubbles and fingertip dimples. Pinch off any huge bubbles since they’ll just explode in the oven while baking. Sprinkle the top with salt as desired.
Tada… It’s baking time now. Oops, I forgot about another rest time. Promise, promise! This is the last and very final one. Let the dough rest for another 10-15 minutes. And then place the dough in the oven, turning down the temperature to 450 deg F. Bake it for 10 mins, rotate the sheet for even baking and then bake for another 10-15 mins until its golden brown. By then your whole house will smell of freshly baked bread with heavenly aroma of herbed oil. Just imagine that!!!
Now it’s the time to take Focaccia out of the oven and let it cool. Remember to remove it from baking pan and place it on cooking rack. Please be patient and let it cool for at least 20 minutes before you attack it. I served mine with hot bowl of Tomato soup.
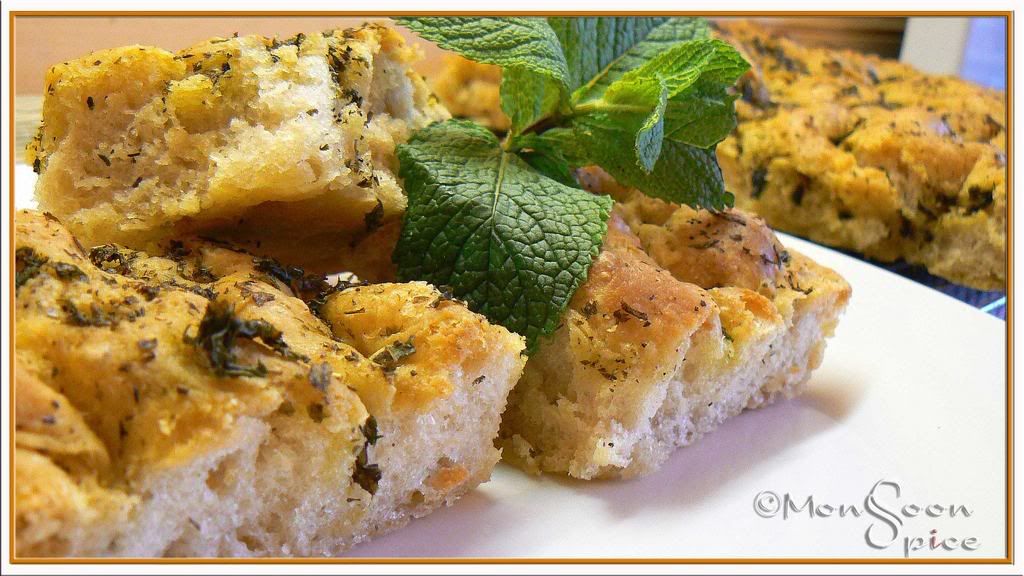
Poolish Focaccia


Notes:
This one was ridiculously huge loaf of Focaccia for just 2 people. So I cut them into desired shapes and stored them in a zip lock bag and popped them in my freezer. When required, I just defrost them for few minutes and then heat them in oven. Voila, they taste as good as they tasted for the first time!
As Lolo suggests, next time I am planning to bake Focaccia with different toppings. For example, some olives, red onions, fresh herbs and may be some garlic too. Or how about some sweet Focaccia? Topped with apples or grapes tossed in little sugar and sprinkled with some aromatic spices like cinnamon or nutmeg? Yum, yum… and yeah, depending on your choice of toppings make sure that you add them just before 5 minutes you take it out from the oven. Thanks, Lolo for helping me get over with the phobia of baking my own bread with this delicious recipe.

08 August, 2008

Sweet Chilli-Lime Tofu with Wok Steamed Spinach & Quinoa: Try Something New

Photobucket
Sweet Chilli-Lime Tofu with Wok steamed Spinach & Quinoa

I don’t have anything to rant today other than give you one wonderful recipe I tried from gorgeous blog Vegan Yum Yum. This is one of my favourite blog where Lolo posts vegan recipes which make my eyes pop and I almost end-up licking my laptop screen. This blog has most tempting pictures of Vegan food which makes you drop all the things at once and rush to your kitchen to start cooking straight away. Not only that, you will be surprised to see so many ways of cooking vegan food without compromising taste factor. You will find an array of vegan food from appetizers to desserts including varieties of baked goodies to satisfy your cravings. Her Knitted Cupcakes are the best ever cupcakes I have ever seen or come across. Go check it for yourself and feast on her drool-worthy pictures. I have already tried two recipes from this wonderful blog and highly satisfied with the end result.

Today I am posting Lolo’s recipe of Sweet Chilli-Lime Tofu with Wok steamed Collard and Quinoa. This was the first time we bought quinoa and cooked at home. So Lolo’s recipe sounded something what we could try for first time. Another thing that got our full attention was the process of “dry frying” the Tofu as till date we had either used them as they are or simply pan fried them with little oil. So we were eager to test and taste quinoa and ‘dry fry’ tofu. Unlike Lolo I used Baby Spinach instead of Collards and made few modifications to the original recipe to our liking. Other change is in the ingredients used in Sweet Chilli-Lime Sauce. We added little extra chilli flakes as we felt the sauce was little mild for our liking and also added a small spoonful of chilli sauce. And we replaced Tamari with Teriyaki sauce as we didn’t have it in our pantry. We also reduced the amount of lime zest used and instead increased the amount of lime juice from original recipe. And addition of ginger again was to our preference.

The sauce was easy to put together and was very flavourful. It formed a nice glaze on dry fried tofu and was a real pretty sight. Over all I can easily say that Sweet Chilli-Lime Tofu with Wok steamed Spinach & Quinoa was one flavoursome, nutritious, pretty and very healthy meal which we devoured without complaining. I am not sure if I have left a thank you note at Lolo’s blog. Lolo, I want to thank you for this wonderful recipe which has become our family favourite. This is my entry for JFI-Soya hosted by yours truly and dearest Pooja's Theme of the Week-Saffron, White & Green in spirit of my beautiful country's Independence Day celebration. And this is also my contribution for Melissa's Let it Grain-Quinoa event which showcases this lovely grain this whole month.

Photobucket Print This Recipe
Sweet Chilli-Lime Tofu with Wok steamed Spinach & Quinoa
Prep Time: 10 mins
Cooking Time: 30 mins
Serves: 2-4
Recipe Source: Vegan Yum Yum

Ingredients:
1 block firm Tofu

For Sweet Chilli-Lime Sauce:
3 tbsp Sugar
2 tbsp Soya Sauce
2 tbsp Teriyaki Sauce (or just use Soya Sauce)
6-8 Mint Leaves, thinly chopped
2 tsp Chilli Flakes (adjust acc to taste)
1 tsp Chilli Sauce
1 clove of Garlic, crushed and very finely chopped
½ inch Ginger, very finely chopped
2 tbsp Lime Juice, freshly squeezed
¼ zest of the Lime
¼ tsp Salt

For Wok Steamed Spinach:
2-3 packed cups of Baby Spinach
A big pinch of Salt
1 tsp Lime Juice

For Spiced Quinoa:
¾ cup Quinoa, rinsed in cool water and drained
¼ zest Lime
½ tbsp Lime Juice
2 Green Cardamom, lightly crushed
½ inch Cinnamon Stick
1 Bay Leaf
¼ tsp Salt
1-1¼ cups Water
Photobucket
Sweet Chilli-Lime Sauce

Photobucket
Dry Fried Tofu glazed with Sweet Chilli-Lime Sauce

Method:
For Spiced Quinoa:
Combine all the ingredients listed under Spiced Quinoa in a thick bottomed pot with tight fitting lid. Bring it to a boil, then cover the lid and reduce the flame to low. Cook undisturbed for around 15-20 mins and turn off the heat. Let it sit covered for about 10 mins so that the steam is retained.

For Sweet Chilli-Lime Sauce:
Meanwhile, prepare the Sweet Chilli-Lime Sauce by combining all the ingredients listed. Whisk the sauce till all the sugar and salt is dissolved and keep it aside.

For Sweet Chilli-Lime Tofu:
Cut Tofu into bite sized pieces of desired shape and set aside.
Heat flat bottomed non-stick pan or good iron pan and arrange the tofu so that it fits in single layer. If not then do it in batches. I used good non stick pan in order to “dry fry” tofu without using any oil.
Spread out the tofu in a pan and with a help of spatula press the tofu. The liquid from tofu will squeeze out and boil away, and the tofu will start turning golden colour. The more water evaporates, the sturdier the tofu will be and that’s exactly what we want. Remember not to press the tofu too hard initially to prevent tofu from breaking.
After several minutes, flip the tofu over and repeat the same method. After 10 mins or so you will be left with dry fired golden tofu pieces. Now you can either proceed with the next step or wok steam the spinach.
To finish the Tofu, bring the pan back to stove if it’s not already very hot. Now add the sauce you prepared and let it bubble up. Switch off the heat and let the sauce reduce and form a glaze. Make sure that the sauce is bubbling up nicely before you switch off the heat.

For Wok Steamed Spinach:
Stack the spinach leaves one above the other and roll them. Slice the roll into 1 inch segments. Repeat same procedure till you get 2-3 tightly packed cups of Spinach.
Heat wok and add spinach, lime juice and salt. You can add about a tbsp of water if required. Cover and cook for 1-2 mins. Remember you don’t need to cook it thoroughly. I like my greens to be little raw and crunchy.

To Assemble:
Place cooked spiced Quinoa on a serving dish and arrange steamed spinach on top. Arrange sweet chilli-lime Tofu on a bed of Quinoa and Spinach and drizzle any left over sauce on top of it. Serve it immediately and enjoy.

Photobucket
Sweet Chilli-Lime Tofu with Wok steamed Spinach & Quinoa


Note:
Other Tofu recipes to feast on

Reminder for JFI-Soya:
I invite you all to celebrate Jihva for Ingredients with this month’s theme JFI-Soya. Choice of Soya products, the recipe, ingredients, method etc is entirely left to you. I would greatly appreciate if you can send me any Vegan or Vegetarian recipes but I leave it to your choice. Soya foods include tofu, tempeh, textured vegetable protein (chunks, mince etc), miso, soya sauces, soya oil and margarine, and soya dairy alternatives.

Deadline: 31st August, 2008

Please go through the guidelines and include all the required information in your post and also in your e-mail while sending your entry. Don't forget to add Your Name, Your Blog Name, Name of the Dish, Type of Dish and Perm Link of the entry along with the gorgeous Photo of final dish.

Click Here or on the logo to find out more information on this event.

25 July, 2008

Is That My Green Thumb: Dabeli

Photobucket
Dabeli

Grow Your Own a.k.a. GYO is a twice-a-month blogging event that celebrates the foods we grow ourselves and the dishes we make using our homegrown products is a brainchild of Andrea who blogs at Andrea’s Recipes. This fortnight it is being guest hosted by dynamic Jugalbandi’s Jai and Bee.

Here comes the problem. Well, it’s another food blog event and the rules are quite straightforward. You might ask me what exactly the problem is. For the last couple of weeks every blogger is showing off their gardening talents. Well, after all its summer and everyone seems to be growing something or the other in their vegetable patch resembling football stadium or snooker table and some even managed to grow in their small sized balconies and containers. I went through all these blogger’s posts with dozens of photographs of their summer bounty and admired their skills.

Then the realization hit me hard!!! All we had grown in a small patch of our backyard is few flowering plants and mind you they were not from seeds we had sown!! We just bought few plants from weekend farmer’s market and just planted them. Now its not that we are lazy (Ok, little bit). The reasons for not growing our own summer vegetable and fruits bounty are many. First and most important of all is the unpredictable weather. Just when we had cleaned our vegetable patch from all those wild weeds (my goodness, they have very strong and had deep roots), slugs and snails (they are so yuck!), it started to rain cats and dogs. After 2-3 weeks of these heavy summer rains the vegetable patch was filled with new bounty of weeds and snails and we didn’t fancy cooking those Dandelions in soups and stews and being a vegetarians eating those snails were unimaginable ;) So again we cleared our veggie patch and again it started to rain!!! We ended up planting few plants of Geranium, roses, lavenders. Second reason, our work schedule. Leaving to work at 7 in the morning and coming back at 7 in the evening doesn’t give much time to spend time in gardening during weekdays. Next reason is the visits to our vegetable patch by unwanted guests. You see some way or the other many cats in our neighborhood feel that it’s their birth right to come and empty their stomachs in our vegetable patch. We have 6 different cats coming and leaving behind their smelly trails. Sometimes we do wonder how roasted and grilled cats taste, just like Manisha. (Ok, I am kidding big time;)

Photobucket

With all these problems, we did manage to grow few herbs in pots. Some mint leaves are growing wildly and we are making good use of it in summer drinks. We have two curry plants donated by our close friends. And we have successfully grown a big pot of coriander leaves. I have been using them in most of the curries as garnishes. And Bee did say coriander used as garnishes can make it to the event. Thank you Bee, my coriander garnish is what I am sending you for GYO. This time its Dabeli garnished with fresh corianders from our garden makes its grand entrance for Jugalbandi’s GYO event.


Dabeli or Katchi Dabeli or Double Roti is a street food mostly originated in Kutchi/Gujarat and very popular street food sold in Mumbai/Bombay. In my engineering days I survived eating these Dabeli for my lunch and sometimes for dinner from our campus Bakery. It is also known as Kutchi Dabeli or Double Roti and uses a special spice blend called Dabeli Masala. When I hosted MBP-Street Food, I had many Dabeli entries and I couldn’t wait to try my favorite street food. When I received Raghavan Iyer’s 660 Curries book for my birthday, I was rejoiced to see detailed recipe for Dabeli with its spice blend.
In Raghavan’s own words,
"Maharashtrian’s are very creative when it comes to combining multiple sources of carbohydrates in the same dish. This curry-in-a-bun is love at first bite-topped with luscious-red, juicy-tart pomegranate seeds. It’s really a cinch to make as a do-ahead dish. Just lay everything out in a bowls assembly-line style, in the same order as they go into the bun, and folks can help themselves by making their own. Those ho-hum taco parties will make a run for the border."
I made Dabeli Masala by strictly following Raghavan’s recipe and then assembled the Dabeli according to our taste. So without any delay, I made these wonderful street food and relived my college days:) Straight this goes to Jugalbandi’s for their GYO.

Photobucket
Kutchi Dabeli

Photobucket Print This Recipe
Dabeli (Spiced Potato & Pomegranate Sandwiches)
Prep Time: 10 mins
Cooking Time: 20 mins
Makes: 4-6
Recipe Source: 660 Curries
Ingredients:
For Dabeli Masala:
1 tsp Whole Clove (about 4-5)
½ tsp Fennel Seeds
½ tsp Black Peppers
½ tsp Coriander Seeds
4 dried Red Chilies (Thai or Cayenne), stems removed (I used Byadagi Chilies)
4 blades of Mace or ¼ tsp Ground Mace (I omitted it as I didn’t have any)
2-3 Whole Star Anie
1-2 Dried Bay Leaves
Seeds from 1-2 Black Cardamom Pods
½ tsp Ground Ginger (You will get them in any Asian stores)
Pinch of Turmeric Powder

For the Filling:
3 large Potatoes (Russet or Yukon Gold), peeled, boiled and mashed
1 small Onion, finely chopped (Optional)
1 tbsp Dabeli Masala
1 tsp Sugar Powder
½ tbsp Oil
Salt to taste

For the Sauces:
Recipe calls for just Sweet & Sour Date-Tamarind Chutney and Green Mint-Coriander Chutny but I also used Spicy Red Chutney.

For Sweet Tamarind-Date Chutney:
1 lemon sized Tamarind Pulp, soaked in water
6-8 Dates, pitted
½ tsp Red Chilli Powder
4-6 tbsp Jaggary (adjust acc to taste)
Salt to taste

For Green Mint Chutney:
1 packed cup Mint Leaves
½ packed cup Coriander Leaves
4-6 Green Chillies (adjust acc to taste)
1 tsp Jeera/Cumin Seeds
¼ tsp Tamarind Paste
Salt to taste

For Spicy Red Chutney:
10 Dry Red Chillies
2-3 Garlic flakes
1 small Tomato (Optional, it helps in grinding the chilies to smooth paste)
½ tsp Tamarind Paste
1 tsp Jeera/Cumin Seeds
Salt to taste

For Assembling the Sandwiches:
4-6 Ladi Pav/Burger Buns
Butter for Spreading
Seeds from 1 small Pomegranate
½ cup Spicy Roasted Peanuts (I used plain ones)
1 small Red Onion, finely chopped
½ cup Sev (Gram flour noodles, deep fried. You will find them in any Asian stores)
1-2 tbsp Coriander Leaves, finely chopped

Photobucket
Spices for Dabeli Masala

Method:
For Dabeli Masala:
The above ingredients make about 2 tbsp of Dabeli Masala. Place all the ingredients in a spice blender or coffee grinder and grind to fine powder. Store it in an air tight container till needed. I will last for 2 months.

For Potato Filling:
Combine mashed potatoes, dabeli masala, salt and sugar and mix well.
Heat oil in a pan and add finely chopped onion if using (adding onion is optional but I remember having it in the dabeli potato filling back in my campus bakery). Sauté it on medium heat till onions turn golden, about 2-3 mins.
Mix in spiced potato and cook, stirring occasionally, until the potatoes are warmed and the spices are cooked, 5-6 mins. Keep this potato mixture aside.

For Sweet Tamarind-Date Chutney:
Grind all ingredients listed to very smooth paste adding very little water at time. This paste should be little thick not runny.

For Green Mint Chutney:
Grind all the ingredients listed to smooth paste adding very little water at time. Adjust the number of green chilies according to taste. I personally like little hot. Make sure that the chutney is not very watery.

For Spicy Red Chutney:
Grind all the ingredients to very smooth paste adding very little water at time. If you find it difficult to grind, add small tomato (tip learnt from my favorite Chaatwalah).

To Assemble Dabeli:
Heat a griddle or skillet over a medium heat. Cut the ladi-pav or sandwich bun in centre and apply little butter on cut side. Place this bun, buttered side down, on a skillet and cook until they are browned, 1-2 mins. Remove the bunds from griddle and keep aside.
To make the sandwich, first spread a tsp each of date-tamarind sauce, mint-coriander chutney and spicy red chutney. You can adjust these chutneys depending on your taste.
Next, place 1/6th of Spiced Potato. You can make a medium lime sized potato balls and pat it a bit and place it on the bun.
Sprinkle a tbsp of juicy pomegranate seeds, followed by a tbsp of roasted peanuts, ½ tbsp finely chopped red onion and a tbsp of Sev.
Garnish with finely chopped coriander leaves on top and then cover it with the other half of bun and serve them.

Photobucket
Dabeli


Reminder: WBB-Summer Feast

For this edition of WBB, your challenge is to cook anything with summer fruits and vegetables. Yes, the theme is WBB-Summer Feast. Go to your town/city’s Farmer’s Market and pick fresh season’s produce and make your favourite breakfast or brunch and join in the Summer Feast.

Deadline: 31st July, 2008

Please go through the guidelines and include all the required information in your post and mail when sending me your entry. Don't forget to add Your Name, Your Blog Name, Name of the Dish you cooked, Perm Link of the entry along with the gorgeous Photo of final dish.

Click Here or on the logo to find out more information on this event.

30 June, 2008

Dahi Batata Puri: Yeh Dil Maange More...

Photobucket
Dahi Batata Puri

It's a beautiful evening with chirping birds flying back to their warm nests. Sun is setting behind the mountains. It looks like he is on his way to meet his lover as the sky is blushes with beautiful red. All of sudden the dimly lit street starts buzzing. People start arriving in large numbers, almost like devotees make pilgrimage to their favourite temples. Just like in any temples you can see people standing in a long queue waiting eagerly for their turn. To me it seems like a never ending queue as I wait eagerly, my patience threatening to fly out of the window. My tummy starts grumbling as my eyes are seduced by the sight of people gorging on platefuls of delicious looking items. My nose seems to have lost in aromatic world of spices and herbs. I stand there drooling non-stop which would easily solve any water issues. Yes, the queue is moving fast now… I am behind just two people now… now just one. The guy before me orders for one plate of Bhel Puri and another plate of Masala Puri. Oh the sweet torture. It’s my turn now… What am I going to have? Is it Bhel or Pani Puri? May be I should have Masala Puri today. Wait, Dahi Batata Puri which that fat guy stuffing in his mouth looks so good. The GaaDi-walah looks at me and asks me what I want to have… At last I make up my mind and ask for plate of Dahi Batata Puri. I look at him as he quickly whips up sinfully delicious looking plate of my favourite Chaat with fascination. First he arranges a plateful of puri and then he starts stuffing it with potato filling and then quickly adds colourful chutneys. Then he starts filling each puri with a spoonful of spiced yogurt. Finally he sprinkles few pieces of red onions and sev… “Bhaiyya, put little extra sev for me!”, I almost plead. He smiles and adds extra handful of sev and there it is… All mine… Mine, mine, mine… He extends my plate of Chaat… It’s almost within my reach and I extend my hand…

Tringggggggggg…………. What, where, how??? It’s a dream!!! It’s just a %&*$ dream!!! Not again, why oh God! Why me!!! Why are you punishing me like this?

God shouts back at me, “Because it’s your fault that you had to choose Street Food for food blogging event. Now repent. Why blame me?”…

Oh yes, this is what happens when you host any blog events. You don’t know when you will get hunger attack as the entries fill in your mail box any time of the day. If it’s close to lunch or dinner time, then you are finished!!! Imagine opening your mailbox just when you had to skip your breakfast because you forgot to set your alarm clock on a very important day at work, and find these delicious, mouth watering, drool-worthy entries there. Do I need to say anymore? Since I announced Street Food theme for this month’s MBP, I have been getting lots of nightmares like this every night. There was only one way to get rid of it and that’s what I did this weekend.

This plate of Dahi Batata Puri is a result of my non-stop nightmares I am getting since past few weeks. To be precise, from the day I announced Street Food for MBP. I have been trying very hard to avoid deep fried puries but failed miserably in the end. Well, you can’t call it exactly junk food. It uses vegetables, greens, and importantly good dose of yogurt. So in my opinion, its healthy food all the way and I am sure most of you will agree with me ;) We used store bought puries and there were 30 of them… and all of them are gone now. It was our lunch yesterday and we skipped our dinner at night ;)

I can’t say it is as good as the ones you get on street carts in India but it was tasty nevertheless. Well, beggars can’t be choosers! This recipe is from my Amma who makes excellent Chaats (second next to the Chaatwalah Bhaiyya! I hope she is not reading this post ;). We licked our plates clean and were confused which plate was washed and which were not washed (Ok, bad joke ;). We have got little extra chutney left in refrigerate which we are going to use tonight. Oh yes, we are having Bhelpuri for dinner as the puries are over and cant make another batch of Dahi Batata Puri or Masala Puri. Off this plate of Dahi Batata Puri goes to gorgeous Sig for her JFI-Tamarind (just on time), dear Dee's Herb Mania-Mint and to bubbly Siri for her Frozen Yogurt. Enjoy girls…

Photobucket
Dahi Batata Puri


Dahi Batata Puri (Chaat, famous street food of India where puffed puries are stuffed with potato, sweet-spicy-mint chutney and fresh yogurt)
Prep Time: 20-30 mins
Cooking Time: 10 mins
Serves: 2-6 (difficult to say)

Ingredients:
20-30 Puffed deep fried Puris (store bought or home made)
½ - ¾ cups Sev
1 Red Onion, finely chopped

For Potato-Peas Filling:
1 large Potato, cooked, peeled and diced into small pieces
½ cup Green Peas, cooked (or use cooked Kabuli Channa (Garbanzo)/Moong Sprouts)
½ tsp Garam Masala
1 tsp Jeera/Cumin Seeds
¼ tsp Turmeric Powder
Salt to taste

For Sweet Tamarind-Date Chutney:
1 lemon sized Tamarind Pulp, soaked in water
6-8 Dates, pitted
½ tsp Red Chilli Powder
4-6 tbsp Jaggary (adjust acc to taste)
Salt to taste

For Green Mint Chutney:
1 packed cup Mint Leaves
½ packed cup Coriander Leaves
4-6 Green Chillies (adjust acc to taste)
1 tsp Jeera/Cumin Seeds
¼ tsp Tamarind Paste
Salt to taste

For Spicy Red Chutney:
10 Dry Red Chillies
2-3 Garlic flakes
1 small Tomato (Optional, it helps in grinding teh chillies to smooth paste)
½ tsp Tamarind Paste
1 tsp Jeera/Cumin Seeds
Salt to taste

For Curd/Yogurt Filling:
3 cups Yogurt, beaten till smooth
1 tsp roasted Jeera/Cumin Powder
1 tbsp Sugar
Big Pinch of Salt

Photobucket
Ingredients for Dahi Batata Puri: Potato-Peas Filling, Sev, Red Onion, Spicy Red Chutney, Sweet Tamarind-Date Chutney, Green Mint Chutney, Spiced Yogurt, Puri


Method:

For Potato Filling:
First prepare the potato filling. Heat a pan and add cumin seeds to it and dry roast for a minute. Then add cooked diced potatoes, green peas, garam masala, turmeric, salt to taste. Sauté on medium flame for a minute or two and keep it aside.

For Sweet Tamarind-Date Chutney:
Grind all ingredients listed to very smooth paste adding very little water at time. This paste should be little thick not runny.

For Green Mint Chutney:
Grind all the ingredients listed to smooth paste adding very little water at time. Adjust the number of green chillies according to taste. I personally like little hot. Make sure that the chutney is not very watery.

For Spicy Red Chutney:
Grind all the ingredients to very smooth paste adding very little water at time. If you find it difficult to grind, add small tomato (tip learnt from my favourite Chaatwalah).

For Curd/Yogurt Filling:
Beat the curd/yogurt till its smooth without any lumps. Now mix in powdered roasted cumin, sugar and salt to taste.

To Assemble the Dahi Batata Puri:
Arrange 6-9 puris in a plate, making small opening on top of each puri big enough to add the fillings.
First fill each puri with a tsp of Potato-Green Peas filling. Add one or 2 tsp of yogurt filling. Then fill it with ¼-½ tsp of all three chutneys. Drizzle over little more of yogurt filling and then sprinkle chopped red onion and sev on each puri.
Serve this delicious plate of Dahi Batata Puri immediately as if kept for long it will become soggy. Remember to use your finger to eat it not with spoon and enjoy this finger-licking-ly delicious Chaat.

Photobucket
This one is for you...


Reminder: MBP-Street Food (Last Call...)
MBP-Street Food ends on 30th of June, 2008. Start patrolling the blogs and cook your favourite Street Food that your tummy begs and heart desires and spread link love.

Deadline: 30th June, 2008

Please go through the guidelines and include all the required information in your post and mail when sending me your entry. Don't forget to add Your Name, Your Blog Name, Name of the Dish you cooked, Perm Link of the entry, Perm Link of original recipe along with the gorgeous Photo of final dish.

Click Here or on the logo to find out more information on this event.

Reminder: WBB-Summer Feast

For this edition of WBB, your challenge is to cook anything with summer fruits and vegetables. Yes, the theme is WBB-Summer Feast. Go to your town/city’s Farmer’s Market and pick fresh season’s produce and make your favourite breakfast or brunch and join in the Summer Feast.

Deadline: 31st July, 2008

Please go through the guidelines and include all the required information in your post and mail when sending me your entry. Don't forget to add Your Name, Your Blog Name, Name of the Dish you cooked, Perm Link of the entry, Perm Link of original recipe along with the gorgeous Photo of final dish.

Click Here or on the logo to find out more information on this event.