Showing posts with label Recipes from Your Kitchen. Show all posts

01 November, 2018

Hyderabadi Dahi Bhindi Masala Recipe | Simple Dahi Bhindi Recipe

Learn how to make Hyderabadi Dahi Bhindi Masala ~ Crispy okra cooked in creamy and spicy yogurt gravy

There are many advantages of cooking from food blogs than cook books. One you get introduced to new cuisines with simple as well exotic ingredients. Second you get to see how the actual dish looks with drool worthy photos posted along the recipes. For me the best part is you can easily reach out  the blogger and clear all your doubts/queries which otherwise is not possible with cookbook authors. And not to forget, you get all these services without costing you a penny. Yup, the buzz word is free. ;)

Ingredients for Hyderabadi Dahi Bhindi Masala


Since twelve years of blogging, I have tried many recipes following the recipes posted in blogs. Very few times the end result ended up in garbage but many a times it was licked clean from plates, spoons and even the serving bowl. When I think of those recipes which have become my family favourites, I realised I haven’t posted most of them. So with this new mission of mine, I will be posting all the recipes I had tried and tested from bloggers and most importantly, loved by my family will be posted under the tag called  Recipes from Your Kitchen to Mine.

25 September, 2009

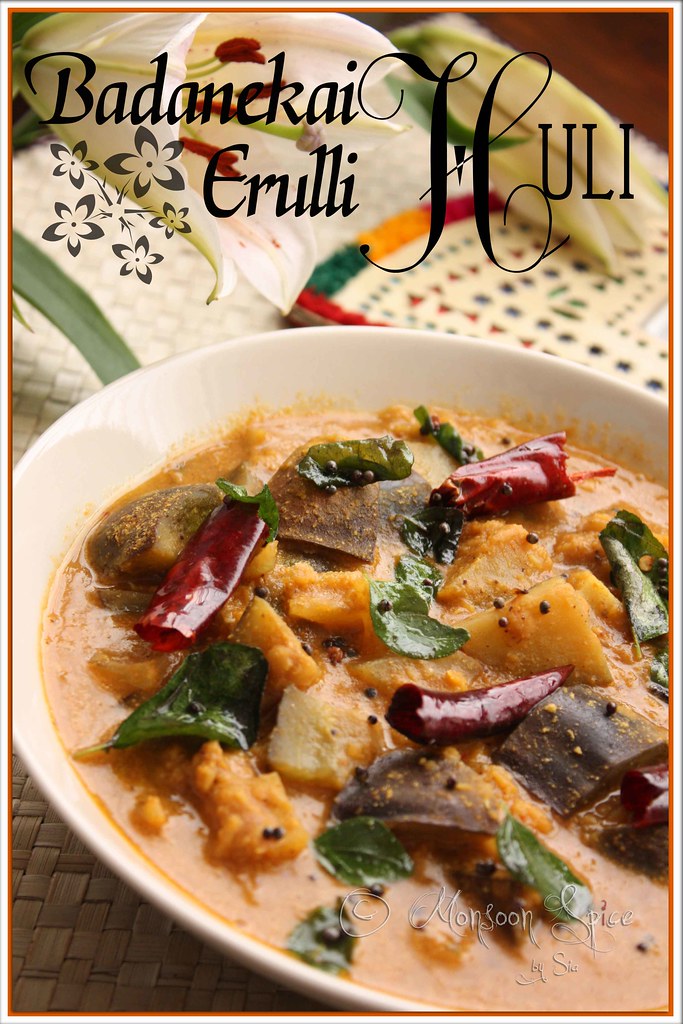
Badanekayi-Eerulli Huli: This is My Legume Affair

badanekai-erulli-huli3

Badanekayi-Eerulli Huli

Wow! I can’t believe I am actually sitting here in my office and blogging!!! But after months of stress, running around and sleepless nights, I wanted to do something else to charge my batteries and obviously blogging is the first thing that came to my mind. I may still be stressed, worried sick, and running around flapping my feathers like freaking chicken but I have decided to come back and blog as it is the only creative outlet I have at a moment. And what the hell? There is nothing more relaxing at the moment than rant, ramble and vent out in my own small space in this virtual world which calms my jumpy nerves.

15 April, 2009

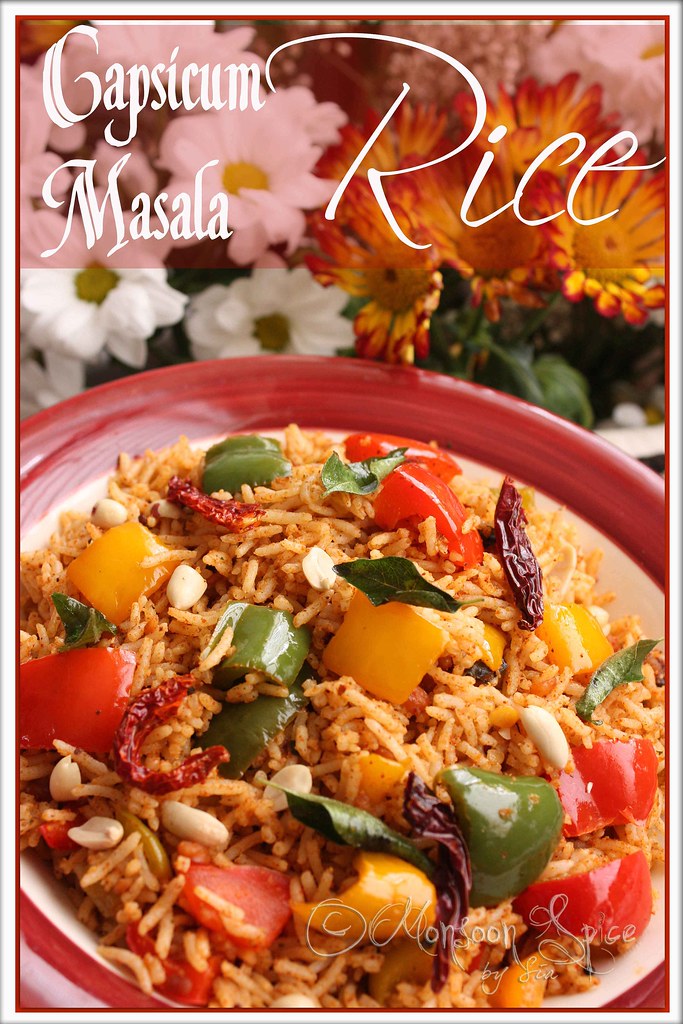
Capsicum Masala Rice: An Ode to Vibrant Spring!

capsicum-masala-rice4

Capsicum Masala Rice


At last my favourite weather is here to stay. Yes, I am talking about spring, the season of new beginning! It’s the season of bursting colours and heady fragrances.

09 April, 2009

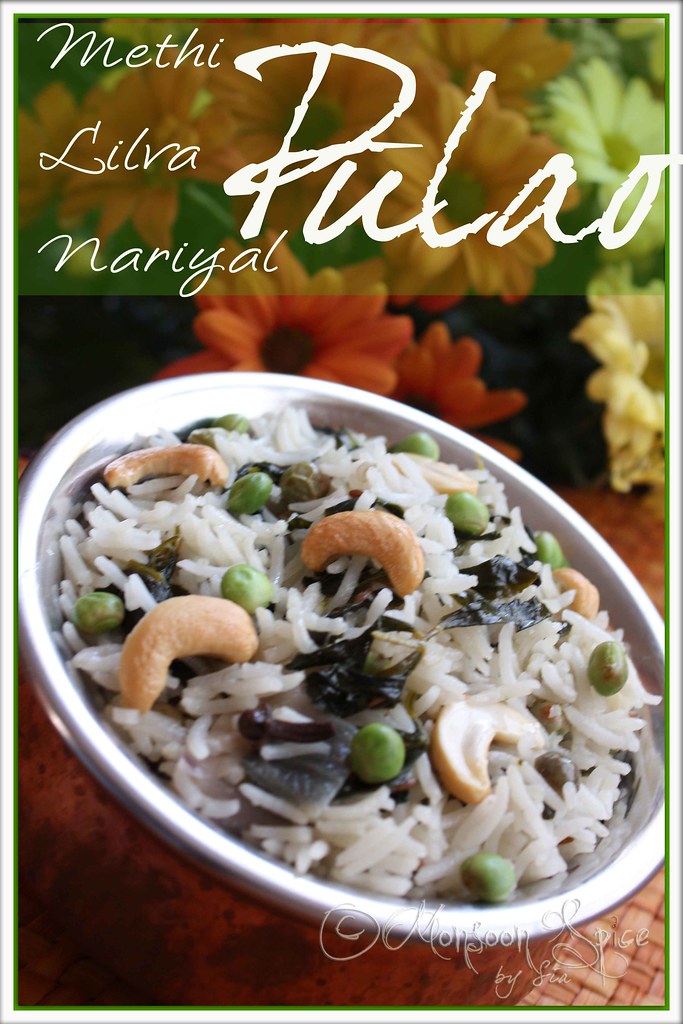
Methi-Lilva-Nariyal Pulao: Bitter is Better!

methi-lilva-pulao1

Methi-Lilva-Nariyal Pulao

I can imagine most of you either rolling your eyes or twisting your nose when I say “Bitter is Better” :). Yes, bitter is definitely better when taken in moderation just like sweets!

03 April, 2009

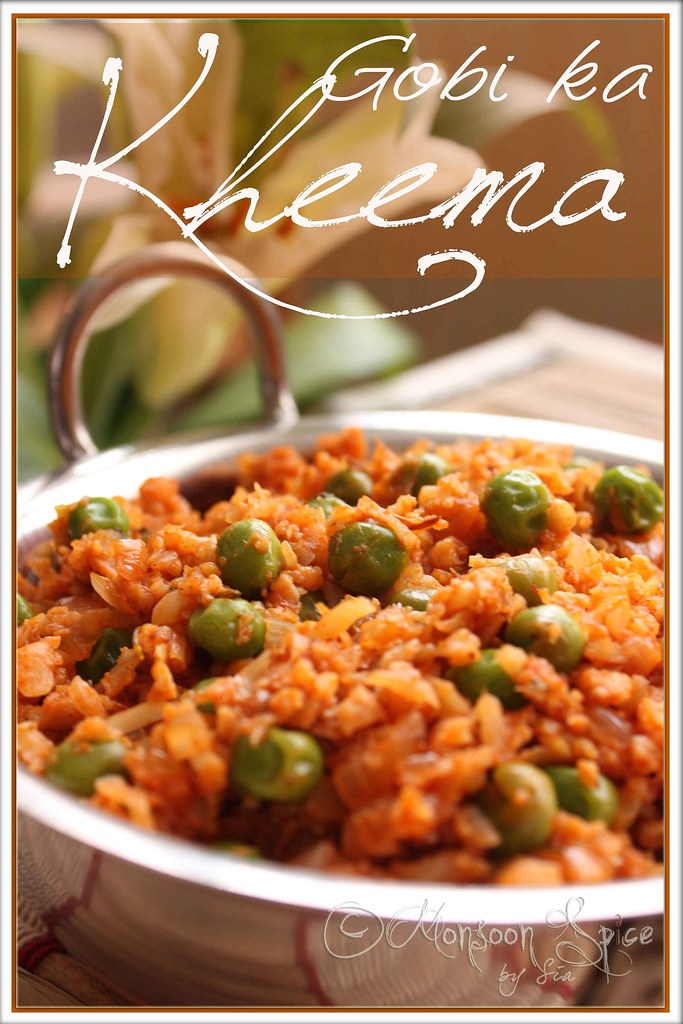
Gobi ka Kheema: The art of 'ahem' Seduction!!!

Gobi-ka-kheema

Gobi ka Kheema

Curly haired, little pot bellied, fair and of course handsome! He was there again that night surrounded by his family and friends. I tried to move away from his sight before he could see me and rushed to move past him. But alas, that was not to happen and he was beside me in within few seconds.


06 March, 2009

Dahiwale Baingan: Less is More!

Photobucket
Dahiwale Baingan

Some times a bright sun beam escaping from grey clouds is enough to lift your mood…
Some times a small cup of coffee at the end of long, hectic day is enough to cheer you up…
Some times a funny forward in your email box is enough whisk away the blues…
Some times a smile from small baby is enough to wipe away the tiredness…
Some times a little card from your dear one is enough to brighten your day…
And some times a simple food is all we need to comfort us and make us feel at home…

Some times all we need is little things that make your day… Just small things that makes us happy and content!

Yes, today we are talking about simple pleasures of life today and also the theory of less is more. Food that we cook or eat everyday is no exception when it comes to simple pleasures of life. And to prove this age old theory, we have a very simple recipe that uses very few ingredients in creating one of the best tasting curries! I made this Dahiwale Baingan following the recipe posted by Saffron Hut. Saffron Hut was one of the very few Indian blogs I came across during initial days of my blogging and I was instantly hooked to her breath taking photographs and wonderful narration. I had bookmarked her recipe for Dahiwale Baingan, or to be precise, Sour Creamwale Baingan long back and almost forgot about it till yesterday. Why till yesterday? Well, yesterday was the first day in last three years of living here in UK that I came across this popular type of Eggplant that we grow in India. Yes, I got hold of the very old Chinese Eggplants I have been so craving for using in Vangi Bhath and Sweet & Sour Eggplant Palya. At last I found them in new Indian grocery in our city and came back home singing and dancing and all that goes with it! Did I hear some one say “What big show-off”? Well, then you definitely don’t have a clue about my love for these purple beauties! I call it simple pleasures of ‘my’ life…

After cooking and eating Vangi Bhath and Palya to my heart’s desire, I was left with three more Chinese Eggplants. One quick look into my bookmarks and I knew instantly what I wanted to try next. It was Dahiwale Baingan from Saffron Hut and I didn’t waste any time in creating this wonderful recipe. I followed her recipe to T except I used a combination of fresh cream and yogurt in place of sour cream. The end result was something that is hard to put into words! I have never thought simple recipe like this would turn into one of the best tasting eggplant dishes and trust me when I say I have tasted quite many recipes made using the king of vegetables. Thanks to Saffron Hut for making me believe once again that less is definitely more and tastier! Dahiwale Baingan is a simple dish of pan fried eggplants that had been marinated with ginger-garlic paste and salt and then mixed with sour and spicy yogurt gravy. Nothing fancy about it except it can give tight competition to any recipe that uses exotic and exclusive ingredients. Don’t you believe me? Then may be it’s time you tried this Dahiwale Baingan for your self and please let me know how you liked it.

Photobucket
Dahiwale Baingan: Work-in-progress

Photobucket Print This Recipe
Dahiwale Baingan (Pan fried Eggplants served with creamy gravy of Fresh Cream and Yogurt)
Prep Time: 5 mins (excluding marinating time)
Cooking time: 30 mins
Serves: 4-5
Recipe Source: Saffron Hut
Recipe Level: Easy/Beginner to Intermediary
Spice Level: Low to Medium
Serving Suggestion: With any Indian flat bread or flavoured/steam cooked rice

Ingredients:
3-4 long Chinese Eggplants (slit in middle and cut into 1cm half moons)
1 large Onion, finely chopped
1 tbsp Ginger-Garlic Paste
3-5 Green Chillies, finely chopped (Adjust acc to taste)
½ tsp Turmeric Powder
2 tbsp Fresh Cream (I used low fat single cream)
¼ cup Yogurt
Salt to taste
2-4 tbsp Oil

For Tadka/Tempering:
1 tsp Jeera/Cumin Seeds
1 tsp Mustard Seeds
Few Curry Leaves
A pinch of Hing/Asafoetida
½-1 tbsp Oil
Photobucket
Dahiwale Baingan

Method:
Rub little salt and ginger-garlic paste to cut eggplant paste. Make sure that you mix them well. Place these eggplant pieces in a colander for 1-1½ hours to marinate. Make sure that you place it near sink as the liquid generated from salted eggplants will drain away. You can also place a bowl filled with water on top (that fits within the colander) which helps in draining more bitter juice from eggplants. Once the juice is drain out, the eggplants fried up very well.
Pan fry these marinated eggplants in little oil, on medium to high heat, till they turn brown and crisp. It’s best to fry them in small batches so that you get evenly fried eggplants. Place them in a plate lined with kitchen towel till needed.
Heat oil in a pan and add mustard seeds to it. When mustard starts to pop and splutter, add cumin seeds, curry leaves and hing. Saute till cumin turns golden red. Mix in finely chopped onion and green chillies and sauté till onion turns translucent, about 3-4 minutes.
Add turmeric powder and sauté the onions for another 2 minutes. Mix in fresh cream and yogurt and reduce the heat to low. Keep stirring the cream and yogurt for another 3-4 minutes and bring it to gentle boil. Switch off the flame and mix in pan fried eggplants and serve this delicious Dahiwale Baingan immediately, garnished with finely chopped coriander leaves, along with chapattis or Roties and enjoy.

Photobucket
Dahiwale Baingan


Note:
It is important to marinate the eggplants for at least one hour before you pan fry. It not only helps in draining the bitter juice from eggplants, it also helps in frying them quickly and evenly.
Next time I might bake the marinated eggplants than pan frying. To do this, simply line the baking sheet with aluminium foil or parchment paper and spray little oil on top of it. Arrange eggplant slices in single layer and bake them till they are nicely browned.
Use pan fried Okra/Bhindi/Ladie’s Fingers in place of eggplants and follow the recipe for Dahiwale Bhindi.

02 March, 2009

Poolish Focaccia: My Story about... "Doing It"!

Poolish Focaccia

“Should I do it today?” she thought to herself. “May be it’s not a good idea. What if I am misunderstood? What if everything goes wrong? Will I be able to show my face to him if I don’t succeed? What will he think of me? What if he thinks I ruined his reputation? What will his people say?” She was left alone to fight her own battle.

“No, I can’t shy away from him anymore” she said loudly. It was at that moment she decided enough is enough. She was tired of longing for him, tired of waiting and watching and wanting. She knew she has to do something about it right then to stay sane! She couldn’t remember the last time she attempted something as brave as this. It felt like it was in another lifetime, in another world. Yes, not in this life and she had to do something about it.

She took a deep breath and got up from where she was sitting. She felt a shiver run down her spine and also adrenaline kicking her blood stream at the same time. She felt light headed and exhilarated at the thought of ‘doing it’ with him which surprised her nevertheless. Wasn’t she supposed to feel nervous and scared for doing it for the first time?

Then she took small steps in the beginning, almost hesitatingly. Then she remembered the anguish and pain of not ‘doing it’ and she didn’t want to live regretting for not ‘doing it’ life long. Her tentative steps increased their pace and with in few minutes she was standing facing his parents’ door. She took a deep breath and opened their door bracing her self for any challenge she might have to face.

Then she saw them, sitting quietly and giving her hard and cold stare. She could feel uncertainty creep her thoughts. She could see the rejection in their eyes and she wanted to give up everything and run back to her sanctuary to lick her wounds in her safe domain. But going back was not an option. She had faced rejection from their all her life and she had had enough of it and this was her ultimate revenge for making her suffer all this time.

Half in doubt, she slowly extended her hands towards them. She could hear her heart beating fast and small drops of sweat forming on her forehead. Once she touched them, she felt they were not as bad as she thought them to be. Surprisingly, the feeling was mutual and with in no time they could feel the sweet bond forming among themselves and they set the house literally on fire.

It may have taken quite sometime for her to at last meet him but the long journey she had to make was all worth in the end. And as they say, all’s well that ends well. She had ultimately conquered her fear and ‘did it’. The success tastes better and means lot when you wrap your fear in confidence and move forward with determination. Her story of ‘doing it’ also had a very happy end. Just like fairy tales…

And that’s how ‘did it’, my friends. I baked bread!

I baked bread from scratch. And boy!!! Does it make you feel high! I followed Lolo’s Poolish Focaccia and Poolish from scratch. It is not exactly a complex recipe to follow but it does test your patience as it takes 2 days. First day you prepare the poolish which needs you to mixing the flour, water and yeast and letting it rest overnight to ferment. And on second day the dough and herb oil is prepared for the focaccia. I have almost followed Lolo’s recipe to T. I lost all the step-by-step photos I had taken among thousands of other photographs (Arrgh.!!!...). So goto Lolo's blog for step by step gorgeous photos which are visual treats Without wasting much of your precious time, let me give detailed instructions for making your own Poolish Focaccia.

Day One: I followed Lolo’s instructions and made poolish on the night before baking. She did mention that you can make focaccia without this step but as it was the first time I tried baking bread, I didn’t want to leave option of getting perfect one. You don’t need to be a rocket scientist to make poolish. All you need is little time and the following ingredients.
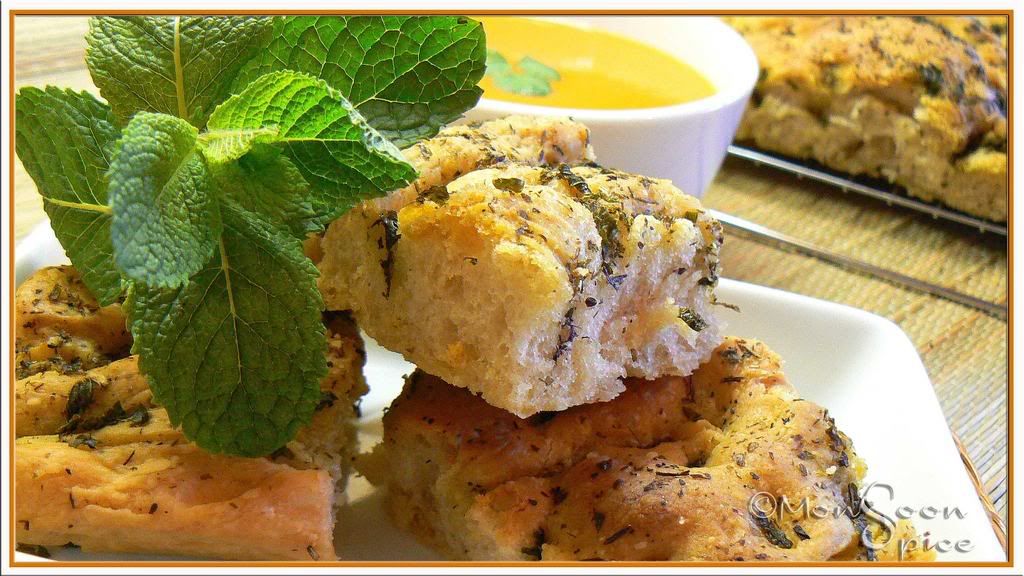
Poolish Focaccia

Photobucket Print This Recipe
Poolish
Prep Time: 10 mins
Cooking Time: -
Makes: About 2-
2 ½ cups of Poolish

Ingredients:
2 ½ Cups Unbleached Bread Flour
1½ Cups Water, at room temperature
¼ tsp Instant Yeast (I cheated and used good ½ tsp yeast ;)
Method:
Take wide mixing bowl and add all the ingredients. With a help of a wooden spoon combine them to form a sticky and smooth mass which looked like a pancake batter. Cover it with a cling film or plastic wrapper tightly and leave it for the yeast to kick in.
Now either you can leave it out all night or store it in refrigerator after 4 hours. Since I had no plan of waking up at 2 in the night, I left it outside all night. This way my poolish was nicely and steadily fermented and it was bubbly, sticky and little stinky too ;)

Day Two: This was the D-day. I had to make dough and herb oil for focaccia. I could feel butterflies in my belli. But Lolo’s instructions assured me enough to plunge into baking spree. So this day I had to combine the poolish prepared last night with some extra flour to make dough for focaccia. And then I was all set to make very fragrant herb oil. The whole process of making the dough was simple enough than I thought it to be. All I had to do is mix the poolish with more flour, water, oil, yeast (the beast;) and of course salt. Yup, simple and straight forward. But then I felt I was back in acrobatics class when I had to fold the dough 3 times (standing in odd positions, and making all sorts of face), and had to wait for the dough to rise between every foldings. Once the dough has risen, I had to transfer it onto a baking sheet (thank god, no was there to watch me in awkward positions ;) and shape it to fill the whole of baking sheet. Then again leave to for its final rise before baking it. Over all it took 4-5 hours (I told you so, you need good amount of patience), but most of it was the rising time between every fold. I can see you yawning there. Hello… Wake up… Time to make Poolish Focaccia.
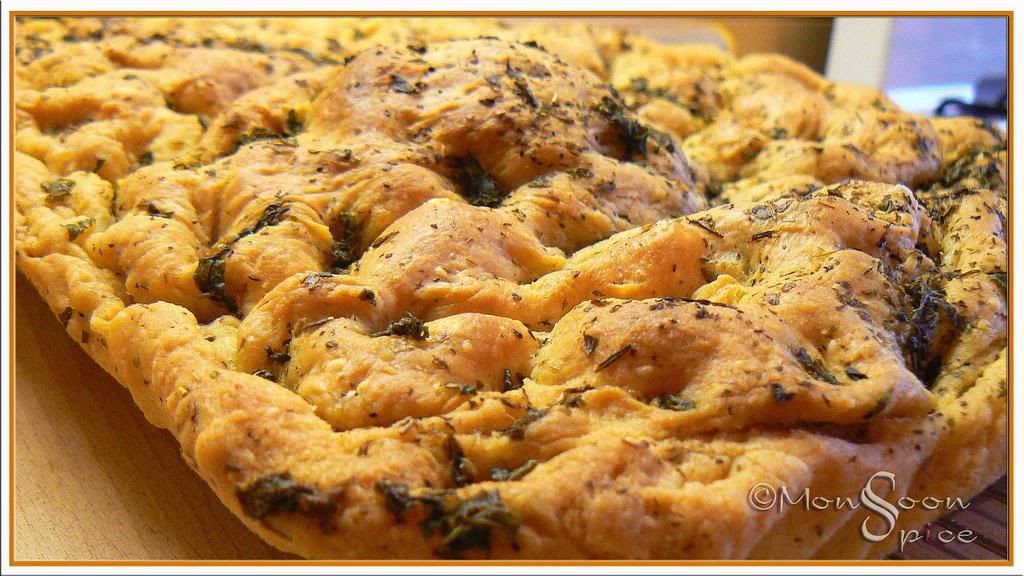
Poolish Focaccia

Photobucket Print This Recipe
Poolish Focaccia
Prep Time: 15 mins- 5 hours (Including Resting & Rising time)
Baking Time: 20-25 mins
Serves: 6-10
Recipe Source: Vegan Yum Yum

Ingredients:
3 Cups Poolish
2 2/3 Cups Unbleached Bread Flour
1½ tsp Instant Yeast
6 tbsp Olive Oil (I used good extra virgin Olive oil)
¾ Cup lukewarm Water
½ Cup Herb Oil (recipe follows)
2 tsp Salt or to taste

For Herb Oil:
1 Cup Olive Oil, little warmed (I used good extra virgin Olive Oil)
½ Cup freshly chopped or 2-3 tbsp Dried Herbs of your choice or combination of fresh and dried ( I used fresh mint and basil and dried mixed herbs and rosemary)
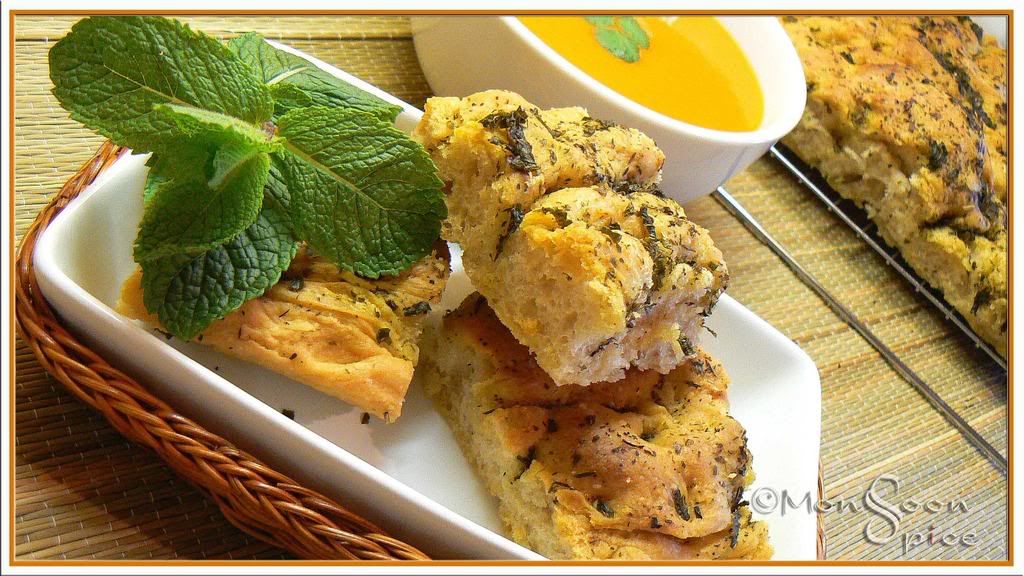
Poolish Focaccia

Method:
If you have refrigerated your poolish, make sure that it is kept outside for at least one hour to come down to room temperature. Once it is warmed enough, proceed to make the dough.
Take a large mixing bowl and mix in the flour, salt and yeast. Now add the poolish along with water and oil given in ingredient list.
If you are using all those muscle power like me, then be prepared for good 10-15 minutes of mixing and kneading. You need to get smooth and sticky dough. So start mixing and beating the dough till your arm aches and mind goes bonkers! The dough will be very sticky and it will stick to the mixing bowl like clinging baby to his/her mother. Since I don’t have machine I can’t really tell you how to do it. So please head over to Lolo’s website for further instruction on using machine to make the dough.
Next thing is to stretch and fold the dough. Use your work surface for this step by dusting it well with flour. Please be little generous with the flour (not too much also) if you don’t want to end up scraping your work surface for next one hour. Now scrape the dough from mixing bowl and dump it on the bed of flour. Sprinkle the top of the dough with flour.
Start patting the dough to get a rectangle shape. Lolo says patting the dough serves three purposes: one it pushes the dough into a rectangle shape, distributes the flour and also removes the excess flour. Let the dough rest for 5 minutes (and you too, but remember just 5 mins OK?)
After 5 minutes, you’ll need to fold the dough like letter. That is in equal 3 parts. First pick up one side of the dough (it will stretch a lot and make you wonder how many strong words you know ;) Be quick when you fold the sides of the rectangle because the quicker the movement, the easier it will be. Repeat with the other side of the dough. You will end up having small rectangle with folds that looks like folded letter. This is your first fold and remember, we have 2 more folds to come after this. Every time you fold, the dimension of the dough should remain equal. Did you just ask how? Well, after the first fold, you will be stretching the dough out and then folding it back again. Hence, you are not folding the dough into smaller rectangles, but stretching it out and folding it back to make equal sized rectangles. Confused? Don’t worry. You will understand it as we proceed.
Next, brush or spray the dough with oil, cover it in plastic warp and let it sit for half an hour. And then you’ll fold the dough again, brush it with oil, cover it with plastic wrap and let it rest for 30 minutes and then fold it again for the third and final time. Each time you fold, it becomes easier to handle the dough. And every time you fold, make sure that you are folding it in the opposite direction than the last. For example, for the first time if you have folded it from left to right, the next time you will fold it from top to bottom.
After the third fold, let the dough rest, covered with plastic warp, for one hour. The dough will rise at this time, but not necessarily double in size.
While the dough rests, we can proceed to make Herb Oil. It’s very simple and straight forward. Warm the olive oil and mix in all fresh or dried herbs or combination of both. Turn off the heat and let these aromatic herbs infuse the oil.
Now it’s the time to prepare your baking tray for baking Focaccia. Take 17” x 12” baking pan with sides and place a layer of parchment sheet. Spray oil on the baking sheet. Carefully transfer the dough from the counter to the baking sheet, try to maintain the rectangle shape. Don’t worry if the dough stretches little bit as the dough is quite soft and unwieldy.
Pour about ¼ cup of Herb Oil that you had prepared earlier on the top of dough. Now it’s the time for some fun. Using only your finger tips begin to press the dough to distribute the oil and flatten the dough out. The dough will begin to spread out in the pan. The aim is to spread the dough evenly, so that it fills the pan. But don’t worry too much if it doesn’t happen as the dough will gradually spread out in the pan after final rise. And important thing to remember is to use just your fingertips to spread the dough and not your fingers or palm. And also you want to keep the majority of air bubbles that forms on the dough which otherwise will not happen if you use your palm and knead it and destroy all your hard work.
Please make sure that the dough is completely covered in oil. Next cover and let the dough rise for two hours. I promise you, this is the final rise. By the end of two hours, the dough will be very puffy with bubbles and have had filled the pan. Close to the end of this final rise, preheat the oven to 500 deg F. make sure that the rack is placed in the centre.
While the oven is getting heated, add another 1/4 cup, or more, of the herb oil. Spread the dough out to its final size using the same fingertip technique that we had used. It’s a pretty sight to see all those bubbles but restrain your self from pinching them. You want a uniform distribution of bubbles and fingertip dimples. Pinch off any huge bubbles since they’ll just explode in the oven while baking. Sprinkle the top with salt as desired.
Tada… It’s baking time now. Oops, I forgot about another rest time. Promise, promise! This is the last and very final one. Let the dough rest for another 10-15 minutes. And then place the dough in the oven, turning down the temperature to 450 deg F. Bake it for 10 mins, rotate the sheet for even baking and then bake for another 10-15 mins until its golden brown. By then your whole house will smell of freshly baked bread with heavenly aroma of herbed oil. Just imagine that!!!
Now it’s the time to take Focaccia out of the oven and let it cool. Remember to remove it from baking pan and place it on cooking rack. Please be patient and let it cool for at least 20 minutes before you attack it. I served mine with hot bowl of Tomato soup.
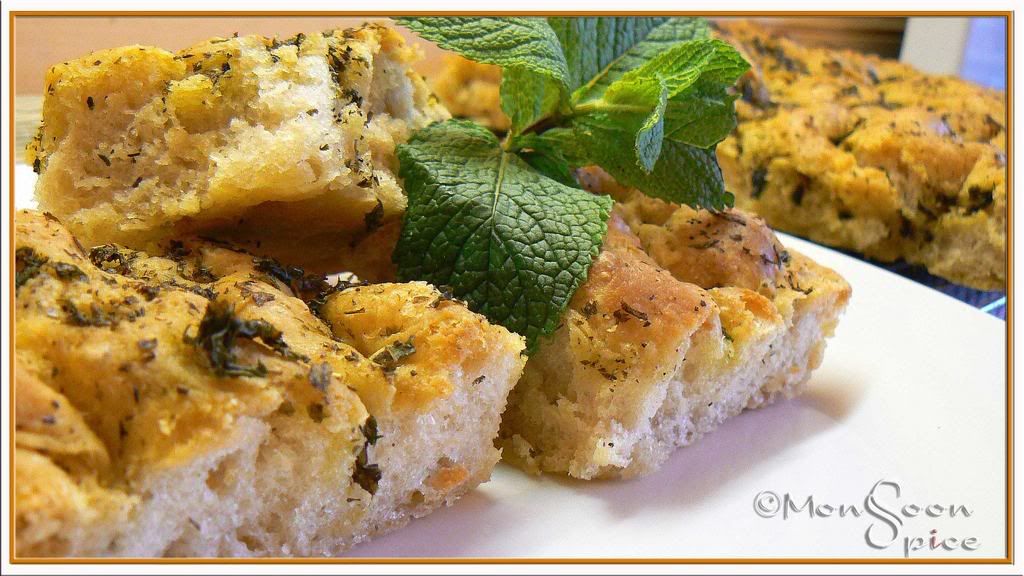
Poolish Focaccia


Notes:
This one was ridiculously huge loaf of Focaccia for just 2 people. So I cut them into desired shapes and stored them in a zip lock bag and popped them in my freezer. When required, I just defrost them for few minutes and then heat them in oven. Voila, they taste as good as they tasted for the first time!
As Lolo suggests, next time I am planning to bake Focaccia with different toppings. For example, some olives, red onions, fresh herbs and may be some garlic too. Or how about some sweet Focaccia? Topped with apples or grapes tossed in little sugar and sprinkled with some aromatic spices like cinnamon or nutmeg? Yum, yum… and yeah, depending on your choice of toppings make sure that you add them just before 5 minutes you take it out from the oven. Thanks, Lolo for helping me get over with the phobia of baking my own bread with this delicious recipe.

10 February, 2009

Coconut-Mango Pulihara/Chitranna: Recreating Forgotten Taste...

Photobucket
Coconut-Mango Pulihara

Last week of March and just a day away from 2 months summer break. Yes, it was the day before my last exam and every year we had same exam to write, Moral Science!!! I always felt that it had to be some immoral and sadist person’s way of making us kids suffer one more day in the name of exams. Yes, Moral science paper which was not at all counted in the final exam valuation. So there was no question of studying! We kids were all excited about 2 long months of sun, mangoes, ice creams and candies, meeting our cousins (more like a bunch of monkey soldiers from Ramayana), lazy afternoons, swim in a stream and late nights.

The day before last exam was also the day where our home buzzed with excitement and non-stop ringing of telephones from our cousins. “Don’t forget to pack your cricket bat and wickets”, said one cousin to my brother. “And bring along that new board games too”, screamed another cousin of mine. “Did you pack your piggy bank for Goli Sodas and ice candies? I have 58 rupees 75 paisa in my piggy bank”, I whispered to my sister in excitement. “And Amma promised that she will give us 20 rupees each when we go to Grandma’s place”, said my chuckling brother.

At last it was the day which we all were eagerly looking forward to. We were too excited to even sleep in the previous night thinking what if we overslept and no one woke us! We surprised our parents by getting up from bed without any alarm and got ready in lightening speed. After quick breakfast, we went through our list of things-to-pack, making sure that we have not left anything behind. Then the waiting game began….

Every five minutes we would look at the clock and then look out on the road for the sign of military green jeep. Our three year old brother continued to stare at the clock without batting his eyelids to make sure that the big hand in clock is moving towards 12 while the small one was at 10. Just when the clock was about to strike ten, we saw a giant green jeep coming towards our house and we would start waving both our hands, screaming at top of our voice to make sure that our uncle noticed all three devils. We never wanted to take risk as what if he at that time suffers from short-term memory loss and drives away!

Every time our uncle came to pick us and along with him were my cousins whom he had picked from their home on the way. Without giving him much time to think about the weeks of torture he will have to face, we would pressure him to take us to Ajji’s home even before he could finish his coffee made by his elder sister, making him choke on the Chakkuli’s that he was busy stuffing his mouth with. Within few minutes we would dump our bags on second rows of seats and jumped into the back of this giant of jeep that served also served as boot for carrying gunny bags filled with Areca nuts, rice and Cocoa from farm. That place was our favourite place to play cards, board games and also house-house game. A thick blanket with green and black checks was spread on a 5 feet by 5 feet boot and we six cousins sat on it spreading tiny stainless steel kitchen toys. While some pretended to be mothers, others were their husbands and kids. While the husbands and kids went to school by jumping to second and front rows of seats, mothers of the family busied themselves with cooking and gossiping! Thus the game went on till we travelled for 3 hours and at last reached our granny’s place.

Those blissful days of fun and frolic…. The days of innocence and carefree spirits… Ah! The magical world of childhood where few rupees were more precious than today’s millions of rupees!!! The simple days where drinking Goli Soda and licking the ice cream running down on your arms were the ultimate pleasures any kid ever wanted!!! The carefree days where seat belts in vehicles were unheard of and two or three wounds on knees were considered too small an issue to even look at!!! I can give up everything to live those days again!

As the nostalgia hits me hard again, I try to loosen the knots of my memories to weave the beautiful days of my childhood… While my mind is busily knitting the colourful days, my hands pick up the ingredients to create a long forgotten recipe from my grand ma’s kitchen. While my mind pictures the retro coloured visuals of one of my favourite childhood favourites, my taste buds, along with my nose join my fingers in typing a familiar name quickly on Google search. And voila, with in few minutes I come across this recipe which very much sounds and looks like the one I have in my mind. Thanks to Mika, I was able to recreate the taste from my childhood which I had thought was buried with the death of my grandma. I found the same taste and aroma of my Ajji’s Coconut-Mango Pulihara/Chitranna in Mika’s recipe for Mango Rice and it was indeed as refreshing and tantalising as I remembered it to be.

Photobucket
Coconut-Mango Pulihara

Sweet Coconut, sour mangoes, spicy green chillies and pungent mustards, a flavour sensation in true sense! Crunch from the Tadka and peanuts is just added bonus to this unbelievably simple and delicious Coconut-Mango Pulihara/Chitranna. Only thing I missed was the small bowl prepared using banana leaves that would fit nicely between our small hands. My granny made these parcels of Coconut-Mango Pulihara in fresh banana leaves tied with threads made using banana stems and put it in a basket made using thick base leaves of areca nut plants along with small bowls made using banana leaves whenever we kids left for our trip to nearby ponds or hills. Can you think of any other better way of saving mother earth and better bio-degradable bags and plates? The heavenly smell of coconut-mango-chilli-mustard mixed with fresh smelling banana leaves is something I will never be able to put it into words. It is something that one has to experience to know exactly what I mean! If you are lucky enough to get some fresh, sour mangoes make it at once and experience the true flavour of simple ingredients. And if you are really-really lucky enough to get fresh banana leaves, just serve this warm Coconut-Mango Pulihara/Chitranna in it to take a small trip to heaven!

Photobucket
Coconut, Mango, Green Chillies & Mustard Powder for Coconut-Mango Pulihara

Photobucket Print This Recipe
Coconut-Mango Pulihara/Chitranna (Rice flavoured with ground mixture of fresh Coconut, Green Mango and Mustard Powder)
Prep Time: 5 mins
Cooking Time: 5 mins (If using leftover Rice) - 30 mins (If using fresh Rice)
Serves: 3-4
Recipe Source: The Green Jackfruit
Recipe Level: Easy/Beginner
Spice Level: Low to Medium
Serving Suggestion: Serve as it is or with any Raita/Yogurt and Tender Mango Pickle

Ingredients:
1½ cups Rice (Preferably Sona Masuri or Basmati)
1 cup Fresh Coconut Pieces or ¾ packed cup grated Coconut
1-1½ cups Green Raw Mango Pieces (you can peel the skin if needed)
3-5 Green Chillies (Adjust acc to taste)
2 tsp Mustard Seeds, ground to Powder using coffee grinder or Pestle & Mortar
1 tsp Turmeric Powder
1 tsp Sugar (Optional but recommended)
¼ cup Roasted Peanuts or Cashews
1-2 tsp Fresh Lime/Lemon Juice (optional, use it if the mangoes are not sour enough)
Salt to taste

For Tadka/Tempering:
1 tsp Mustard Seeds
1 tbsp Urad Dal
1 tbsp Channa Dal
2 Dry Red Chillies, halved
Few Curry Leaves
¼ tsp Hing/Asafoetida
1-2 tbsp Ghee or Oil
Photobucket
Coconut-Mango Pulihara

Method:
Cook rice using 1:2 ratios of rice and water. Once cooked, separate each grain with a help of fork and keep it aside to cool. The best rice is usually the leftovers from previous day’s dinner or lunch.
Take coconut pieces, mango pieces and green chillies in a food processor or mixer and pulse it to get roughly ground paste without adding any water. You should get bits and pieces of coconut, mangoes and chilli when you eat this rice. Keep this mixture aside.
Heat oil or ghee in a pan and add mustard seeds to it. When mustard starts to pop and splutter, add channa dal, urad dal, dry red chillies, curry leaves and hing. Sauté till dals turn golden brown.
Mix in ground coconut-mango-green chilli mixture, mustard powder, turmeric powder and sugar and give it a good toss for 2-3 mins and switch off the flame. Remember not to over cook this ground mixture as you want to retain the raw sour taste of mangoes. Add lime or lemon juice, if using, and salt to taste and mix well.
Mix in cooked rice and toasted peanuts or cashews and give it a good toss so that every grain of rice is coated well with ground mixture. Serve this delicious Coconut-Mango Pulihara/Chitranna hot as it is or with yogurt or any raita and pickle of your choice and enjoy.

06 November, 2008

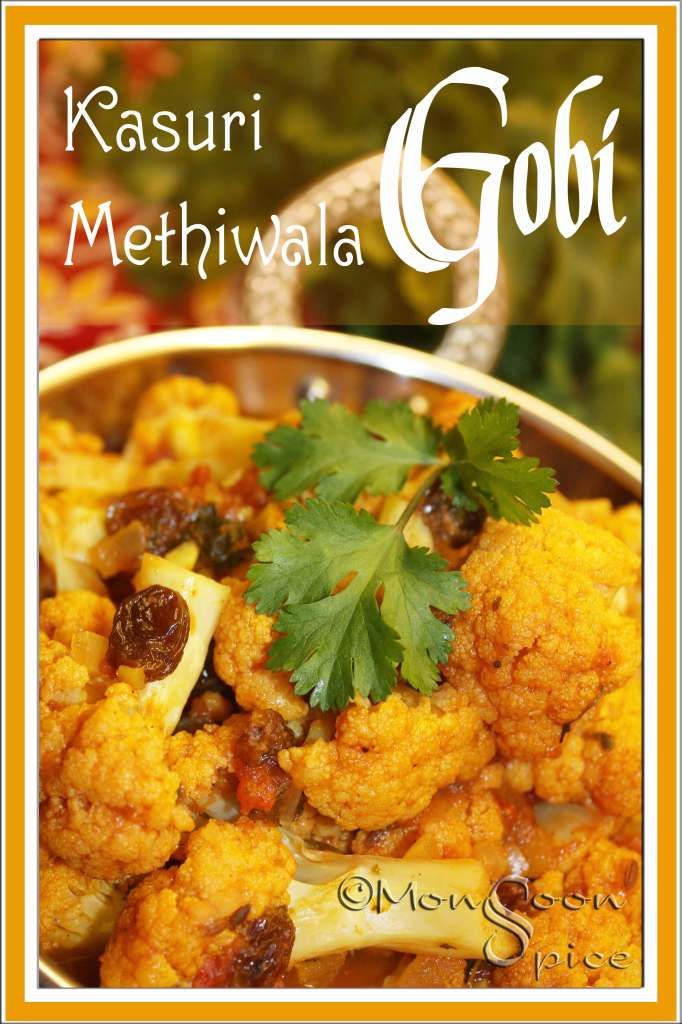
Kasuri Methiwale Gobi ki Subji/Subzi: Sweet Romance

Kasuri Methiwala Gobi Ki Subji

Tall, dark and handsome…
Rich, powerful and charismatic…
Beautiful, fair and simple…
Young, virgins and innocents…

You don’t need to appoint detectives from Scotland Yard to figure out what I am talking about. This is how almost all the heroes and heroines of Mills & Boon novels. For all those people who are twitching their nose in disgust at the mention of M&B, did you know it’s been a whole century since Mills and Boon began publishing? Yes, 100 years of romance and romance alone and surprisingly even now at 21st century it has vast readership by selling 130 million books a year in 26 different languages. And did you also know that the company turnover is over £21 million and it has 1,600 writers dedicated to writing romantic novels?

The documentary on BBC channel on a Century of Romance: Mills & Boon triggered the memories of my teen days when I read first M&B book which was stuck in between Hardly Boys and Nancy Drew novels I was addicted to. It was the story of rich, powerful business man falling in love with a pretty secretary of his. And since then I have had read hundreds of similar stories with the same storyline with almost similar characters. The men are always rich, handsome and powerful millionaires or billionaires who are either successful business men or doctors or Arabian sheikhs or business tycoons with a smile that would set every (submissive) female specie’s heart ablaze.

I have lost the count of numer of times I have had read M&B novels, tucked safely in between thick text books of logistics or graphic designing, at boring college lectures. They were notoriously famous among girls as the books were small enough to hide comfortably between any texts books which almost resembled large print oxford dictionaries and dream of their prince charming between coding and programming. Since the book was small with 40 to 50 thousand words, it was easy to finish in a session or two. Well, you don’t need to use your mind when you read M&B novels, just turn pages and finish it and pass it on. Ever wondered why these books were so famous? Do share your stories and thoughts with us :)

Moving on to recipe part, I have different things to romance these days, food and cooking. What did you think? Tsk, tsk… Anyways, I have been seen lately romancing with Dudhi which ruled our kitchen for the past few months and also other vegetables which make regular appearance in our kitchen. But Gobi/Cauliflower is one vegetable which I buy reluctantly, mainly it stinks!!! Did I say that? Hmmm… It does stick when over cooked and I know you too know that!!! Even when I buy Gobi I disguise it among other vegetables, especially I like to pair it with potatoes which makes it much bearable. And I absolutely hate over-cooked cauliflower. But this time hubby dear was particular about cooking it alone without pairing with other veggies. Well, it took me more than one week to think and decide and by yesterday I was almost ready to give up and cook Aloo-Gobi if not for very intriguing recipe posted by dear Indira of Mahanandi.

Indira’s recipe of Gobi Kasuri Methi with Raisins sounded too interesting to be ignored. Kasuri methi rules my kitchen and I usually buy big packs of it from India instead of buying here which hardly gives any flavour. So I was all set to try this recipe and with in few minutes I was chopping cauliflower into medium florets. My recipe of Kasuri Methiwala Gobi Subji/Subzi uses three main ingredients cauliflower, kasuri methi and raisins used by Indira but my recipe is slightly different from the original. I skipped coconut and added little bit of garam masala and aamchur powder. And I also used fresh ginger and garlic along with sweet onions and tart tomatoes. While kasuri methi gives a mild, pleasantly bitter taste, sultanas soaked up in spicy tomato gravy gives it a nice sweet bite to this absolutely delicious Subzi/Subji. Thank you Indira for this delicious inspiration and I am packing this bowl of delicious Kasuri Methiwala Gobi Subji/Subzi to dear Zu for her T&T-Mahanandi event.

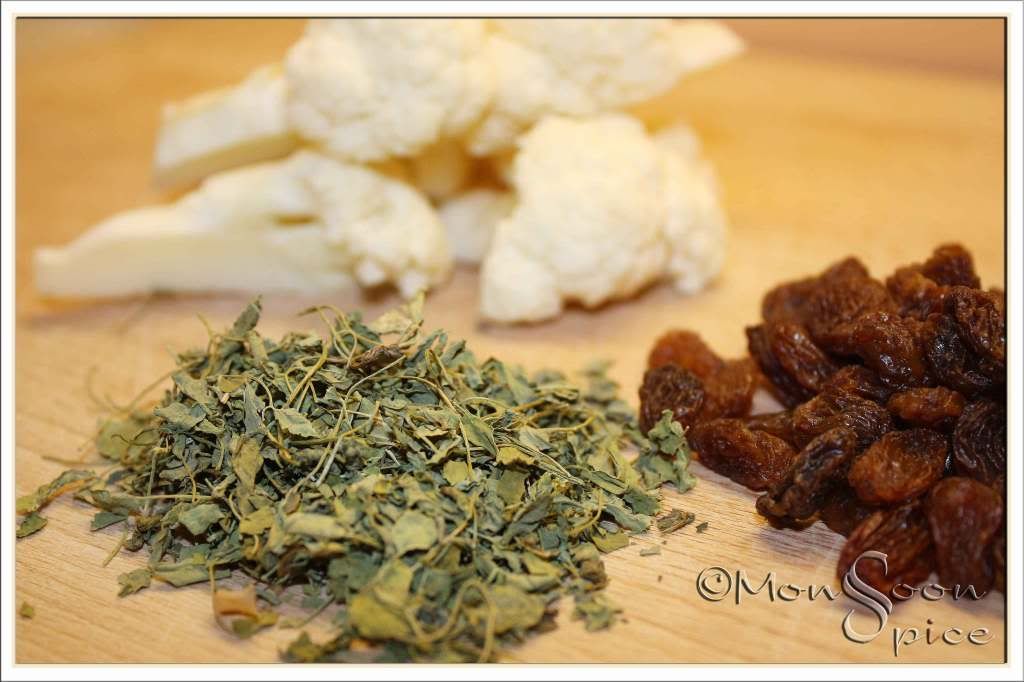
Cauliflower, Kasuri Methi & Sultanas

Photobucket Print This Recipe
Kasuri Methiwala Gobi Subzi/Subji (Sweet and Spicy Cauliflower Curry cooked with pleasantly bitter Dried Fenugreek Leaves and sweet Sultanas)
Prep Time: 10 mins
Cooking Time: 20-25 mins
Serves: 4-6
Recipe Inspiration: Mahanandi
Ingredients:
1 medium Cauliflower, cut into medium florets
1 large Onion, finely chopped
1 can or 3 large Tomatoes, finely chopped
1 inch Ginger, peeled & finely chopped
3-4 large Garlic cloves, finely chopped
¼ cup Sultanas or Raisins
1 tbsp Kauri Methi/Dried Fenugreek Leaves
½ - 1 tsp Garam Masala
½ tsp Kitchen King Masala (Optional)
½ tsp Turmeric Powder
½ - 1 tsp Aamchur/Dry Mango Powder (Adjust acc to taste)
1 tsp Jeera/Cumin Seeds
¼ tsp Hing/Asafoetida (Optional but recommended)
1 tbsp Oil
Salt to taste
Kasuri Methiwala Gobi Ki Subji

Method:
Heat oil in a pan and add cumin seeds and hing. When cumin starts to sizzle and change golden red, add finely chopped ginger and garlic and sauté them for about 30 seconds. Then add finely chopped onions and sauté till they turn golden brown, about 2-3 mins.
Mix in kasuri methi, garam masala, kitchen king masala and turmeric powder and fry for half a minute. Add canned chopped tomatoes or finely chopped tomatoes and cook for 3-4 minutes on medium flame till they turn pulpy.
Now add ½ - 1 cup of water, salt to taste and aamchur powder and mix well. Mix in cauliflower florets and cover the lid. Let it cook for 10-12 minutes on medium flame, stirring in between, till cauliflower is almost cooked.
Uncover and mix in sultanas or golden raisins and let it simmer for another 5-7 minutes. Mix in finely chopped coriander leaves and serve the delicious Kasuri Methiwala Gobi Curry with any Indian Breads or steaming bowl of Rice and enjoy.

21 October, 2008

Chavli Amti: Recipes from Your Kitchen to Mine

Photobucket
Roasted Spices for Amti Masala

Yes, it’s a time for this month’s “Recipes from Your Kitchen to Mine”. This month I have tried 2 recipes from different blogs and if time permits I will post the second recipe before the clock strikes 12 on 31st October. So today I am posting a recipe I tried from Nupur’s One Hot Stove.

Nupur’s One Hot Stove is one of the inspirational blogs where she takes us on virtual culinary journey of authentic and delicious Marathi cuisine. Coming from a beautiful city of Kolhapur, Nupur warmly welcomes us to savour simple yet heavenly home food which she grew up enjoying eating and later creating the same magic in her kitchen. Well, I don’t think I need to write more about Nupur or her blog as most of us visit her very often to see the Marathi culinary gems she churns from her One Hot Stove.

On one of such visits I stumbled upon delicious looking Chavli Amti. Amti is as dear to Maharashrtians as Rasam is to South Indians. I have come across many recipes of Amti in last two years of blogging but surprisingly never ventured into making it till now. Since I am quite partial to Black Eyed Peas these days, I couldn’t resist the temptation of trying her Chavli Amti. Well cooked plump black eyed peas in delicious creamy coconut, onion and tomato gravy was something which is hard to resist. And with freshly made batch of Amti Masala from her blog it was everything any true foodie can think of.

Except for the soaking bit I followed Nupur’s recipe without twisting and tweaking. In recent experiment with cooking the black eyed peas in Methi Lobia, I have learnt that black eyed peas can be directly cooked without soaking them overnight. Since I had few other things to do, I could soak these beans for 2 hours and it came out just perfect when pressure cooked. So don’t worry if you don’t have time to soak the peas in water. Just bring a pot of water to a boil and add these beans. Cover and pressure cook for 15 minutes till they get nicely cooked and plumped. The freshly ground Amti Masala is sure to find its way into many other recipe I am going to cook. As Amti Masala doesn’t contain over powering spicy ingredients, it is just perfect for the recipes which needs little kick of aromatic, fresh spice powder. Roasting of lentils and spices along with onion and coconut simply jazzes the whole dish and gives creamy base gravy with a touch of sweet and nuttiness. I made it little thick on first day to go with fresh batch of Phulkas and added little more water on next day to get thin gravy to serve with a pot of steam cooked rice and needless to say we licked our fingers and plates clean ;) Thank you, Nupur for inspiring me to cook this extra ordinary dish which has become talk of our home :) This is my third and final entry (I hope so;) for dear Sra’s My Legume Love Affair-Fourth Helping, initiated by lovely Susan. Well, this should show my love affair with legumes and lentils, I think ;)

Photobucket
Chavli Amti

Photobucket Print This Recipe
Amti Masala Powder
Prep & Cooking Time: 5 mins
Makes: ¾ cup
Shelf Life: 3 months
Recipe Source: One Hot Stove

Ingredients:
½ cup Coriander Seeds
¼ cup Jeera/Cumin Seeds
2 tsp Shah Jeera/Black Cumin Seeds
1 inch Cinnamon Stick
10 Cloves
Photobucket
Freshly Ground Amti Masala


Method:
Dry roast all the ingredients in a pan at medium-low heat till they change colour to lovely golden red and fragrant. Let it cool completely before you proceed.
Grind these roasted spices to smooth powder and store this aromatic Amti masala powder in an air tight jar or container and use as and when needed.

Photobucket
Chavli Amti

Photobucket Print This Recipe
Chavli Amti (Black Eyed Peas in delicious spiced gravy of Coconut, Onion and Tomato, a recipe from Maharashtra)
Prep Time: 10 mins
Cooking Time: 30 mins
Serves: 4-6
Recipe Source: One Hot Stove

Ingredients:
1 cup Black Eyed Peas, washed and soaked in a bowl of water overnight
1 medium onion, thinly sliced or finely chopped
2 large tomatoes, pureed or finely chopped
1½ tsp Amti Masala Powder or use any Curry Powder of your choice (Garam masala, Sambar masala etc)
1 tsp Jaggery/Sugar
Salt to taste

For Masala Paste:
1 tsp Urad Dal/Split Black Lentils
1 tsp Channa Dal/Split Chickpeas
1 tsp Coriander Seeds
½ tsp Methi/Fenugreek Seeds
1 tsp Jeera/Cumin Seeds
3-4 Dry Red Chillies (Adjust acc to taste)
1 small Onion, finely chopped
3 tbsp grated Coconut, fresh or frozen or desiccated
½ -1 tbsp Oil

For Tadka/Tempering:
½ tbsp Oil
1 tsp Mustard Seeds
Few Curry Leaves
A big pinch of Hing/Asafoetida
½ tsp Turmeric Powder

Photobucket
Chavli Amti

Method:
Cook soaked beans along with the same water used in soaking in a pressure cooker for 10-15 mins till it is cooked thoroughly. I soaked these peas for about 2 hrs in water and cooked them in pressure cooker. Alternatively if you don’t have enough time to soak the peas in water, bring 2-2½ cups of water to boil in a pressure cooker and to this add washed beans. Cover the pressure cooker lid and proceed to cook for 15 mins or for 3 whistles. Let the pressure cooker cool slightly and let it release all its pressure before opening the lid to avoid nasty accidents in your kitchen.

For Masala Paste:
While black eyed peas are cooking, add all the ingredients listed under the masala paste ingredient list in a pan and fry them in a little oil till they are lightly roasted, about 2-3 minutes on medium flame.
Switch off the flame and let the spices cool slightly. Grind it to a smooth paste by adding little water at a time. Keep it aside until required.

Proceed to make Chavli Amti:
Heat oil in a pan and add mustard, hing, curry leaves and turmeric powder in that order and let the mustard pop and splutter. To this add finely chopped/sliced onions and sauté till it turns golden brown, about 2 mins.
Now add chopped tomatoes or tomato puree, sugar, amti or other curry powder, ground masala paste and salt to taste. Fry this on medium flame for another 2-3 mins.
Add cooked black eyed peas along with the water in which it is cooked and bring the whole mixture to a boil. Add little more water if needed and simmer for another 5-10 minutes. Serve it hot garnished with finely chopped coriander leaves along with roties or steaming bowl of rice and enjoy.