Showing posts with label Basil. Show all posts

13 November, 2018

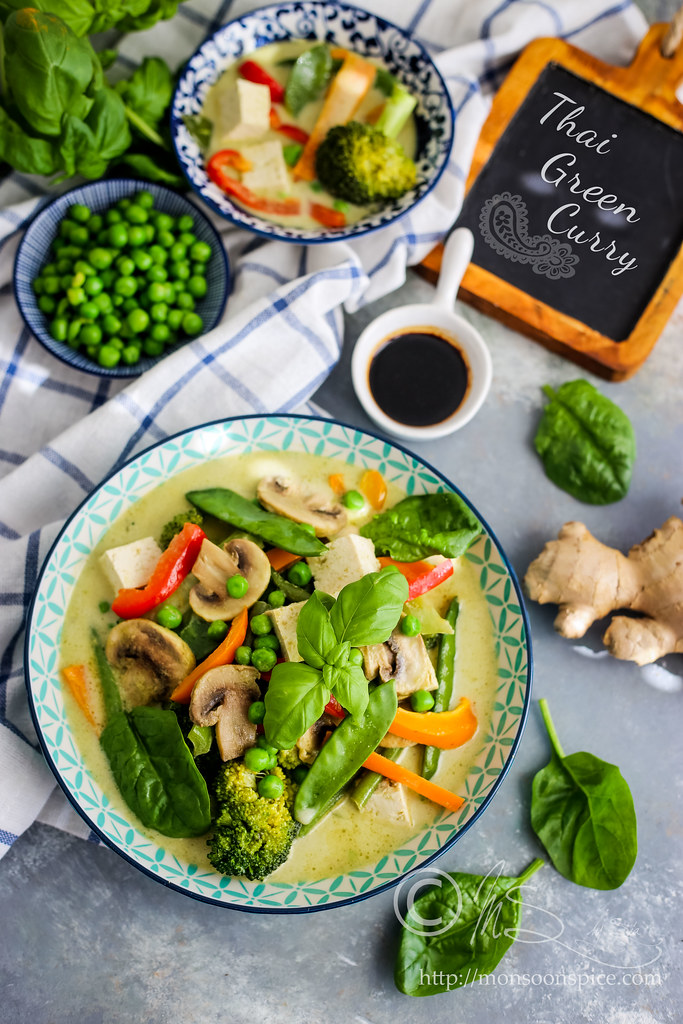
Mixed Vegetable and Tofu Thai Green Curry Recipe | Vegan Thai Green Curry Recipe

Learn how to make Mixed Vegetable and Tofu Thai Green Curry

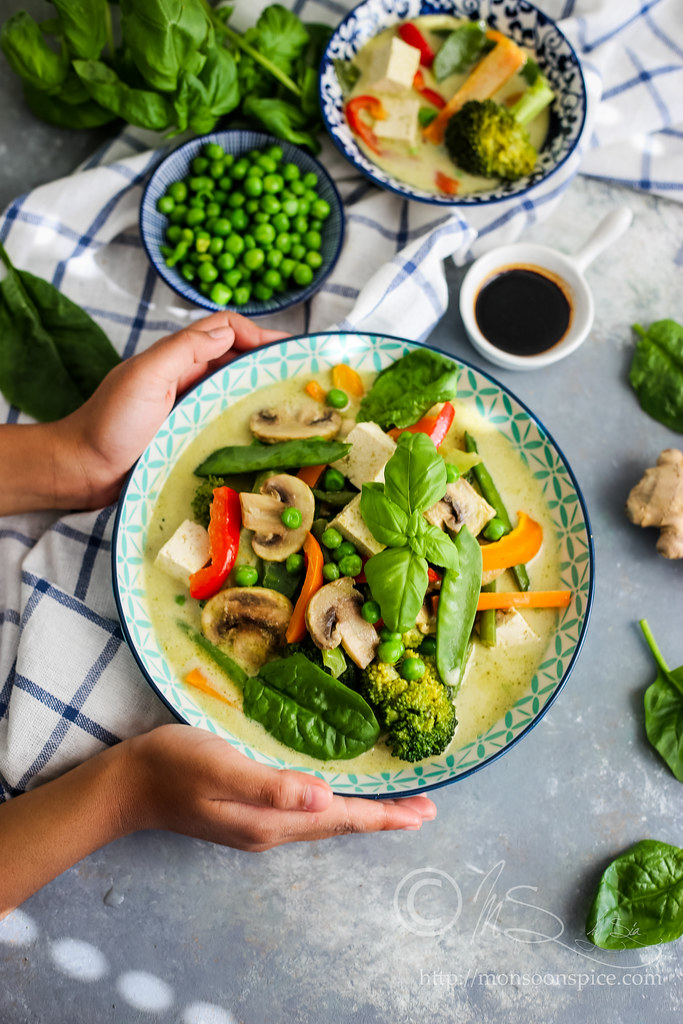
Who doesn’t like a bowl of fresh, highly aromatic and warm curries on a cold days?! Especially when it is a highly fragrant and beautifully flavoured Thai Green Curry? Personally, I find its perfect balance of fresh green chilli heat and sweet, calm coconut has no other competitor for comfort. A bowl of hot curry with an array of colourful vegetables on top of steaming, fragrant Thai jasmine rice is what dreams are made of… It’s serious food heaven!

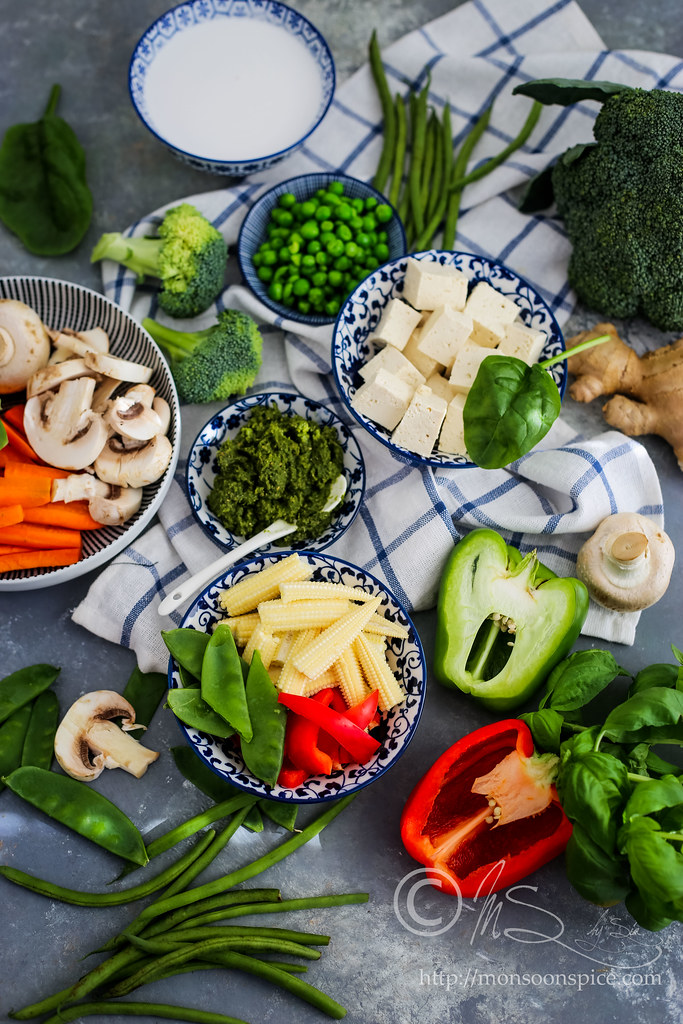
Ingredients for Thai Green Curry


My husband K and I are not great fans of eating out or takeaways. We opt to cook and experimenting in our kitchen than shedding unnecessary money on plate of food that we don’t enjoy. There are very few restaurants in our neck of wood that serves good food and that may be one of the reasons why we enjoy cooking. Also, having handful of friends who love our simple home cooked meals is also another reason for not eating out that often. Whatever reason it may be, we both are kind of people who enjoy spending quality time in kitchen, doing things together and having lots of fun with experimenting and tasting new cuisines.

17 October, 2018

Thai Red, Yellow and Green Curry Paste Recipe | Trio Of Thai Curry Pastes

Learn how to make trio of Thai Curry Pastes; Thai Red Curry Paste, Thai Yellow Curry Paste and Thai Green Curry Paste

"Cookery is not chemistry. It is an art. It requires instinct and taste rather than exact measurements."
~ Marcel Boulestin

One thing I have learnt from my over a decade of kitchen adventure is learning how to balance and harmonize flavours. Even the fresh ingredients, such as herbs, spices and vegetables, can differ depending on their freshness, the soil and climate condition where they are grown, the way they are packed and stored etc. Same chilli I had bought few days back was less spicy and the tomatoes were more juicer than the one from my previous shopping trip to same old supermarket. Similarly, tamarind puree from same brand may differ in degree of sourness depending on how thick or thin it is made while the colour of chilli powder may be brighter than the last pack you consumed.

Thai Red, Yellow and Green Curry Pastes

Thai Green Curry Paste

For any cook, amateur or experienced, it is important to make adjustments in the quantity used to bring out the right flavour of the ingredients to suit your taste buds rather than blindly following the given recipes religiously. Recipes should serve as guidelines as they cannot speak for our taste preference or the variance in the ingredients we get from different places. Rather following the cooking instructions, I follow my instinct and my palate as it is these two which tells me what I would like in a particular dish, a hint of this a dash of that which creates a perfect harmony between flavour, aroma and the complete satisfaction of creating something which my loved ones enjoy.

21 November, 2013

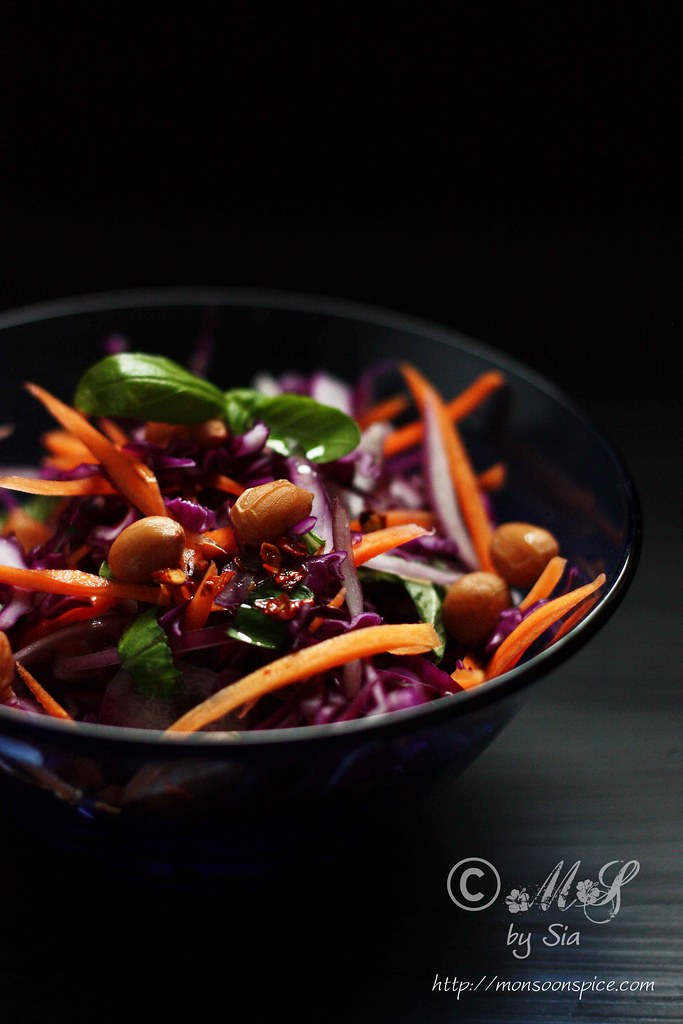
Spicy Red Cabbage Slaw or Salad Recipe | Quick and Simple Salad Recipes

Learn how to make Spicy Red Cabbage Slaw or Salad recipe with salted boiled peanuts and spicy chilli and lime olive oil dressing

It’s that time of the year when the outside temperature drops to minus and I feel like a grizzly bear who just want to hibernate through the winter only to open its eyes when the spring season graces the mother earth! One can dream with closed eyes and in my case I can day dream anytime with both my eyes wide open! Not that I want to be grizzly bear, but I could so do with few good nights’ sleep though! Sigh...

02 October, 2013

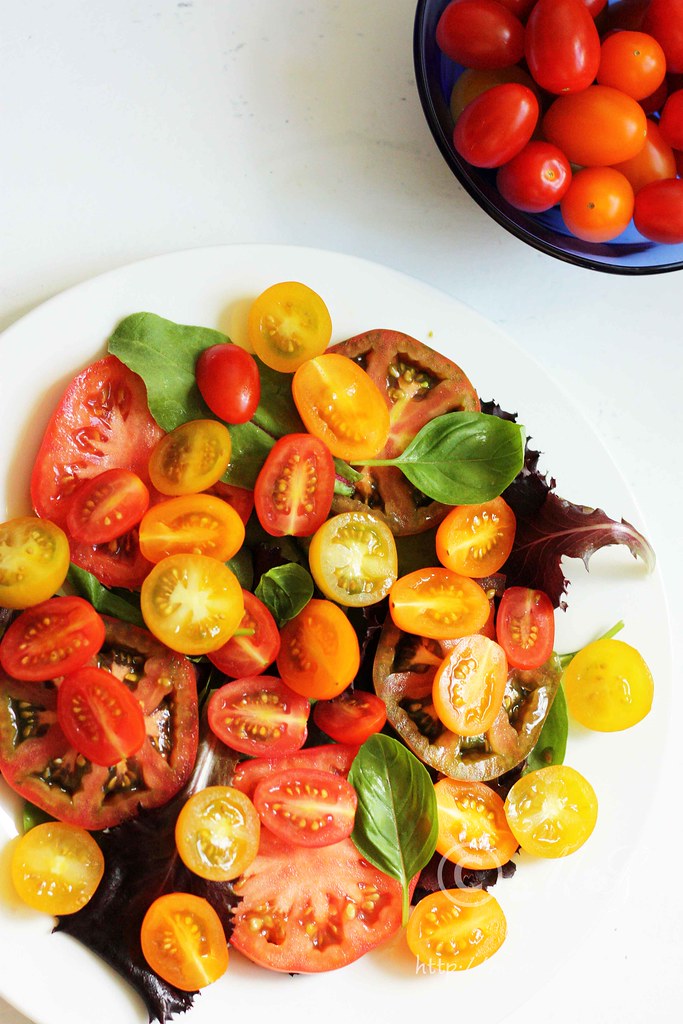
Simple Tomato Salad | Summer Salad Recipes

Learn how to make Simple Tomato Salad ~ Basic tomato salad with basil and lime and pepper dressing

I am not going to bore you today with my rants and rambles. Although my mind is bursting with thoughts, the words have abandoned me today as they refuse to flow at my fingertips which otherwise enjoy tap dancing on the keyboard! The exhaustion has finally overtaken my desire to share one of my most favourite recipes from the treasure chest of secret family recipes!

29 March, 2009

Tofu & Pineapple Thai Yellow Curry: Sunshine, at least, in My Bowl!

Photobucket

Tofu & Pineapple Thai Yellow Curry

Sunshine is delicious, rain is refreshing, wind braces us up, snow is exhilarating; there is really no such thing as bad weather, only different kinds of good weather.
~John Ruskin


02 March, 2009

Poolish Focaccia: My Story about... "Doing It"!

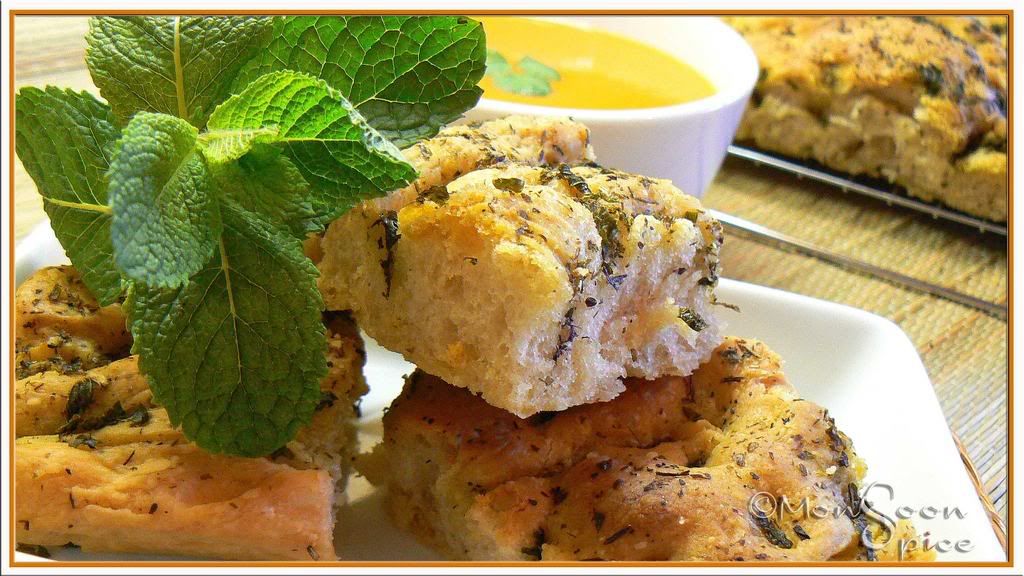
Poolish Focaccia

“Should I do it today?” she thought to herself. “May be it’s not a good idea. What if I am misunderstood? What if everything goes wrong? Will I be able to show my face to him if I don’t succeed? What will he think of me? What if he thinks I ruined his reputation? What will his people say?” She was left alone to fight her own battle.

“No, I can’t shy away from him anymore” she said loudly. It was at that moment she decided enough is enough. She was tired of longing for him, tired of waiting and watching and wanting. She knew she has to do something about it right then to stay sane! She couldn’t remember the last time she attempted something as brave as this. It felt like it was in another lifetime, in another world. Yes, not in this life and she had to do something about it.

She took a deep breath and got up from where she was sitting. She felt a shiver run down her spine and also adrenaline kicking her blood stream at the same time. She felt light headed and exhilarated at the thought of ‘doing it’ with him which surprised her nevertheless. Wasn’t she supposed to feel nervous and scared for doing it for the first time?

Then she took small steps in the beginning, almost hesitatingly. Then she remembered the anguish and pain of not ‘doing it’ and she didn’t want to live regretting for not ‘doing it’ life long. Her tentative steps increased their pace and with in few minutes she was standing facing his parents’ door. She took a deep breath and opened their door bracing her self for any challenge she might have to face.

Then she saw them, sitting quietly and giving her hard and cold stare. She could feel uncertainty creep her thoughts. She could see the rejection in their eyes and she wanted to give up everything and run back to her sanctuary to lick her wounds in her safe domain. But going back was not an option. She had faced rejection from their all her life and she had had enough of it and this was her ultimate revenge for making her suffer all this time.

Half in doubt, she slowly extended her hands towards them. She could hear her heart beating fast and small drops of sweat forming on her forehead. Once she touched them, she felt they were not as bad as she thought them to be. Surprisingly, the feeling was mutual and with in no time they could feel the sweet bond forming among themselves and they set the house literally on fire.

It may have taken quite sometime for her to at last meet him but the long journey she had to make was all worth in the end. And as they say, all’s well that ends well. She had ultimately conquered her fear and ‘did it’. The success tastes better and means lot when you wrap your fear in confidence and move forward with determination. Her story of ‘doing it’ also had a very happy end. Just like fairy tales…

And that’s how ‘did it’, my friends. I baked bread!

I baked bread from scratch. And boy!!! Does it make you feel high! I followed Lolo’s Poolish Focaccia and Poolish from scratch. It is not exactly a complex recipe to follow but it does test your patience as it takes 2 days. First day you prepare the poolish which needs you to mixing the flour, water and yeast and letting it rest overnight to ferment. And on second day the dough and herb oil is prepared for the focaccia. I have almost followed Lolo’s recipe to T. I lost all the step-by-step photos I had taken among thousands of other photographs (Arrgh.!!!...). So goto Lolo's blog for step by step gorgeous photos which are visual treats Without wasting much of your precious time, let me give detailed instructions for making your own Poolish Focaccia.

Day One: I followed Lolo’s instructions and made poolish on the night before baking. She did mention that you can make focaccia without this step but as it was the first time I tried baking bread, I didn’t want to leave option of getting perfect one. You don’t need to be a rocket scientist to make poolish. All you need is little time and the following ingredients.
Poolish Focaccia

Photobucket Print This Recipe
Poolish
Prep Time: 10 mins
Cooking Time: -
Makes: About 2-
2 ½ cups of Poolish

Ingredients:
2 ½ Cups Unbleached Bread Flour
1½ Cups Water, at room temperature
¼ tsp Instant Yeast (I cheated and used good ½ tsp yeast ;)
Method:
Take wide mixing bowl and add all the ingredients. With a help of a wooden spoon combine them to form a sticky and smooth mass which looked like a pancake batter. Cover it with a cling film or plastic wrapper tightly and leave it for the yeast to kick in.
Now either you can leave it out all night or store it in refrigerator after 4 hours. Since I had no plan of waking up at 2 in the night, I left it outside all night. This way my poolish was nicely and steadily fermented and it was bubbly, sticky and little stinky too ;)

Day Two: This was the D-day. I had to make dough and herb oil for focaccia. I could feel butterflies in my belli. But Lolo’s instructions assured me enough to plunge into baking spree. So this day I had to combine the poolish prepared last night with some extra flour to make dough for focaccia. And then I was all set to make very fragrant herb oil. The whole process of making the dough was simple enough than I thought it to be. All I had to do is mix the poolish with more flour, water, oil, yeast (the beast;) and of course salt. Yup, simple and straight forward. But then I felt I was back in acrobatics class when I had to fold the dough 3 times (standing in odd positions, and making all sorts of face), and had to wait for the dough to rise between every foldings. Once the dough has risen, I had to transfer it onto a baking sheet (thank god, no was there to watch me in awkward positions ;) and shape it to fill the whole of baking sheet. Then again leave to for its final rise before baking it. Over all it took 4-5 hours (I told you so, you need good amount of patience), but most of it was the rising time between every fold. I can see you yawning there. Hello… Wake up… Time to make Poolish Focaccia.
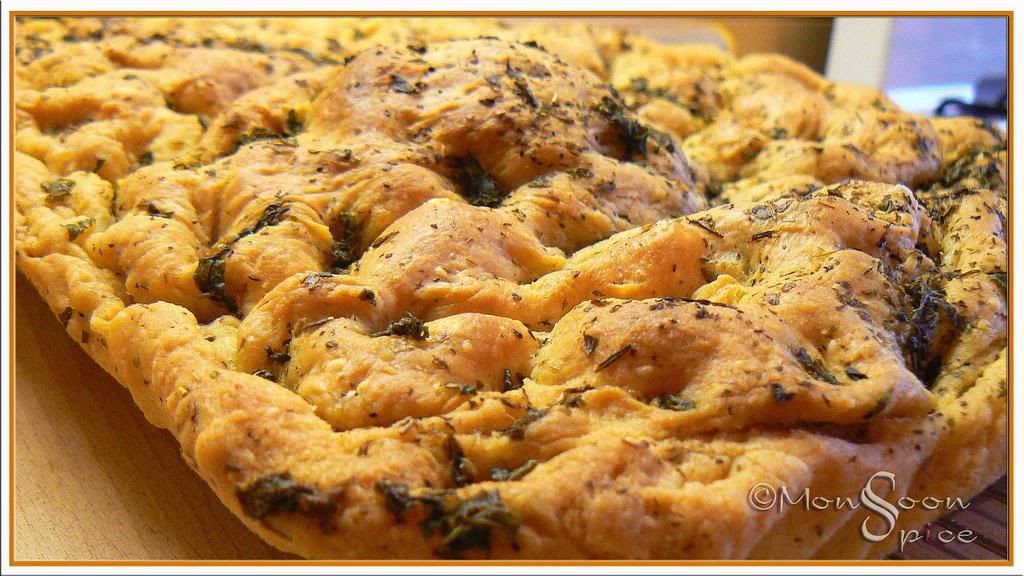
Poolish Focaccia

Photobucket Print This Recipe
Poolish Focaccia
Prep Time: 15 mins- 5 hours (Including Resting & Rising time)
Baking Time: 20-25 mins
Serves: 6-10
Recipe Source: Vegan Yum Yum

Ingredients:
3 Cups Poolish
2 2/3 Cups Unbleached Bread Flour
1½ tsp Instant Yeast
6 tbsp Olive Oil (I used good extra virgin Olive oil)
¾ Cup lukewarm Water
½ Cup Herb Oil (recipe follows)
2 tsp Salt or to taste

For Herb Oil:
1 Cup Olive Oil, little warmed (I used good extra virgin Olive Oil)
½ Cup freshly chopped or 2-3 tbsp Dried Herbs of your choice or combination of fresh and dried ( I used fresh mint and basil and dried mixed herbs and rosemary)
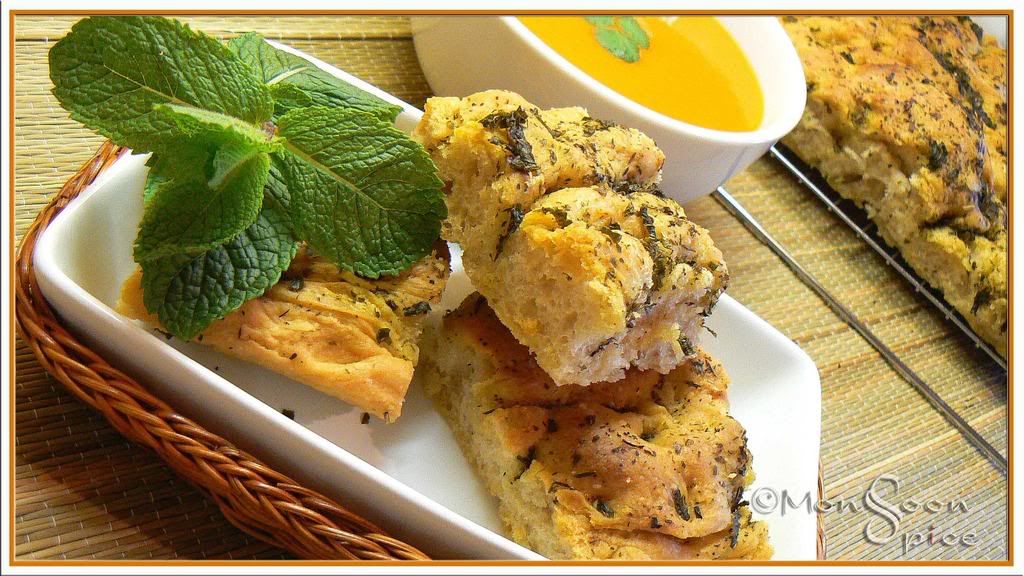
Poolish Focaccia

Method:
If you have refrigerated your poolish, make sure that it is kept outside for at least one hour to come down to room temperature. Once it is warmed enough, proceed to make the dough.
Take a large mixing bowl and mix in the flour, salt and yeast. Now add the poolish along with water and oil given in ingredient list.
If you are using all those muscle power like me, then be prepared for good 10-15 minutes of mixing and kneading. You need to get smooth and sticky dough. So start mixing and beating the dough till your arm aches and mind goes bonkers! The dough will be very sticky and it will stick to the mixing bowl like clinging baby to his/her mother. Since I don’t have machine I can’t really tell you how to do it. So please head over to Lolo’s website for further instruction on using machine to make the dough.
Next thing is to stretch and fold the dough. Use your work surface for this step by dusting it well with flour. Please be little generous with the flour (not too much also) if you don’t want to end up scraping your work surface for next one hour. Now scrape the dough from mixing bowl and dump it on the bed of flour. Sprinkle the top of the dough with flour.
Start patting the dough to get a rectangle shape. Lolo says patting the dough serves three purposes: one it pushes the dough into a rectangle shape, distributes the flour and also removes the excess flour. Let the dough rest for 5 minutes (and you too, but remember just 5 mins OK?)
After 5 minutes, you’ll need to fold the dough like letter. That is in equal 3 parts. First pick up one side of the dough (it will stretch a lot and make you wonder how many strong words you know ;) Be quick when you fold the sides of the rectangle because the quicker the movement, the easier it will be. Repeat with the other side of the dough. You will end up having small rectangle with folds that looks like folded letter. This is your first fold and remember, we have 2 more folds to come after this. Every time you fold, the dimension of the dough should remain equal. Did you just ask how? Well, after the first fold, you will be stretching the dough out and then folding it back again. Hence, you are not folding the dough into smaller rectangles, but stretching it out and folding it back to make equal sized rectangles. Confused? Don’t worry. You will understand it as we proceed.
Next, brush or spray the dough with oil, cover it in plastic warp and let it sit for half an hour. And then you’ll fold the dough again, brush it with oil, cover it with plastic wrap and let it rest for 30 minutes and then fold it again for the third and final time. Each time you fold, it becomes easier to handle the dough. And every time you fold, make sure that you are folding it in the opposite direction than the last. For example, for the first time if you have folded it from left to right, the next time you will fold it from top to bottom.
After the third fold, let the dough rest, covered with plastic warp, for one hour. The dough will rise at this time, but not necessarily double in size.
While the dough rests, we can proceed to make Herb Oil. It’s very simple and straight forward. Warm the olive oil and mix in all fresh or dried herbs or combination of both. Turn off the heat and let these aromatic herbs infuse the oil.
Now it’s the time to prepare your baking tray for baking Focaccia. Take 17” x 12” baking pan with sides and place a layer of parchment sheet. Spray oil on the baking sheet. Carefully transfer the dough from the counter to the baking sheet, try to maintain the rectangle shape. Don’t worry if the dough stretches little bit as the dough is quite soft and unwieldy.
Pour about ¼ cup of Herb Oil that you had prepared earlier on the top of dough. Now it’s the time for some fun. Using only your finger tips begin to press the dough to distribute the oil and flatten the dough out. The dough will begin to spread out in the pan. The aim is to spread the dough evenly, so that it fills the pan. But don’t worry too much if it doesn’t happen as the dough will gradually spread out in the pan after final rise. And important thing to remember is to use just your fingertips to spread the dough and not your fingers or palm. And also you want to keep the majority of air bubbles that forms on the dough which otherwise will not happen if you use your palm and knead it and destroy all your hard work.
Please make sure that the dough is completely covered in oil. Next cover and let the dough rise for two hours. I promise you, this is the final rise. By the end of two hours, the dough will be very puffy with bubbles and have had filled the pan. Close to the end of this final rise, preheat the oven to 500 deg F. make sure that the rack is placed in the centre.
While the oven is getting heated, add another 1/4 cup, or more, of the herb oil. Spread the dough out to its final size using the same fingertip technique that we had used. It’s a pretty sight to see all those bubbles but restrain your self from pinching them. You want a uniform distribution of bubbles and fingertip dimples. Pinch off any huge bubbles since they’ll just explode in the oven while baking. Sprinkle the top with salt as desired.
Tada… It’s baking time now. Oops, I forgot about another rest time. Promise, promise! This is the last and very final one. Let the dough rest for another 10-15 minutes. And then place the dough in the oven, turning down the temperature to 450 deg F. Bake it for 10 mins, rotate the sheet for even baking and then bake for another 10-15 mins until its golden brown. By then your whole house will smell of freshly baked bread with heavenly aroma of herbed oil. Just imagine that!!!
Now it’s the time to take Focaccia out of the oven and let it cool. Remember to remove it from baking pan and place it on cooking rack. Please be patient and let it cool for at least 20 minutes before you attack it. I served mine with hot bowl of Tomato soup.
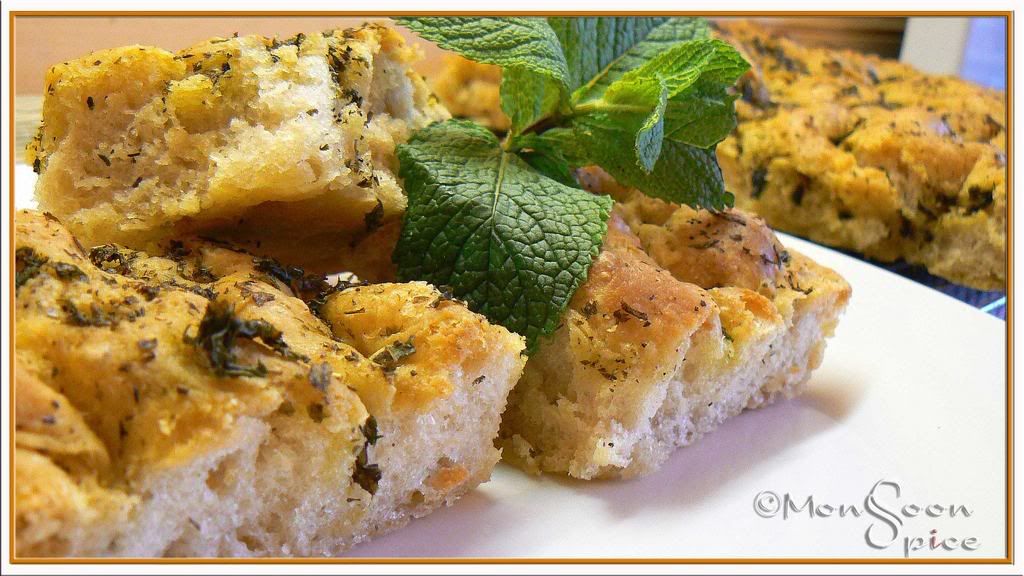
Poolish Focaccia


Notes:
This one was ridiculously huge loaf of Focaccia for just 2 people. So I cut them into desired shapes and stored them in a zip lock bag and popped them in my freezer. When required, I just defrost them for few minutes and then heat them in oven. Voila, they taste as good as they tasted for the first time!
As Lolo suggests, next time I am planning to bake Focaccia with different toppings. For example, some olives, red onions, fresh herbs and may be some garlic too. Or how about some sweet Focaccia? Topped with apples or grapes tossed in little sugar and sprinkled with some aromatic spices like cinnamon or nutmeg? Yum, yum… and yeah, depending on your choice of toppings make sure that you add them just before 5 minutes you take it out from the oven. Thanks, Lolo for helping me get over with the phobia of baking my own bread with this delicious recipe.

25 November, 2007

Winter Warmers: Thai Clear Soups

Photo Sharing and Video Hosting at Photobucket
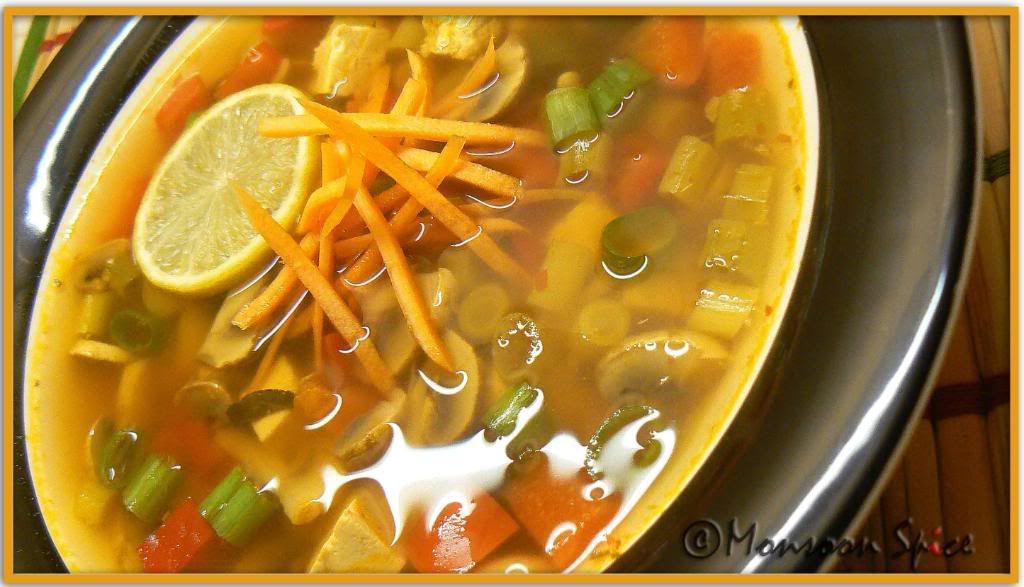
Tome Yum Soup with Mushroom & Tofu

With the mercury hitting south in our part of the globe, our kitchen smells of sizzling pots of soups, rasams and dals. Sizzling bowl of soup with warm bread straight from the oven or steaming cup of rice with hot Rasam/Dal is what we crave for. After my successful attempt at making Thai Curries, I was keen to learn and cook something new. Thai food is greatly influenced by its neighbours, India, China, Malaysia and Laos. No wonder our Indian taste buds start singing and dancing when tasting Thai food, an explosion of salty, spicy, sweet and sour flavours that sparkle with personality. The four main Thai flavour groupings are salty (from fish sauce), sweet (from coconut and palm sugar), spicy (from dry and fresh chillies) and sour (tamarind, lime, lemongrass), with the less used bitter as a fifth primary flavour. These five primary flavours are the characteristics of Thai cooking, something to touch and delight every taste bud.

As I said in my earlier post, don’t get intimidated by the unfamiliar ingredients used in Thai cooking. There are good substitutes available which you can use if few ingredients are not available in your local shop or you can omit those ingredients which you are not very fond of. And more importantly, don’t be afraid to make changes to suit your taste. While cooking Thai food at home, we found that the food tasted much better than the one from local Thai restaurant. And why it shouldn’t, with freshest of fresh ingredients used, homemade curry pastes and spices made a whole difference. You will never get to see the liberal use of fresh ingredients in any restaurant as at home. Many people shy away from cooking Thai food under the misconception that it takes lot of time and ingredients which are unfamiliar to them. Something magical is created when you cook Thai food or any foreign food over time and the ingredients which were aliens in the beginning become more familiar. I find the time consuming dishes more rewarding. Believe me when I say it is as close as meditation when you get to use mortar and pestle and pound out day’s anxiety.

With today’s recipes we want to prove that Thai cuisine can be as simple as it can get and you need not use many ingredients to taste some authentic Thai fair. By planning ahead and little preparation everyone can cook delicious Thai food which sure to please every taste bud. Make sure you use the best and freshest ingredients and be flexible. Cook with an air of playfulness, experiment with flavour and learn to balance. If you are not sure and nervous, follow the recipe strictly and pay careful attention to the final result. As you taste the dish, think to yourself: is it spicy/sweet/sour/salty enough? Does it suit your palate? Most importantly, remember to please yourself-cook the food the way you like it because it should taste good to you and enjoy the whole process. Every time we experiment and cook, we learn something new. Cooking is as refreshing as meditation with delicious food as a reward and nobody can say no to this delicious reward :)

Armed with our new acquisition Real Vegetarian Thai by Nancie McDermott to our empty cookbook rack we tried two Thai clear soups, Tome Yum Soup with Mushroom & Tofu and Jasmine Rice Soup with Mushrooms, Green Onions & Crispy Garlic. As author says, “Soup is an essential component of almost every meal, served and savored along with rice and its accompanying dishes. In keeping with Thailand’s Chinese culinary ancestry, soup functions as a beverage, a liquid refreshment that cleanses the palate between bites and makes way for further rides on roller coaster of tastes that make up a classic Thai meal.” Most of the Thai Vegetarian recipes are also perfect for Vegans and I thought these soups will be a perfect entries for this Vegan Month. These two Thai Clear Soup goes to Suganya's Vegan Ventures Event.
Nancie says,
“Tome Yum Soup with Mushroom & Tofu is a one bowl celebration of Thailand’s sparkling cuisine. Spicy hot with roasted chilli paste and sharply fragrant with lemongrass, wild lime leaves, and a squeeze of lime, tome yum sounds an inviting reveille to your senses.”
And I totally agree with her. This delicious flame-colored broth studded with green herbs and vegetables with exotic citrus perfume is a pure delight to one’s senses. Serve hot with a bowl of jasmine rice and enjoy its healing power.

Photobucket Print This Recipe
Tome Yum Soup with Mushroom & Tofu
Prep Time: 10 mins
Cooking Time: 20 mins
Makes: 3-4
Ingredients:
4 cups Vegetable Stock
2 Lemongrass Stalks
3+2 Kaffir Lime Leaves, cut into long stripes
1 inch Galangal/Ginger, sliced (Optional)
3 tbsp Lime Juice, freshly squeezed
3 Spring Onions, thinly sliced
1 Green Chilli, thinly sliced
1 cup Tofu, cut into 1cm cubes
1 cup Button Mushroom, thinly sliced
½ cup Carrot, julienned (Optional)
½ cup Red Bell Peppers, cut into i cm pieces (Optional)
1-2 tbsp Sambal Olek
1 tbsp Basil Leaves, finely chopped (Optional)
2 tsp Palm Sugar
1-2 tsp Soya Sauce
Salt to taste
Photo Sharing and Video Hosting at Photobucket
Tome Yum Soup with Mushroom & Tofu

Method:
In a large pan bring vegetable stock to boil over medium heat.
Meanwhile, trim the lemongrass stalk by removing upper hard, dried skin leaving smooth stem. Cut the stalk into 2 inch pieces and lightly bruise the stalk with pestle and mortar.
Add bruised lemongrass , 3 kaffir lime leaves strips, galangal to boiling stock and reduce the heat to low. Let the ingredients simmer for 5-8 minutes till lemongrass stalks turn into khaki green and nice citric aroma fills the room.
While the soup simmers, combine spring onion greens, 2 kaffir lime leaves strips, green chilli slices and lime juice and place them into serving bowls and keep aside.
Scoop lemongrass stalks, galangal from vegetables stock and discard. Add tofu, mushrooms, carrot, bell peppers, basil leaves, sambal olek, soya sauce, sugar, spring onion and salt to taste and increase the heat to high.
When the soup boils again, remove it from heat and pour it on serving bowls and serve at once with Jasmine Rice.

Photo Sharing and Video Hosting at Photobucket
Tome Yum Soup with Mushroom & Tofu

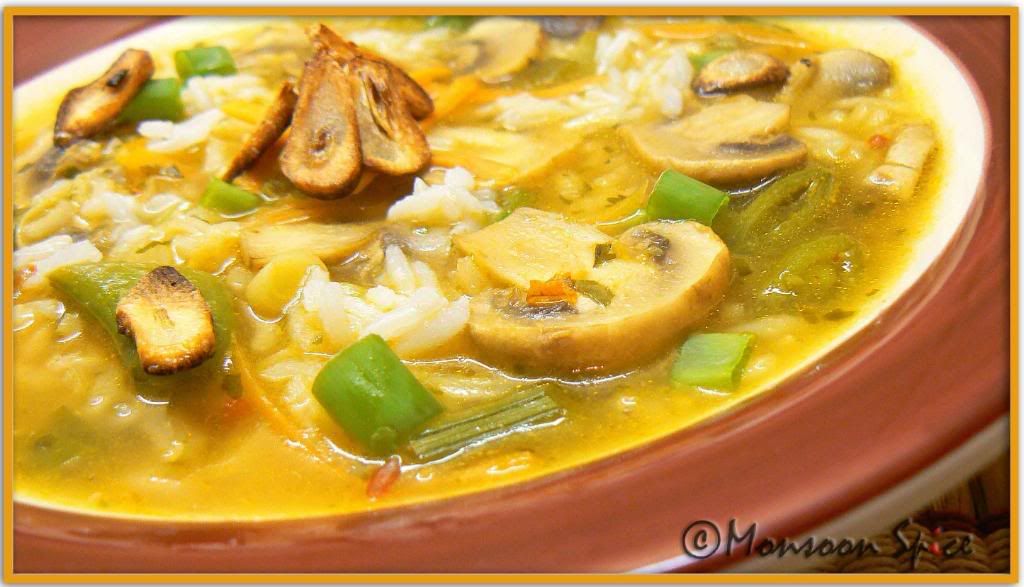
Nancie says, “Rice soup is comfort food in Thailand, simmered up from leftover rice to nourish a family member who is ill. It is also popular as a hearty breakfast or midnight snack. Cold, fever, aches, hangover and heartbreaks all seem to soften their edge just a little when a generous steaming bowl of Kao Tome appears.” And how can we not try this soup which claims to have medicinal properties and can be served as one-dish meal to satisfied our taste buds. We omitted Wheatballs or Wheat Gluten which the recipe calls and made few changes to suite our taste.

Photo Sharing and Video Hosting at Photobucket
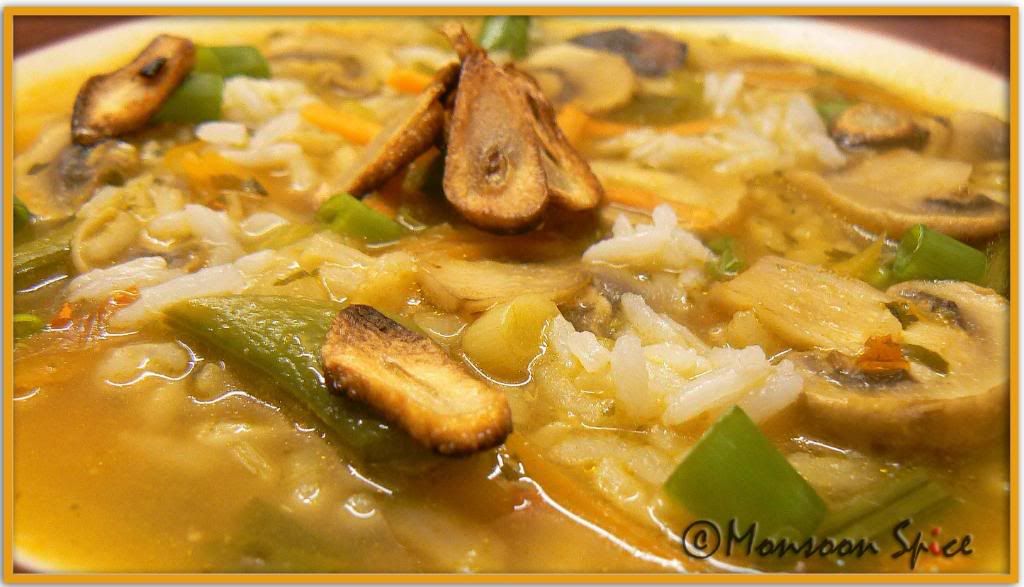
Jasmine Rice Soup with Mushrooms, Green Onions & Crispy Garlic

Photobucket Print This Recipe
Jasmine Rice Soup with Mushrooms, Green Onions & Crispy Garlic
Prep Time: 15 mins
Cooking Time: 20 mins
Serves: 3-4
Ingredients:
1 tbsp Garlic, coarsely chopped
½ tsp freshly ground Pepper
¼ cup Coriander Roots or Steams, coarsely chopped
5 cups Vegetable Stock
1 cup Mushrooms, thinly sliced
½ cup Carrots, shredded
½ cup Sugar Snap Peas, cut into 1 inch pieces (Optional)
1½ cups Cooked Jasmine Rice
¼ cup Spring Onion, chopped
1-2 tbsp Coriander Leaves, coarsely chopped
2 tbsp Crispy Garlic in Oil (Recipe follows. Original recipe used ¼ cup)
1 stalk Lemongrass (Optional)
½ inch Galangal/Ginger (Optional)
½-1 tsp Palm Sugar
Salt to taste
Photo Sharing and Video Hosting at Photobucket
Jasmine Rice Soup with Mushrooms, Green Onions & Crispy Garlic

Method:
In a blender, combine 1 tbsp garlic, pepper, coriander roots/stems with little vegetable stock and grind to smooth paste.
Heat vegetable stock in a pan and mix in ground paste over a low flame. Add bruised lemongrass stalk, sliced galangal if using and bring the stock to boil in low flame.
Meanwhile, deep fry or pan fry sliced garlic pieces till they are crisp and golden and transfer to paper towel till required.
Heat 1 tbsp vegetable oil in a pan and add mushrooms. Toss them for about 3-5 mins until they are shiny and tender and keep them aside.
Discard lemongrass stalk and galangal from vegetable stock and add sautéed mushrooms, carrots, sugar snap peas, sugar and salt to taste and cook for further 5-8 minutes over low heat.
Add cooked jasmine rice, spring onions and cook for further 5 minutes.
Serve hot or warm soup garnished with crisp fried garlic and coriander leaves and enjoy this one-dish meal.

Photo Sharing and Video Hosting at Photobucket
Jasmine Rice Soup with Mushrooms, Green Onions & Crispy Garlic


Notes:
To check substitutes for different ingredients used in Thai Cuisine and also read more of Thai Cooking at Monsoon Spice Click Here. Also Read
Thai Vegetarian Red Curry
Thai Veg and Tofu Green Curry
How to cook Jasmine Rice
How to make Thai Red Curry Paste
How to make Thai Green Curry Paste
Also Check Jugalbandi’s Thai Pantry.