Showing posts with label Carrots. Show all posts

26 November, 2018

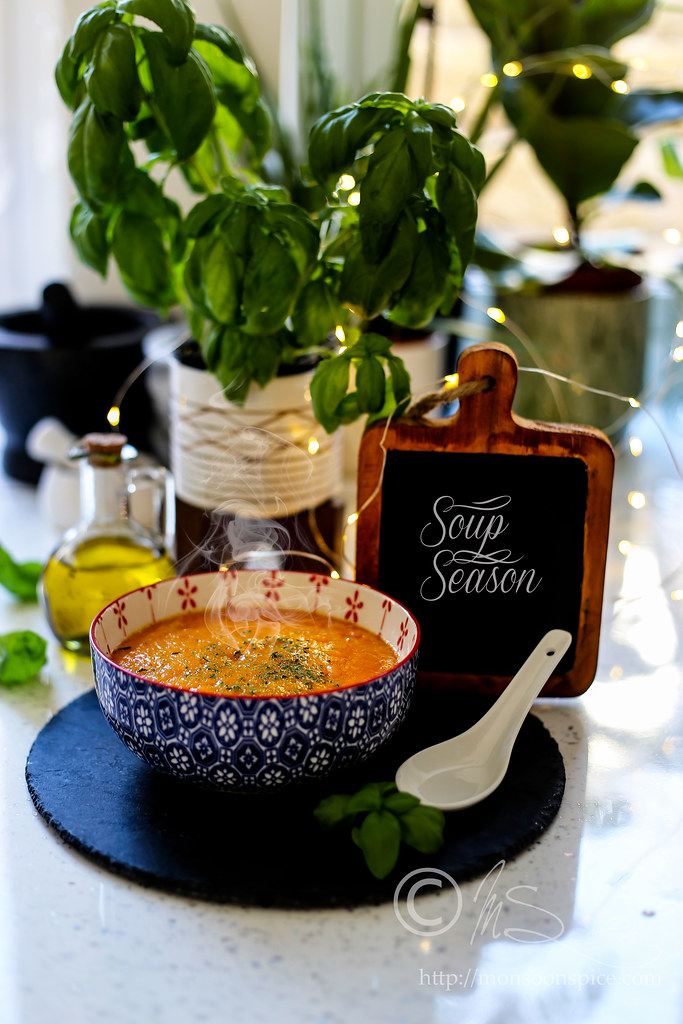
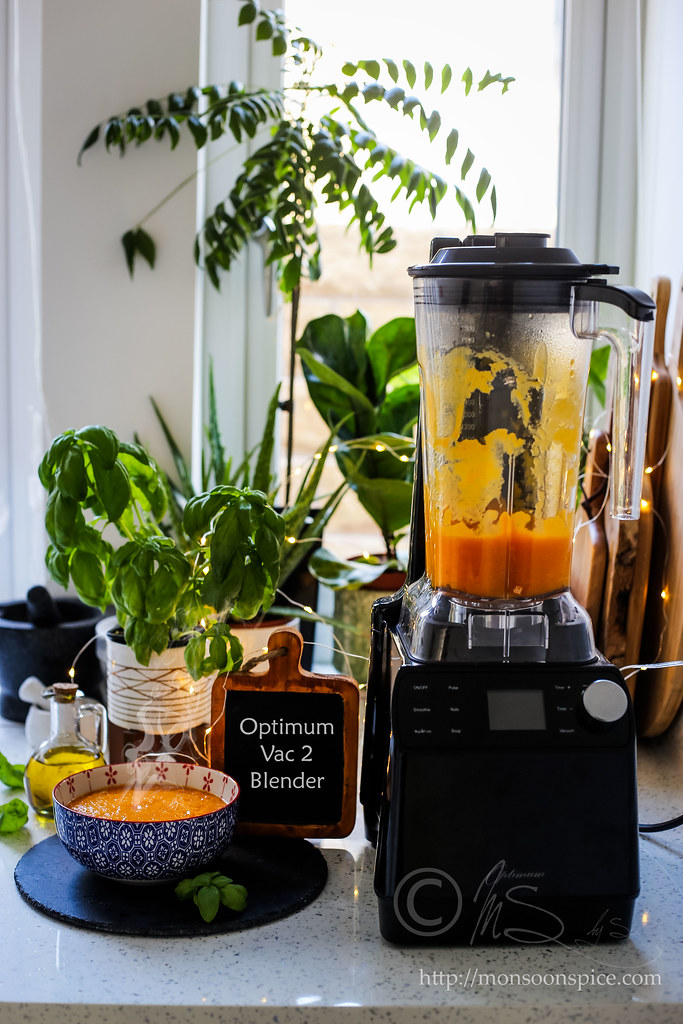
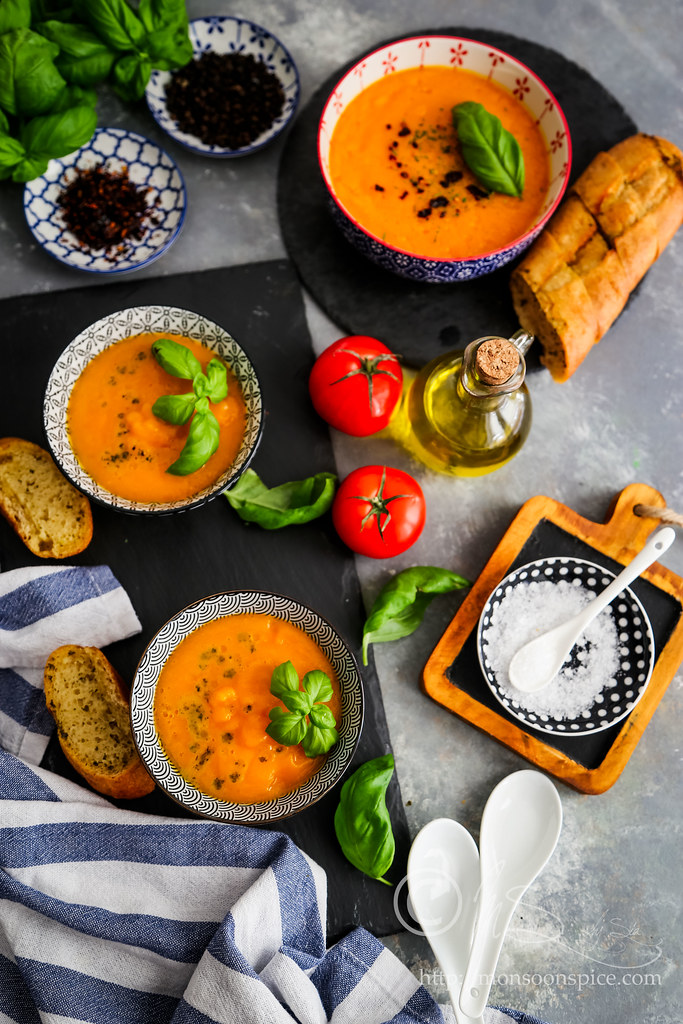
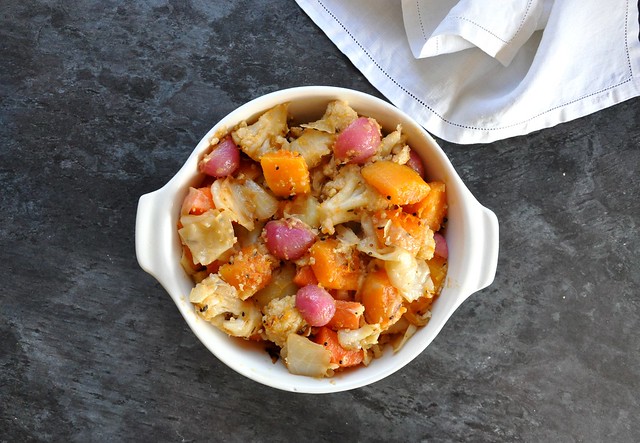
Vegan Carrot, Cauliflower and Tomato Soup with Optimum Vac2 Vacuum Blender Review

Learn how to make Pressure Cooked Vegan Cauliflower, Tomato and Carrot Soup

When Froothie contacted me in April to try their latest Optimum Vac2 Vacuum Blender, I was in a middle of packing and moving houses from Cornwall to Yorkshire. They sent me the blender as soon as we shifted to our new house but it took me over a month to give it a try. I was so caught up with unpacking, turning the house into a home, buried under a pile of paper works and settling the kid into a whole new place and school that before I could blink it was summer holiday and we left to India to spend all of the summer break with our family. When we returned from India, I finally got time some time to try the blender to its full potential by making smoothies after smoothies along with using it for making nut butters, curry pastes, spice blends, pasta sauces and even dosa and idli batters. So here is the detailed post about my experience with the Froothie Optimum Vac2 Vacuum Blender after using it rigorously over the last 3 months.

Optimum Vac2 Vacuum Blender


Froothie Optimum Vac2 Vacuum Blender comes with a blender base, BPA free 2 liters jug with 6 stainless steel wet and dry multi-purpose blade assembly, two-part lid, heavy duty tamper tool for improved processing and mixing, spare vacuum seals and instruction manual. It also comes with a recipe book with over 70 mainly vegan recipes. Vac2 blender comes in 3 colour choices (red, black and silver) and has 8 different speed settings and has some preset buttons that will set the time and speed for you like smoothie, veg and fruits, pulse, nuts, and soup. It has the option to turn the dial to set the timer yourself. The bright blue LED screen on the blender base shows the speed and time setting. Pretty straight forward.

23 September, 2016

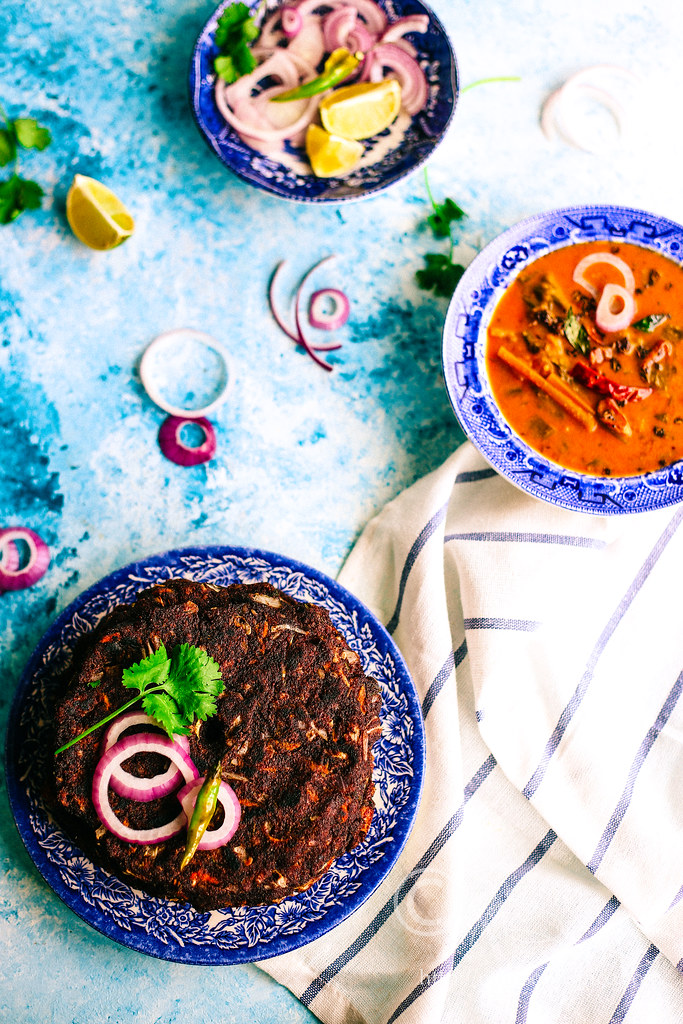
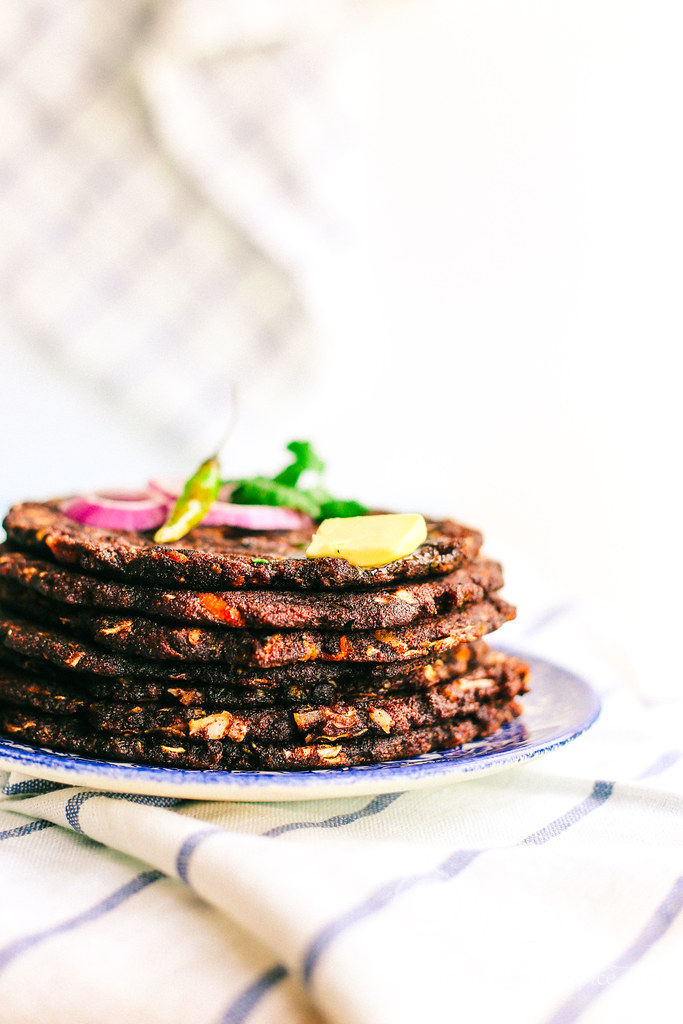
Veg and Coconut Ragi Rotti Recipe | Vegan and Gluten Free Finger Millet Flat Bread

Learn how to make Veg and Coconut Ragi Rotti ~ Vegan and gluten free coconut and veggie loaded finger millet flour flat bread

“Ghar ki murgi daal baraabar” is a Hindi idiom which I have come to appreciate over the time. The literal word by word translation is a chicken at home is no better than daal (everyday lentil soup) and it is used when someone undervalues the things which they own. It is quite similar to English quote ‘the grass is greener on other side’. Are you wondering why I am talking about chicken, lentil soup and grass today? Well, I have a very good reason to rant about… So stay with me if you have time to hear (more like read) my rants, or simply scroll down to the recipe of Veg and Coconut Ragi Rotti, a vegan, gluten-free finger millet flour flat bread loaded with vegetables and coconut.


In the last couple of years I have seen a rise in interest for the super foods. While quinoa, kale, green tea, cranberries were the super foods of the past, the cauliflower, chia seeds, coconut and beetroots are the trending super foods of the present. As much as I appreciate the health benefits they have, you will never find me publishing recipes after recipes of green, red, pink and rainbow coloured smoothie bowls, cauliflower rice, chia seed puddings etc here in my blog unless my family and I really love the dish! I am not a food snob, and I don’t follow any latest food trends. Being a food blogger and running in a circle of foodies, I am bound to come across many articles and recipes that celebrate the current food trends. I enjoy reading them, swooning over the beautiful food photographs, and sometimes, I try couple of recipes to see what the hoopla was all about. That’s where my fascination with the super foods ends as I just continue to cook and enjoy the food that I am most familiar with, like ancient grains that have been tried and cooked for centuries by our ancestors in India.

24 September, 2015

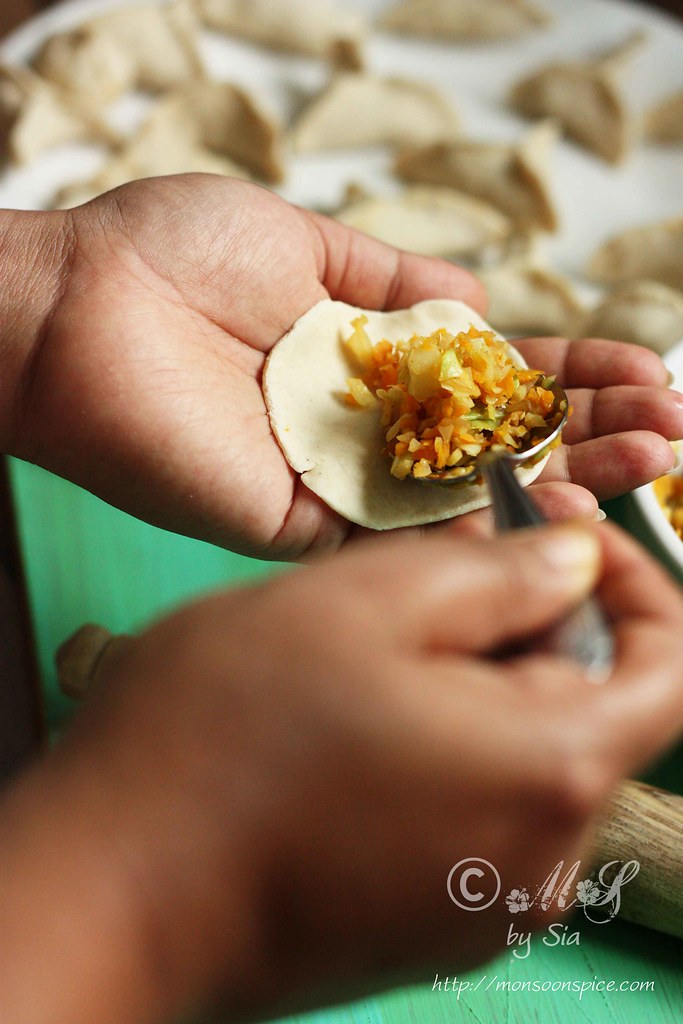
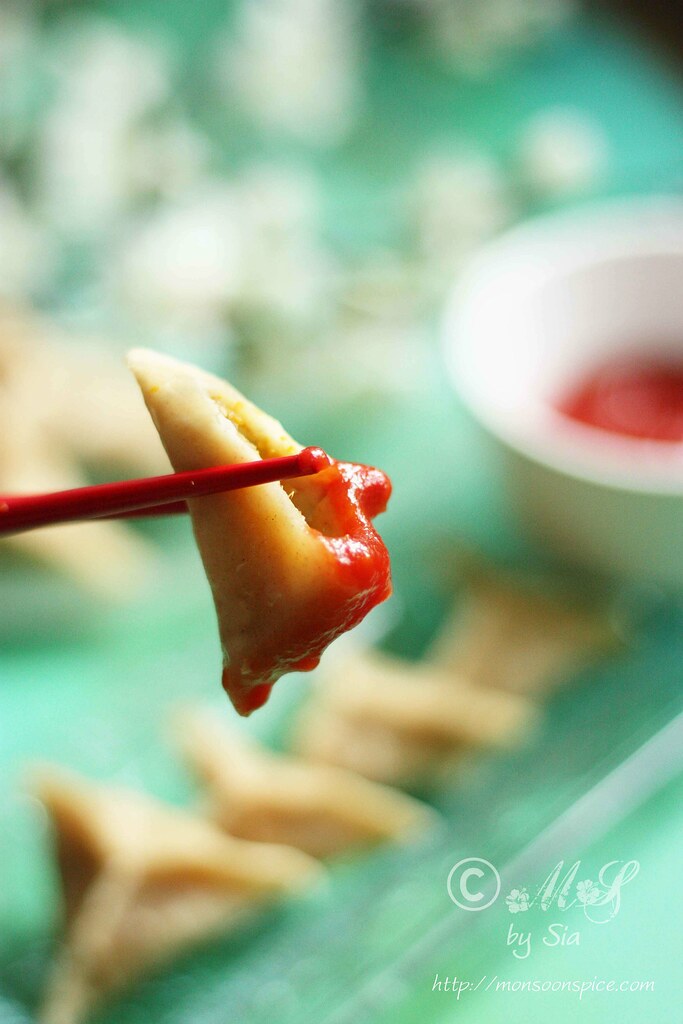
Whole Wheat Tibetian Vegetable Momo Recipe | Step by Step Recipe for Veg Momos

Learn how to make Whole Wheat Tibetian Vegetable Momos ~ Steam cooked whole wheat dumpling stuffed with crispy vegetables, a delicacy from North East India

Who would have ever thought that the day will come where I will sit down to write this post?! A post about blog-anniversary! Believe it or not, Monsoon Spice just turned 9 years old. It’s been NINE YEARS since this blog was born on a lazy afternoon and I really find it difficult to digest the fact that I have stuck to blogging after all these years. With my two men army fighting nasty cold and fever, I almost missed the blog milestone. 9 years of blogging is a huge milestone for someone who strongly believes ‘change is the only constant in life’! It looks like my love and passion for food blogging has not dulled or died down even after all these years of food blogging and if anything else, my love affair with food writing, photography and blogging has grown stronger and deeper.


 It was the peak of winter in 2005 when the days were really short and the sun disappeared for days. I was a new bride in unknown city, new country and different continent and had nothing worthwhile happening in my life. After spending long hours on phone, reading books and flipping the channels on idiot box, I was still left with many more hours of solitude and boredom! I began to spend more time in kitchen to relive the husband of mine from cooking the same meal every day. Slowly I began to cook one dish after another that I learnt from my mother through our hour long telephone conversations and expanded my recipe repertoire which was limited to half a dozen recipes. After many misadventures, small kitchen accidents and blunders, I decided to document my culinary journey for posterity to have some laugh at my expense! After couple of months I decided to take a plunge and give my personal diary an online presence for amateurs home cooks like me who struggled to differentiate pigeon peas from split chickpeas and cilantro from parsley. Well, who would have imagined that the blog born out of boredom and necessity would complete 9 enjoyable years! Not me!!! Never in zillion years! It has come a long way from being amateur cooking blog to much confident and passionate cooking blog of today!

08 May, 2014

Panch Mishali Torkari Recipe | Guest Post by Pia of The Peppercorns in My Pocket

Learn how to make Panch Mishali Torkari Recipe from Pia of The Peppercorns in My Pocket
Friendship is born at that moment when one man says to another: "What! You too? I thought that no one but myself . . ."
~ C.S. Lewis
That’s pretty much sums up the friendship I share with this multi-talented girl! I am talking about my gorgeous friend Pia, author of a one of THE most beautiful blogs called the Peppercorns in My Pocket (don’t you just love the name?!). I was smitten with her wonderful photography the moment I chanced upon her blog, and her soul stirring narration that made me eagerly look forward to every new posts. Over the years I have become friends with few food bloggers and Pia is someone if we’re to meet in person, we’d really get on like a house on fire! As she rightly said one day while exchanging emails, we both have quite a lot of things in common; our love for books, food, family, prettying our home with pretty things and our love and yearning for the place we call home, India! Pia’s blog is a place where you can get lost in her words as she vividly paints the stories of her past and present. Hop over to her amazing space, I will assure you that you will be transported to the world of simple joy. If you enjoy some really good write-ups accompanied with recipes, then you can be sure to leave her space with big smile and happy thoughts. The stories of Chotu Ma, Pia’s chirpy, big dreamy eyed, beautiful little girl is an added bonus :) It is such a privilege to have you here, Pia and thank you for sharing such comfort food when we need it the most :) You can follow Pia on her Facebook page, Twitter and Instagram too.

Backwards and forwards

Can one walk backwards and forwards at the same time? Or do the two actions negate each other and make distance disappear, so that you stay in the same place like a tree - torso moving with the wind, toes digging into earth? I have a feeling, a good way of staying centred is to pretend you're riding a unicycle. One-pedal-forward-one-pedal-backward. That is what you need to do to achieve fine balance. To find your centre-of-gravity. Your rootedness. Rootedness has always had its root in movement.

My friend Sia, is moving from England, back to India, with her husband and little son. They're going back the way they came; walking in reverse. But towards family and old friends. Towards familiar roads and a well-known rhythm. Towards home. Backwards and forwards.


21 November, 2013

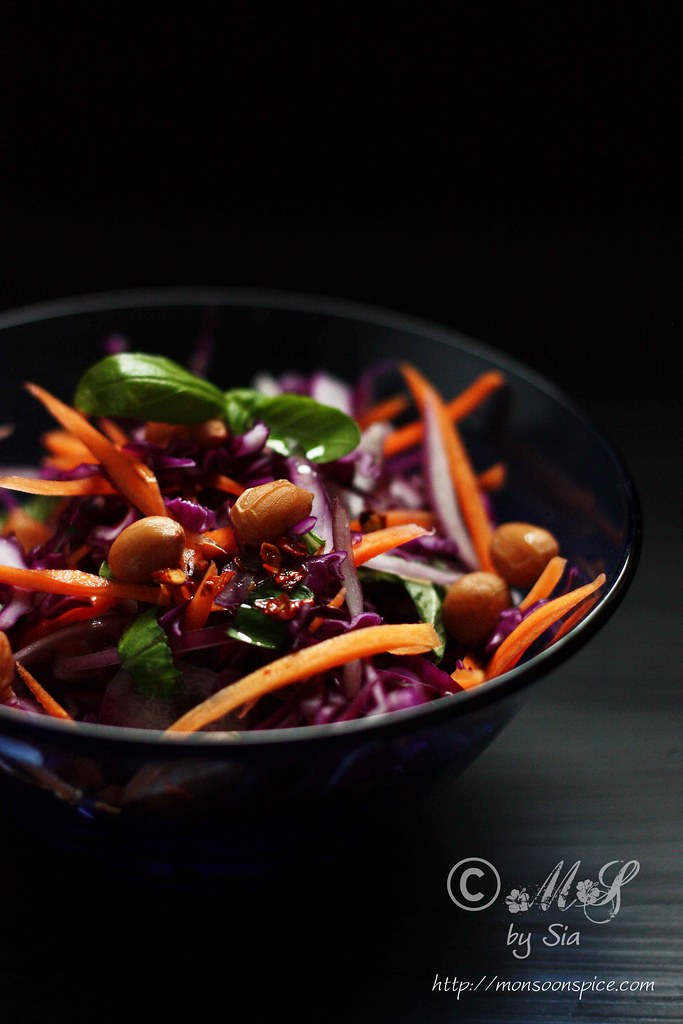
Spicy Red Cabbage Slaw or Salad Recipe | Quick and Simple Salad Recipes

Learn how to make Spicy Red Cabbage Slaw or Salad recipe with salted boiled peanuts and spicy chilli and lime olive oil dressing

It’s that time of the year when the outside temperature drops to minus and I feel like a grizzly bear who just want to hibernate through the winter only to open its eyes when the spring season graces the mother earth! One can dream with closed eyes and in my case I can day dream anytime with both my eyes wide open! Not that I want to be grizzly bear, but I could so do with few good nights’ sleep though! Sigh...

12 September, 2013

Vegetable Hakka Noodles Recipe | Indo-Chinese Veg Hakka Noodles Recipe

Learn how to make Vegetable Hakka Noodles ~ Indo-Chinese recipe of stir fried vegetable and noodles with assorted sauces

As my fingers tap danced on the laptop’s keyboard to shape my thoughts into words, my eyes wandered out of the window to admire the tall trees swaying at the cool evening breeze. They stood tall like a proud soldiers as the green leaves on branch ruffle and sway when caressed by the evening breeze. And then I noticed something...

23 August, 2013

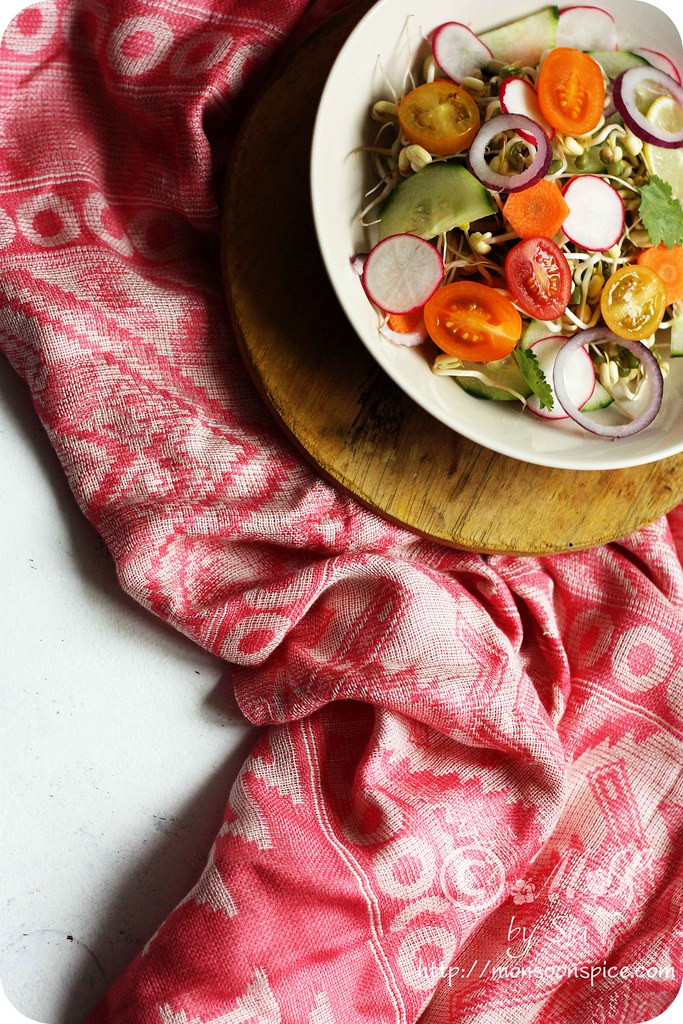
Sprouted Moong Bean Salad Recipe | Simple Indian Salad Recipe

Learn how to make Sprouted Moong Bean Salad ~ Indian styled sprouted moong bean salads with assorted vegetables and chilli-lime dressing

As far as I know, there is no concept of salads in Indian cooking. Thinly sliced pieces of cucumber, tomatoes and onion rings with lemon or lime wedge is mostly the kind of salads served with main meals. Sometimes few whole or chopped green chillies accompany these vegetables as we Indians really like real spice kick in our meals!

14 December, 2012

Carrot Kheer/Payasam Recipe | How to Make Carrot Kheer

Learn how to make Carrot Kheer/Carrot Payasam ~ Thick and creamy Indian sweet pudding of carrots cooked in milk, flavoured with cardamoms and topped with crunchy cashew nuts

Memories… Some memories are like a scripture carved in stones, etched in minds like crystal clear pictures. And then there are kind of memories, like dew drops on rose a petal which melts away as the morning sun kisses them, leaving behind blurry images… Some memories come rushing like waves after soaring high waves of mighty ocean, leaving you giddy headed! And there are other memories that come fluttering like a butterfly, lively and playful but transient at the same time, bringing little flashes from past!

16 February, 2012

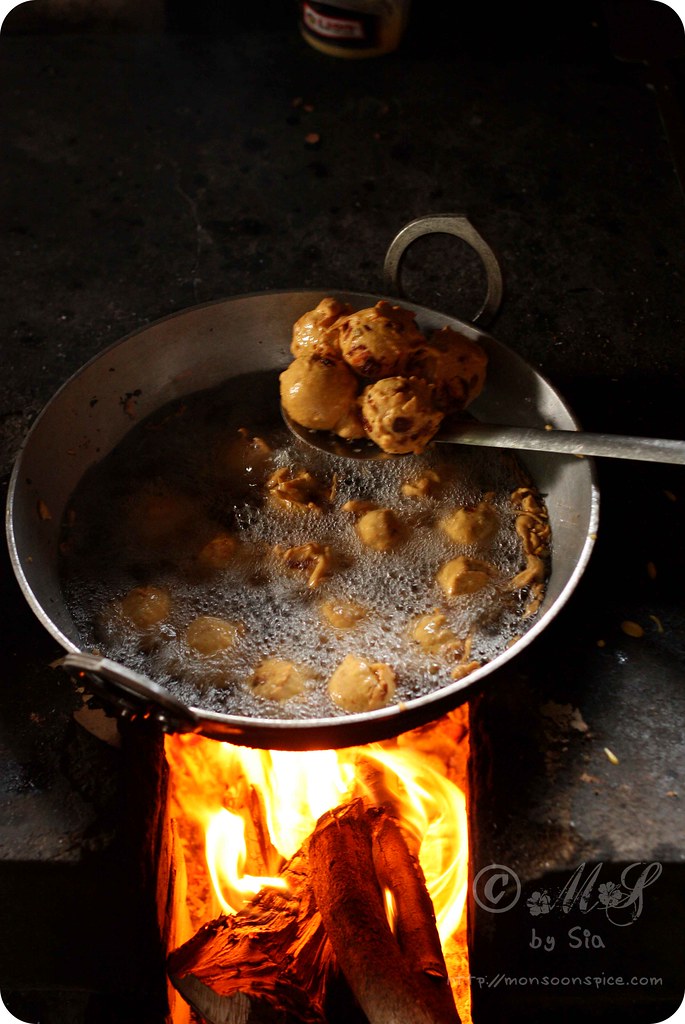
Aloo/Batate Bonda Recipe | Step by Step Recipe for Aloo Bonda


Deep fried crisp, delicious and addictive treats ~ Aloo/Batate Bonda

Winter!

Winter… Cold, bitter, biting, chilling and freezing!

Winter… Thick layer of frost on the window panes, but on roads and pavements is a real pain!

Winter… A flurry of snow, here and there and other times a thick blanket of silver dust every where.

Winter… Naked trees standing tall stripped from their glossy green hair!

27 January, 2012

Cabbage Akki Rotti Recipe | Gluten Free Spicy Cabbage Flat Bread Recipe


Cabbage Akki Rotti Recipe | Gluten Free Spicy Cabbage Flat Bread

I think I need another vacation to recover from previous one! Well, it almost sums up my recent trip to India-aah!

Food-dozing-food-chasing the toddle-food-trying to stop Lil Dumpling from running wild naked-food-meeting dozens of aunts and uncles-food-travelling with one super active toddler-food-temple visits-food-catching few blinks while Lil Dumpling runs riot without a stitch of thread on his back-food-trying to avoid cousin jealousy when one kid snatches toys from other-food-catching up with all the latest gossips in family and friend circle-food-taking few photos in between Lil Dumpling’s short day naps-food-food-food-and more food! Well, this almost sums up my India trip!!!

30 November, 2011

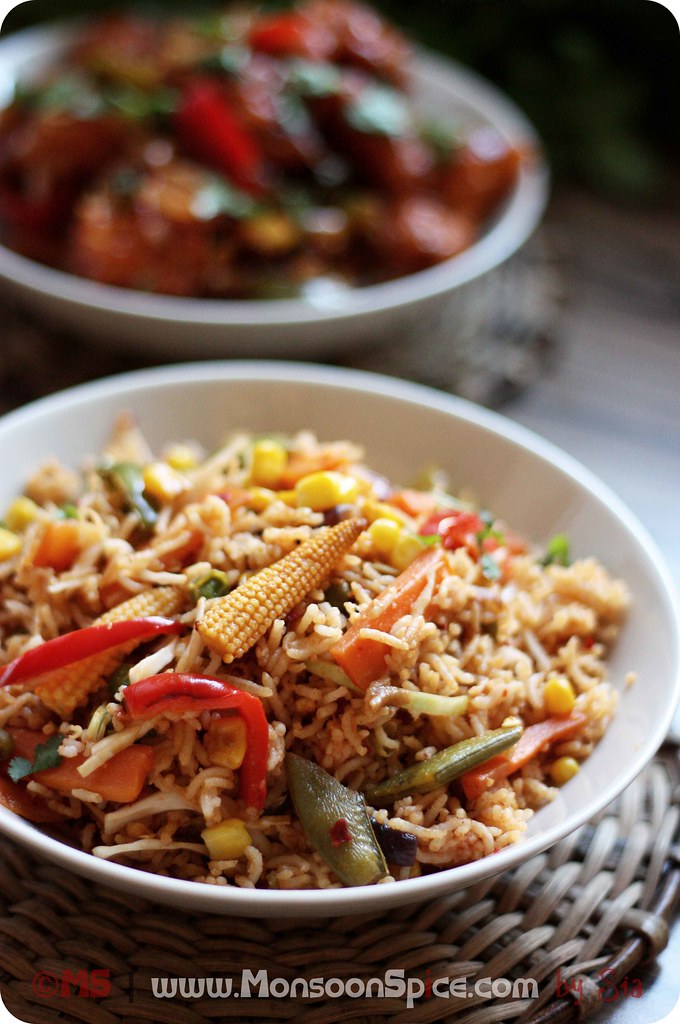
Veg Schezwan Fried Rice Recipe | Indo-Chinese or Chindise Delight!


This is probably my last post on Monsoon Spice…. Well, what I meant was it is this year’s last post… I am not giving up blogging, yet. My passion for cooking, clicking and blogging is still burning as bright as the day one! After being away from blogging for more than a year, I resumed my blogging soon after Lil Dumpling turned a year old. From posting one post per week, this blog has been thriving and going strong with three posts a week!!! I think it’s time I slowed down a bit and smelled the roses, literally!

14 August, 2008

Carrot, Beans & Channa Dal Palya - For Simple Food Lovers

Photobucket
Carrot-Beans-Channa Dal Palya

For all the rants, ramblings, and grumblings you read in my blog, I won’t be surprised if you think I am very social and chatty person in real world!!! But people who know me very well in real world would laugh out laud if someone even suggests that. I am one of those people who hate the lime-lights and small social talks and are comfortable when I am with few people who are very close to me. To be frank, I shy away from moments like that. So it is great surprise to my family and friends who read my blog how out spoken and chatty I am while posting recipes and how easily I share my feelings or memories with total strangers. You see, it took them quite long of time and lots of patience to know and understand me ;) Many people I met still believe I have major attitude problem where in reality they fail to notice how difficult I find it when it comes to small talks. Life is full of contradictions and after all we are just humans!!! So that’s why I have many friends but very few close friends.

Likewise, I have many favourite recipes but very few which I like to eat every other day. These recipes are simple and homely, just like me ;) One such recipe which I cook very often and eat is Palya or simple vegetable stir-fry. Vegetables stir fried with a tempering of nutty channa and urad dal and mustard with a hint of spice from chillies, both dry red and fresh green, and sweet note of jaggery, with minimal oil what makes it healthy, quick and utterly delicious side dish. This time I made it bit different from usual vegetable stir fries. Usually my Amma made Carrot-Beans Palya where small pieces of Carrots and French Beans are stir fried with few spices. In the end she would squeeze few tsp of fresh lime juice giving it a little sour note. Addition of channa dal as one of the main ingredient is inspired from Sailu’s Kobbari Senaga Pappu Kura recipe. So please do refer to her blog for another healthy way to eat your vegetables and lentils and to see beautiful photos. I used Runner Beans, which I have become very fond of, instead of French Beans. What I loved the most is the nutty taste of cooked Channa Dal. The Palya was so delicious I ended up eating it as lunch and later at night I served it as side dish with Phulkas and simple Tadka Dal. I am sending this bowl of Carrot-Beans-Channa Dal Palya to dear Pooja for her Theme-Independence Day event and also to Anisheetu who is guest hosting SWC-Karnataka.

Photobucket Print This Recipe
Carrot-Beans-Channa Dal Palya (Stir Fried Vegetables with Lentils)
Prep Time: 10 mins
Cooking Time: 25-30 mins
Serves: 4-5
Recipe Inspiration: Sailu’s Food

Ingredients:
½ cup Channa Dal/Split Bengal Gram
1 cup Carrot, peeled & cut into 1 cm cubes
2 cups Runner Beans, cut into 1 cm pieces (alternately you can use French Beans or other beans of your choice and availability)
¼ tsp Turmeric Powder
1 tsp Jaggery (adjust acc to taste)
2 Green Chillies, slit
1-2 tbsp grated Coconut, fresh/frozen
1-2 tbsp Fresh Lime Juice (adjust acc to taste)
Salt to taste

For Tadka/Tempering:
½ tsp Jeera/Cumin Seeds
1 tsp Mustard Seeds
1 tsp Urad Dal
1 tsp Channa Dal
1-2 Dry Red Chillies, halved
Big pinch of Hing/Asafoetida
Few Curry Leaves
½ tbsp Oil
Photobucket
Carrot, Runner Beans & Channa Dal

Method:
Wash dal, 2-3 times, in clean water till the water turns clear. Place it in a pressure cooker or any thick bottomed vessel with lid. To this, add turmeric powder and few drops water. Cook covered in 1½-2 cups of water till it is cooked thoroughly, stirring in between. Make sure the dal should not turn mushy and should retain its shape. I cooked using thick bottomed pot and it took around 15-17 mins to cook. If using pressure cooker, cook for 8-10 mins or just one whistle. Drain water and keep it aside till needed.
Heat oil in a pan and add mustard seeds to it. Once mustard starts to pop and splutter, add urad dal, channa dal, broken dry red chillies, curry leaves and hing. Sauté till dals turns light golden yellow. Now add jeera and sauté for few more seconds till it turns light brown.
Mix in chopped carrots, runner beans, slit green chilli, salt to taste and jaggery. Add about tbsp of water and cook covered for about 5 mins on medium to low flame. Open the lid and mix cooked channa dal and mix well. At this stage add another tbsp or two of water and mix well. Cook covered for further 5-10 mins on medium to low flame, stirring in between to make sure vegetables doesn’t stick to the pan.
Mix fresh/frozen grated coconut and fresh lime juice and switch off the flame. Serve this hot with Rice/Chapatti/Phulka and Rasam/Dal or serve as evening snack.

Photobucket
Carrot-Beans-Channa Dal Palya


Note:
Same dish can be prepared using other vegetables like Cauliflower, French Beans, Potatoes, and Capsicum/Bell Peppers.
Vary the quantity of carrot, beans and channa dal used according to your preference and taste.
Other Palya recipes blogged so far

Reminder for JFI-Soya:
I invite you all to celebrate Jihva for Ingredients with this month’s theme JFI-Soya. Choice of Soya products, the recipe, ingredients, method etc is entirely left to you. I would greatly appreciate if you can send me any Vegan or Vegetarian recipes but I leave it to your choice. Soya foods include tofu, tempeh, textured vegetable protein (chunks, mince etc), miso, soya sauces, soya oil and margarine, and soya dairy alternatives.

Deadline: 31st August, 2008

Please go through the guidelines and include all the required information in your post and also in your e-mail while sending your entry. Don't forget to add Your Name, Your Blog Name, Name of the Dish, Type of Dish and Perm Link of the entry along with the gorgeous Photo of final dish.

Click Here or on the logo to find out more information on this event.

13 May, 2008

Cooking with Babies: Baby Corn & Carrot Masala

Photobucket
Baby Corn & Carrot Masala with Aloo Parathas

Every time I come back from India I kind of go under emotional roller coaster ride. There you are, surrounded by your loved ones at any odd time of the day or night sipping a cup of filter Kaapi and talking about everything under this sky and it feels like time just flies without you knowing. And here you are, with only your partner to talk to (that to when he is not busy giving bubble bath to love of his life Lajjo Rani (don’t fret, its our car I am referring to) or jumping up and down like crazy guy while stuck to idiot box watching football or cricket (I call it kiri-kiri meaning irritating)). There you are, eating all wonderful food cooked by every other person other than you and hardly required to move your big fat ass. Here you are, fretting over what to cook everyday and arguing whose turn to empty the waste bin. There you are, just required to walk few steps to eat your heart’s content and yet pay few pennies. Here you are, travel miles together to eat at reasonably good restaurant and end up lightening your wallet and half full stomach. Ah!!! Some pleasures of staying away from home!!!!!!

While still recovering from jet lag (I blame my Boss for making me go to office very next day we landed here and now you know why I’ve not been able to blog hop these days. Bhohoo) all we have been eating is Ganji with Ghee and Pickle or just plain Curd Rice. Well, I am not really complaining here. All we wanted after eating the food served on flight was just simple ones as our taste buds were not ready to volunteer as a guinea pig in anymore of laboratory testing. So it was only during weekend after sleeping till noon that we finally managed to eat something other than simple Comfort Food. With big batch of Aloo Parathas I had cooked and tucked in the freezer before leaving to India, we had to just worry about some simple curry to serve. Well, not exactly simple when it comes to taste department. This delicious Baby Corn-Carrot Masala in creamy gravy of onion, tomato and cashews is what we enjoyed with Aloo Parathas. Very tender Baby Corn and Baby Carrots from Farmer’s Market are the highlights of this yummilicious Curry which simply retains is crunchiness and sweet taste even when cooked with spices. And another addition to this gravy is my ever favourite Kitchen King Masala and Kasuri Methi (Dried Fenugreek Leaves) which enhances its taste. Do try this Curry of Tender Baby Corns and Baby Carrot fingers simmered in rich gravy of sweet onions, tangy tomatoes and flavourful cashews and well balanced spices which is sure to awaken all your senses.


Baby Corn & Carrot Masala (Veggies cooked in Creamy Gravy of Onion, Tomato and Cashew)
Prep Time: 10 mins
Cooking Time: 20 mins
Serves: 4-5

Ingredients:
15-20 tender Baby Corn, cut into fingers
10-12 Baby Carrots/ 2-3 medium Carrots
1 medium Onion, finely chopped
2-3 Green Chillies, slit (Adjust acc to taste)
1 tsp Jeera/Cumin Seeds
½ tbsp Kasuri Methi/Dried Fenugreek Leaves
1 tbsp Coriander Leaves, finely chopped
¼ tsp Turmeric Powder
½ tbsp Oil/Ghee

Photobucket
Baby Corn & Baby Carrots
For Ground Masala:
1 small Onion, quartered
3 large Tomatoes, blanched in hot water and peeled/1 canned Chopped Tomato
2-3 cloves of Garlic
¾ -1 inch Ginger, peeled and roughly chopped
2-3 Dry Red Chilli (I used Byadagi for Colour, adjust acc to taste)
¾ -1 tsp Garam Masala
½-1 tsp Kitchen King Masala
½ tsp Amchur/Dried Mango Powder (Optional)
½ tsp Jeera/Cumin Seeds
1 tsp Coriander Seeds
1 tsp Sugar
10-12 Cashews
Photobucket
Baby Corn & Carrot Masala

Method:
Grind all the ingredients listed above from onion to cashews to smooth paste without adding any water and keep it aside.
Cook Baby Corn and Baby Carrots with turmeric powder and salt to taste in enough water for about 5-6 minutes till they are fork tender. Drain and reserve the water.
Heat oil in a pan and add cumin seeds to it. When cumin starts to sizzle, add finely chopped onion and slit chillies and sauté on medium flame till it turns golden brown.
Now add ground paste, Kasuri Methi and sauté it continuously for about 2-3 minutes on medium to low flame till raw smell of masala disappears.
Mix cooked Baby Corn and Carrots. Add reserved water as and when required to get required gravy consistency. Simmer and cook for another ten minutes for all the flavours to blend well.
Mix finely chopped coriander leaves before serving it with Chapatti, Roti or Paratha of your choice and enjoy this creamy goodness.

12 March, 2008

Winter Warmers: Carrot-Coconut Shorba

Photobucket
Carrot-Coconut Shorba

Warm, cold, cold, cold, warm, warm, cold, warm, cold…

No, I am not chanting some mantra nor I have gone mad. Well, it’s my usual grumbling about the weather here in Britain. I guess I can write a thesis on changing weather and still be left with much more thing to talk about. Two weeks back it was earthquake and now its flood warning!!! Mother Earth is really angry at us and I am not surprised! Even 5 year olds are talking about Global Warming and its consequence!!! When I was of their age all I talked about was how snow white got her price charming and thinking of getting married to my prince charming. I even remember asking my parents for coloured television as my wedding gift!!! Ah!!! My first love, an Idiot Box.

I did it again, drifted away from current topic. Well, what was I talking about?! Oh yes, weather. We are experiencing quite unusual change in weather once in every few hours. Don’t be surprised to see if it starts to snow just when the sky was clear a moment ago with bright sunshine kissing the lovely daffodils. At once you see sun shining and next moment he is hiding behind the black clouds. It feels like weather god is busy playing games with us but not everyone is amused with his little games here. It’s very common to see people falling sick as the weather changes. With truck loads of work on my desk and deadline fast approaching I try not to take any risk when it comes to health. So we have been cooking and eating food which are good source of anti-oxidants and help in keeping us fit. If you are planning to visit us be prepared to be welcomed with big steaming pot of broth cooking in our kitchen. It’s a common to see piping bowl of soup and warm bread direct from oven in our household.

K and I both enjoy soup with bread. We both love experiment with the ingredients and use fresh produce from farmer’s market. Last weekend we bought big basket full of carrots from farmer’s market and decided to make soup. As carrots are rich source of vitamin A and C and also anti-oxidants we use them quite often, be it raw or cooked. Carrots are considered to be the ‘best vegetable’ for balanced diet. Sometime back I had watched Sanjeev Kapoor’s recipe of Carrot-Coconut Shorba which immediately caught my attention. Carrot and coconut, a marriage made in heaven!!! He used king of spices and Indian spices to spice up this sweet vegetable and creamy coconut milk. No more convincing was required to cook this for our dinner. Although carrot and coconut milk are the main ingredients which are sweet in flavour, the real punch comes from black peppercorns, chilli, fresh cilantro and other spices. The burst of flavour you experience when sipping this bowl of soup is makes this recipe a keeper. I am sending this Carrot-Coconut Shorba to Holler of Tinned Tomatoes who is hosting March edition of No Croutons Required and the theme is Spicy Vegetarian Soups.


Carrot-Coconut Shorba
Prep Time: 5 mins
Cooking Time: 20 mins
Serves: 3-4
Recipe Source: Sanjeev Kapoor

Ingredients:
4-5 medium Carrots, peeled and sliced to ½ cm pieces
1 cup Coconut Milk
1 medium Onion, roughly sliced
1 tsp Black Peppercorns (Adjust acc to taste)
2-3 Green Chillies (adjust acc to taste)
1 tsp Jeera/Cumin Seeds
½ tsp Mustard Seeds
1 tbsp Coriander Leaves, finely chopped
Few Curry Leaves
1 tsp Oil
4-5 cups Water
Salt to taste


Photobucket
Carrot & Coconut Milk for Shorba

Method:
Heat oil in a pan and add mustard seeds and curry leaves. When mustard starts to pop and splutter, add jeera and sauté.
When jeera starts to sizzle, add roughly sliced onion, whole green chillies, black peppercorns and sauté for a minute.
Mix in sliced carrots, salt to taste and close the lid. Cook the carrots covered without adding any water for five minutes, sautéing in between.
Add water, coriander leaves and cook for further five minutes over a medium heat till carrots turn tender.
Drain the water and reserve. When it is cool enough to handle grind carrot mixture adding little reserved stock at a time to smooth paste.
Transfer reserved stock, ground carrot paste and cook for 2-3 minutes. Mix in coconut milk and cook for another 2-3 minutes on a medium flame.
Adjust the seasoning and serve hot garnished with a splash of coconut milk and enjoy.

Photobucket
Carrot-Coconut Shorba


Reminder!

PhotobucketAn Ode to Potato ends on 15th of March (GMT Time). Send in your entry before the deadline and join us in the singing. Bake, boil, mash, fry, sauté, grill, stuff, cook... The choice is endless.

Deadline:
15th March, 2008


Please go through the guidelines and include all the required information in your post and mail when sending me your entry. Don't forget to add Your Name, Your Blog Name, Name of the Dish you cooked, Perm Link of the entry along with the gorgeous Photo of Potato dish.

Click Here to find out more information on this event.

29 February, 2008

One is Not Enough: Double Decker Paratha

Photobucket
Double Decker Paratha

Have u ever been obsessed with anything? Something you can’t stop thinking about it. You see it everywhere even with your eyes closed. You dream of it when you fall asleep and still day dream about it when you are wide awake. Yes, that type of obsession and my current obsession is rolling Parathas. Not just plain parathas but some mean stuffed parathas. It feels good when you master (no place for modesty here ;) something which you thought to be impossible to make let alone master. No, actually it doesn’t feel good… It feels great!

I can already visualise many of you shaking your head and some even banging it against the wall. I am very well aware of the fact that many of you skilfully roll hundreds of these stuffed parathas everyday with ease. I salute all you Aunties. ~ducks her head ;) ~ But it’s a different paratha story for me. I feel like a small baby who just learned to walk without any support and happened to be enjoying this new found freedom!

After my successful attempt with Tofu, Aloo, Gobi, Mooli etc stuffing I wanted to make little different parathas. With little bit of googling (Long Live Google!!!) I came across very unusual recipe from none other than Indian cooking diva Mrs. Tarla Dalal’s blog. Although I don’t own even single book of hers (I really can’t call my single digit cook books as my cook book collection) and never cooked any of her recipes, I have had seen many of her creations being recreated and appreciated in blog world. More than everything what attracted me to this particular recipe of hers is the challenge involved! It was not some usual stuffed paratha. It was unique paratha which she calls Double Decker Paratha where two different fillings are used to create two layered paratha. One look at the recipe I knew I am not gonna rest until I make them. And that’s what exactly what I did on last weekend after postponing my spring shopping!!! For a shop-o-holic, I didn’t regret even for a moment to stay at home and create these babies. Although taste wise it might taste similar if you had to combine these two fillings and make just a usual stuffed parathas, it was gorgeous to look at. Two thin layers of parathas stuffed with crunchy carrots and sweet green peas were lovely to look at. For a foodie they were nothing less than a stunning piece of jewellery studded with corals and emeralds!!!

Click here to view the original recipe. I used the same main ingredients used by Mrs. Dalal but made few changes to suit our palette. I am planning to follow same technique and use different ingredients for my friends during Easter break. Yeah, what can I say? I am a big show off ;) I am sending this to dear Suganya who is guest hosting WBB-Healthy Eats. With colourful raw vegetables and just few drops of oil, I think it does qualify for healthy breakfast eats. Sug, I hope you like it:)

Photobucket Print This Recipe
Double Decker Paratha
Prep Time: 30 mins
Cooking Time: 30 mins
Makes: 4-5 Large Paratha
Recipe Inspiration: Mrs. Tarla Dalal

Ingredients:
For the Dough:
3 cups Atta/Wheat Flour
¼ tsp Salt
Warm Water for kneading

For the Carrot Stuffing:
1½ cups Carrot, grated
1-2 Green Chillies, finely chopped
½ tsp roasted Jeera/Cumin Powder
¼ tsp Red Chilli Powder
½ tsp Anardaana/Pomegranate Seeds Powder
1-2 tsp Lime Juice
1 tbsp Coriander Leaves, finely chopped
Salt to taste

For the Green Peas Stuffing:
1 cup fresh/frozen Green Peas, boiled and mashed
2 tbsp Onion, finely chopped
1 tsp Ginger-Garlic Paste
½ tsp Aamchur/Dry Mango Powder
½ tsp Kitchen King Masala
1 tbsp Mint Leaves, finely chopped
Salt to taste

Other Ingredients:
Little Atta/Wheat Flour for rolling
Ghee/Oil for Cooking (Optional)
Photobucket
Carrot and Green Peas Stuffing for Paratha

Method:
For the Dough:
Place atta, salt and warm water in a bowl and mix well to form smooth dough. Keep aside for at least 30 mins covered with a wet cheese cloth.

For the Carrot Stuffing:
Mix grated carrot with all the ingredients listed and keep it aside.
Original recipe instructs to cook carrot for 2-3 minutes but I just mixed the raw ingredients to retain its colour and nutrition and also its crunch. And also it gets lightly cooked when you pan fry the Paratha over medium heat. So the choice is yours.

For the Green Peas Stuffing:
Mix cooked and mashed green peas with all the ingredients listed and keep it aside.
Again the original recipe instructs to cook the ingredients for few minutes.

Photobucket
Step-by-Step Instruction for Assembling the Paratha - Clock-wise from Top Left

Assembling, Stuffing and Rolling the Paratha:
Heat the tawa/griddle at high flame and reduce to low to medium flame.
Knead the dough for another minute or a two and divide it into 12 or 15 equal sized balls (for 4 or 5 Parathas respectively).
Roll them into equal sized discs and cook 4 or 5 chapattis lightly (for 4 or 5 Parathas respectively) and keep aside. Let them cool completely before you proceed.
Now place one uncooked chapatti on a surface and spread about 1 tbsp of carrot stuffing evenly leaving 1-1½ cms in the end.
Cover this carrot stuffing with a cooked chapatti and spread 1 tbsp green peas stuffing evenly on top of this.
Now place the second uncooked chapatti on top of this and seal the edges by pressing it lightly with your fingers. Make sure that you seal the edges well.
Place this Double Decker Paratha on tawa and cook on a very low heat by applying little ghee/oil if desired. Cook till the both the sides are cooked well and brown spots starts to appear.
Cut them into quarters and serve hot with a curry or just plain yogurt and enjoy.

Photobucket
Double Decker Paratha


Notes:
Make sure that the chapattis are completely cooled down before you proceed with assembling the paratha as if assembled when it is still warm may tear the uncooked paratha due to moisture produced.
If you are a beginner, you can start off by making small parathas and not stuffing too much of filling.
You can also cook these parathas in Quesadilla maker.
Try using different ingredients for stuffing and follow the same technique to create different flavoured parathas.

Reminder!

PhotobucketAn Ode to Potato ends on 15th of March. Send in your entry before the deadline and join us in the singing. Bake, boil, mash, fry, sauté, grill, stuff, cook... The choice is endless.

Deadline: 15th March, 2008

Please go through the guidelines and include all the required information in your post and mail when sending me your entry. Don't forget to add Your Name, Your Blog Name, Name of the Dish you cooked, Perm Link of the entry along with the gorgeous Photo of Potato dish.

Click Here to find out more information on this event.

11 October, 2007

Tomato Saaru & Pepper-Carrot Palya

Photo Sharing and Video Hosting at Photobucket
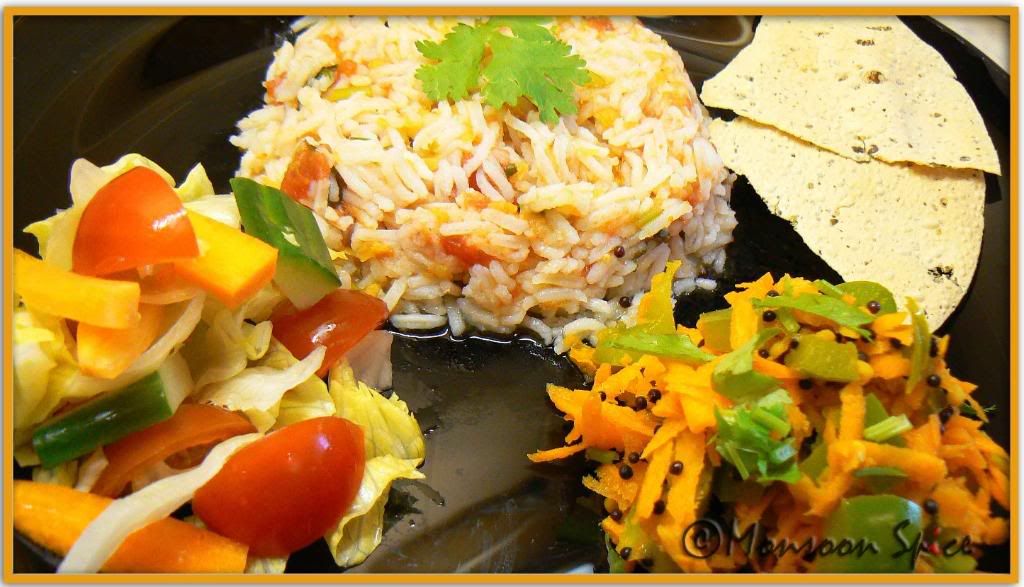
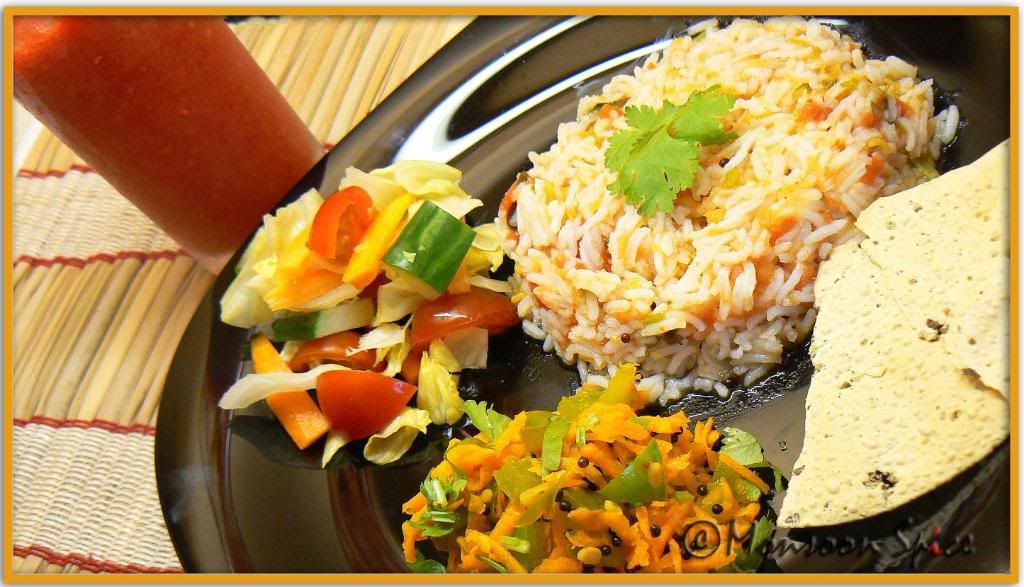
Our Comfort Food: Rasam Rice, Papads, Pepper-Carrot Palya and Salad

"Food, like a loving touch or a glimpse of divine power, has that ability to comfort."
-Norman Kolpas

Our senses hold some of our most potent memories. Touching the silk or smelling herbal soap, aroma of ground coffee brewing in coffee maker or sizzling of curry leaves in oil sends me back in time to my Ajji’s kitchen. There is a delicious Rasam bubbling in a large copper pot over an open fire-wood heated stove in one corner; one helper is pounding red chillies and spices in other corner while my aunt is grinding freshly grated coconut with chillies for chutney in a stone grinder. There is a small stream of water flowing close to the kitchen, with just the right breeze causing a mist to drift across my face, tickling my nose. I am sitting cross legged on red oxide floor with my sister and cousins wondering where to have our picnic lunch, that day’s most important question. The sight, smell and taste of what my granny cooked are fresh and vivid memories which I will always carry with me.

While cooking everyday meals, I find myself musing lately over comfort foods. If I were to ask you what food you associate with feeling good, what would be your answer? I know that your answer is probably different from what I consider to be my comfort food, mainly because of our individual life experiences, backgrounds and cultures. Comfort food satisfies our soul as well as the stomach and that’s why we love it so much. Often these dishes remind us of our childhood, happy memories. Cooking up that dish our Granny or Mom or Aunt used to make is as soothing as eating it because it reminds us of a time when life was simpler. My Amma would always say that the reason why comfort food always tastes best is because it is shared with our loving family and friends with no frills, just with love. The kitchen filled with the aroma and scent of food that brings back warm and fond memories is what makes it more comforting and as these recollections takes place around the table with our loved one, yet another fond and loving memory is born.

Like most people, I don’t have just one memory associated with just one food. I have good number of favourite foods which fall under comfort food zone. These recipes are simple with minimal ingredients used and are unpretentious. But these are the food which oozes with flavours and make me feel good when preparing and eating them. One such dish is simple tangy Tomato Saaru with Pepper-Carrot Palya. They are simple culinary delights I crave, just for comfort...

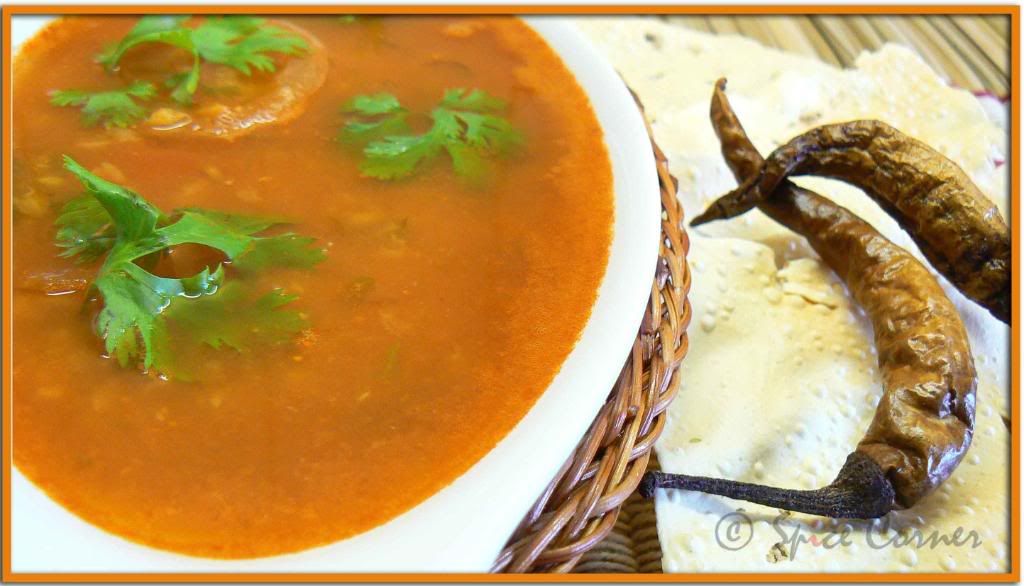
After many unsuccessful attempts at making simple Tomato Saaru which I wanted to taste just like the one my Amma and Ajji makes my hubby surprised me with his Rasam. It tasted as good as the one I remembered eating when growing up-same flavour, same aroma, same colour and same taste. Although he used the similar ingredients which most of us use when making Rasam it tasted different from what I cook. I immediately wrote down his recipe and tried it next time using same measures and ingredients and following his method. Darn!!! There was still something missing, may be it’s to do with the taste which goes into ingredients when he touches them. Since then it’s Krish who makes Rasam for me, the one which is comfort food for me and takes me down the memory lane.

Photo Sharing and Video Hosting at Photobucket
Tangy Tomato Saaru

Photobucket Print This Recipe
Tomato Rasam
Prep Time: 10 mins
Cooking Time: 20-25 mins
Serves: 3-4

Ingredients:
3-4 large ripe & juicy Tomatoes, thinly sliced or chopped
¾ cup Toor Dal, picked and washed
1 tbsp Rasam Powder
1 large marble sized Tamarind Pulp/½ tbsp Tamarind Puree
2 Green Chillies, slit
½-1 medium Onion, thinly sliced or roughly chopped
½ inch Ginger, crushed
½ tsp Turmeric Powder
½ tsp Black Pepper, lightly crushed using pestle and mortar
½-1 tbsp Jaggery
2-3 tbsp Coriander Leaves, finely chopped
Salt to taste

For Tempering:

1 tsp Mustard Seeds
1 tsp Jeera/Cumin Seeds
½ tsp Black Peppers
3-4 cloves of Garlic
1-2 Dry Red Chilli, broken
Few Curry Leaves
A big pinch of Hing/Asafoetida
½ tbsp Oil/Ghee
Photo Sharing and Video Hosting at Photobucket
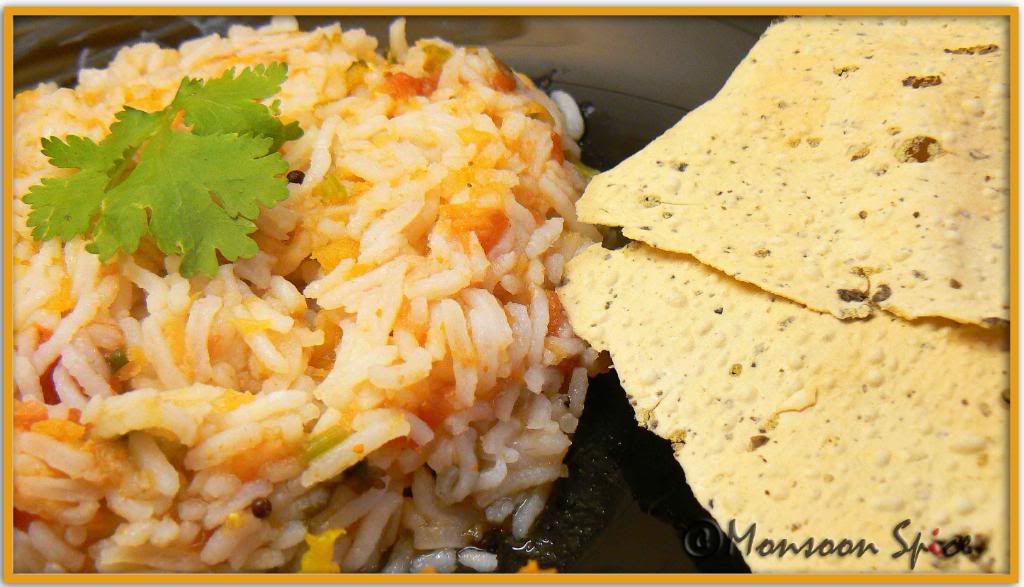
Rasam Rice with Papads

Method:
Cook toor dal with 2 cups of water, turmeric and a tsp of oil in pressure cooker for about 15-20 minutes till they are nicely cooked.
Release the pressure from pressure cooker before you open the lid and roughly mash the cooked dal with ladle or potato masher.
Soak tamarind pulp in half a cup of warm water for about 5 minutes and squeeze the pulp to release its juice. Discard the pulp once used.
Transfer cooked dal into heavy bottomed pan and add sliced onions, slit green chillies, crushed ginger and about 2-3 cups of water and boil it for about 5 minutes in medium flame.
Add sliced tomatoes, tamarind extract, rasam powder, jaggery, crushed black peppers and salt to taste and simmer the heat and cook for another 20-30 minutes on medium to low flame.
Add more water if you feel the rasam is thick. When rasam is reduced to ¾th of its quantity, mix in chopped coriander leaves.
For tempering, first crush cumin seeds and black pepper in a mortar and pestle. Also roughly crush garlic cloves and keep it aside. Heat oil in a pan and add mustard seeds, broken red chillis, crushed cumin-pepper-garlic, hing and curry leaves in that order and when mustard starts to pop and splutter transfer the tadka to rasam and mix well. Let the Rasam simmer for another 5 minutes for all the flavours to blend well.
Serve hot rasam with steamed rice and papad or serve in a bowl as a soup.

Photo Sharing and Video Hosting at Photobucket
Rasam Rice, Papads, Pepper-Carrot Palya and Salad: Our Simple Meal

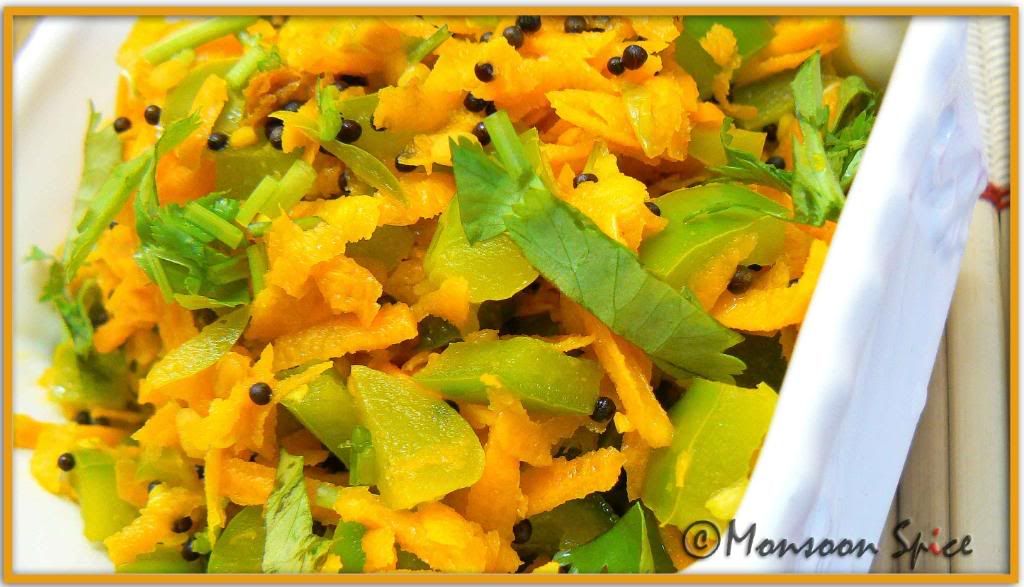
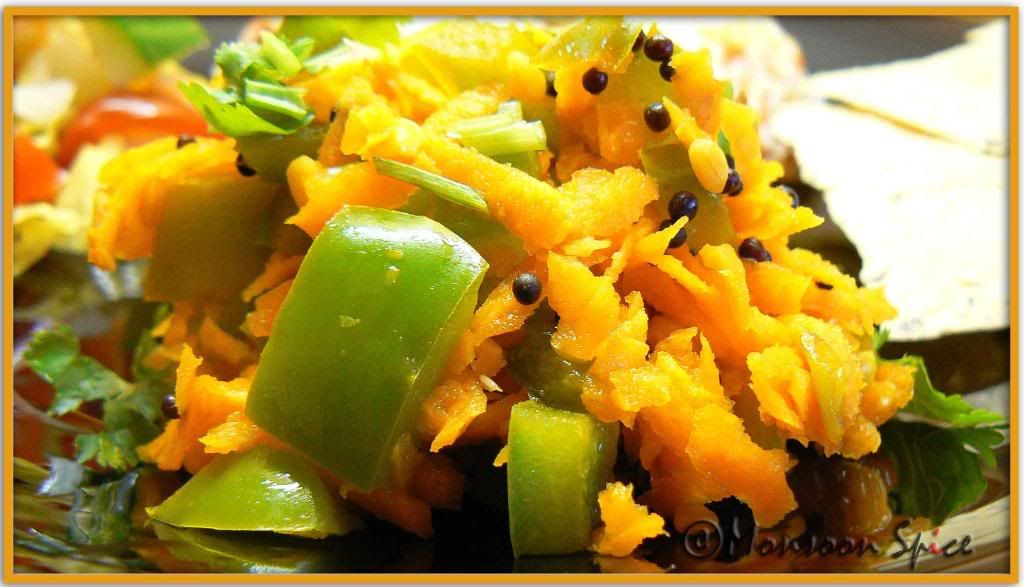
There is nothing better than a simple vegetable stir fry and Pepper-Carrot Palya which my mom made is something I would happily eat as a salad with Yogurt or as a side dish with Rasam Rice. The beauty of this dish is its simplicity with minimal preparation and cooking time. Stir fried green pepper and grated carrot is spiced up with simple seasoning and a splash of lime juice makes it comfort food for me.

Photo Sharing and Video Hosting at Photobucket
Pepper-Carrot Palya

Photobucket Print This Recipe
Pepper-Carrot Palya
Prep Time: 10 mins
Cooking Time: 5 mins
Serves: 2-3

Ingredients:
2 cups Grated Carrot
1 large Green Pepper/Capsicum, cut into 1 cm squares
1 Green Chilli, sliced (Optional)
1-2 tbsp Lemon Juice
½ tsp Jaggery/Sugar
A pinch of Turmeric Powder
1 tbsp Coriander, finely chopped
Salt to taste

For Tempering:
1 tsp Mustard Seeds
1 tsp Urad Dal
1 Dry Red Chilli, broken
A Spring of Curry Leaves
1 tsp Oil
A pinch of Hing/Asafoetida
Photo Sharing and Video Hosting at Photobucket
Pepper-Carrot Palya

Method:
Heat oil in a pan and add urad dal, broken red chilli, mustard seeds, hing and curry leaves in that order.
When urad dal turns golden yellow and mustard starts to pop and splutter, add chopped capsicum pieces, slit green chilli and sauté over medium heat for about 1-2 minutes till its skin starts to wilt.
Now add turmeric powder, jaggery, grated carrots and salt to taste and sauté them for about 1 minute till the heat is equally spread. Make sure that you don’t over cook pepper and carrots and they should retain their colour and crunch.
Turn of the gas and mix in lemon juice and chopped coriander leaves. Serve hot with Rasam Rice or eat it with yogurt the way I prefer.

31 July, 2007

Moong Kichidi with Carrot Raita

We may live without poetry, music and art;
We may live without conscience,
and live without heart;
We may live without friends;
we may live without books;
But civilized man cannot live without cooks.
-Owen Meredith, 'Lucile’

We are living in a modern busy world. World filled with busy people, busy families, busy work life with busy routine. We have everything we need or we want at our fingertips. Tired after long busy day at office? No worries, there are hundreds of restaurants or take-a-ways right next to the door. Feel like eating watermelon for Christmas? Just fetch one from local grocery store or supermarket who has them shipped from some exotic corner of the world. Did you say you like Chinese food? No worries, just pop into airport, catch the first plane to china to eat it fresh from the kitchen in few hours. Yes, almost everything is doable in this incredible, modern world. Almost everything… With everything looking incredibly simple can we make cooking as simple as possible? I am not talking about fast food here. I am talking about delicious, tasty, healthy home cooked food packed with nutrition.
I am a through and through “foodie” by heart. Although I love to cook, spending time in the kitchen isn’t always possible. At a same time I am not very fond of popping a pizza from freezer to oven or dialling nearest take-a-way. Eating out and convenience food may sound good for some time but at the same time they are expensive and packed with fats and calories. Having been a big foodie all my life, I have seen my Amma, Aunts and Atte prepare delicious, nutritious and healthy meals with little cooking time. They never compromised on the quality of the food cooked quickly. So express cooking doesn’t mean compromising on taste or quality of the food.
Photo Sharing and Video Hosting at Photobucket
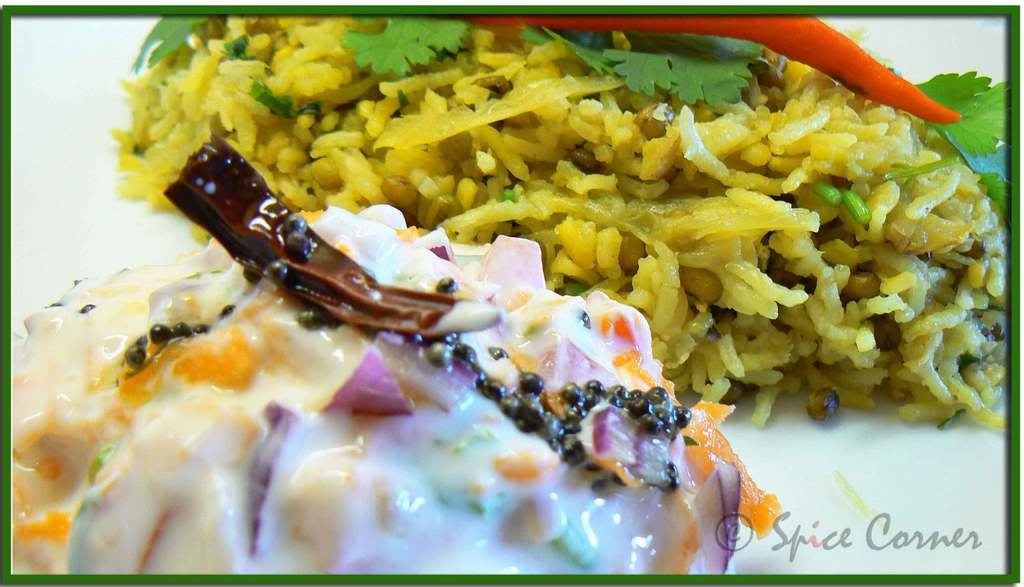
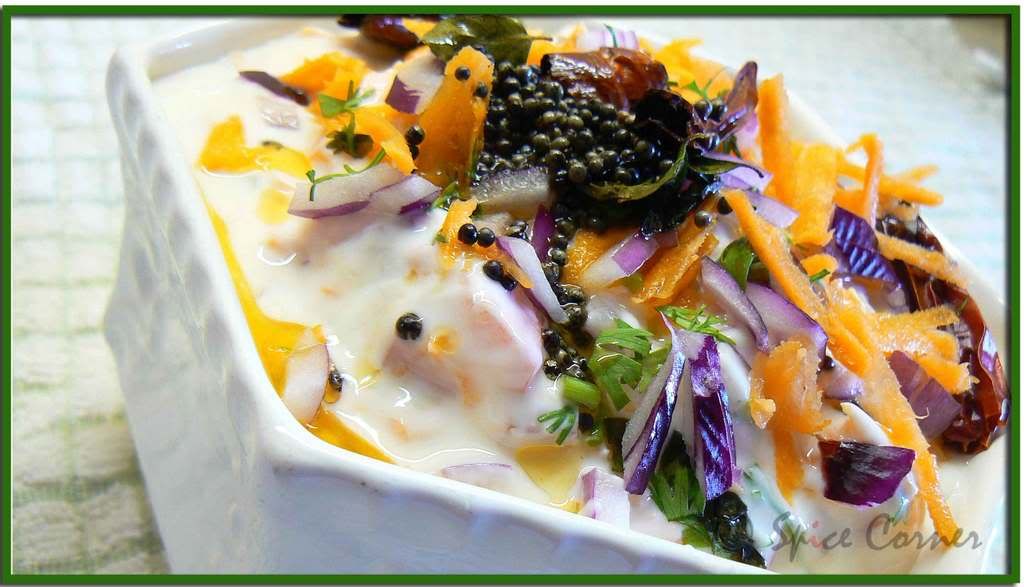
Moong Kichidi with Carrot Raita


When Shaheen of Malabar Spices came with an idea of Express Summer Cooking I was overjoyed. Here not only I can share some of my favourite easy-peasy dishes which take very minimal preparation and less cooking time but also I will get to see and learn from fellow bloggers. At last when it started to feel like summer in my part of the world what more can I ask than collecting some recipes which don’t need me slogging in my kitchen for hours. I can think of lots of other activities for this summer than just sweating away in my tiny kitchen ;)
First dish which came to my mind with the word ‘Express’ was Moong Kichidi, a recipe I learnt from Archana who is a childhood friend of mine. It’s a simple dish which takes very little preparation and cooking time. Kichidi, medley of lentils and rice is a one pot dish cooked with different spices. Kichidi is not just a comfort food but also packed with nutrition. Serve hot Kichidi with thanda-thanda, cool-cool Raita and there is very less chance of you not falling in love with this simple and superb dish. If all these coaxing and cajoling did not excite you then what I am going to say next is surely going to sweep you off your feet. So listen to me carefully. Kichidi is one dish which will not just save your cooking time but also your partner’s time in cleaning the dish ;) So here comes my Moong Kichidi with Carrot Raita for this Summer Express Cooking.
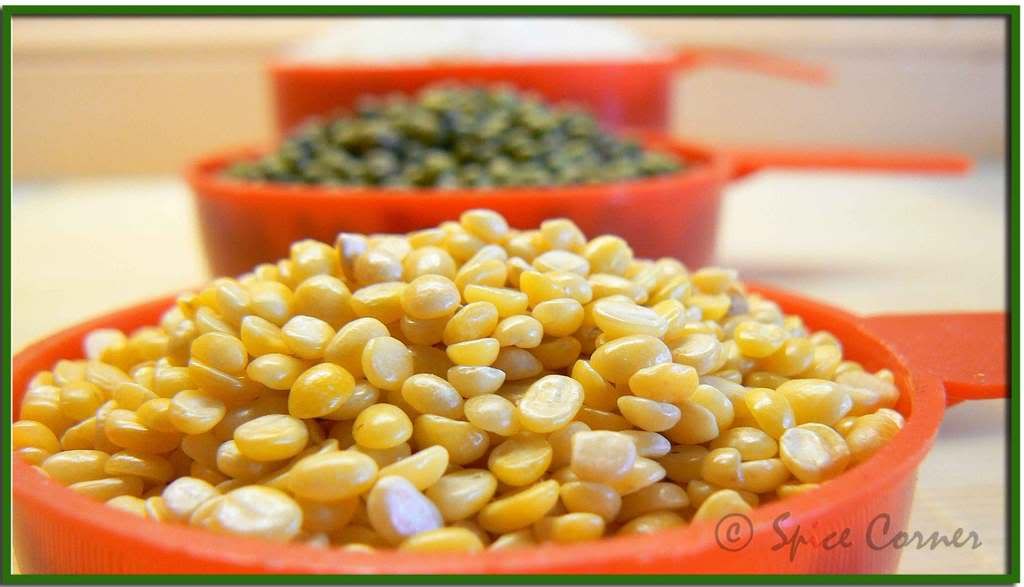
Photo Sharing and Video Hosting at Photobucket
Rice, Whole & Split Moong


Moong Kichidi
Prep Time: 5 mins
Cooking Time: 15-20 mins
Serves: 3-4

Ingredients:
1½ cups Rice (I usually use Sona Masuri or Basmati)
½ cup Whole Moong Dal/Green Gram
¼ cup Split Moong Dal
1 large Onion, sliced
2-3 Green Chillies, split
1 inch Ginger, crushed and finely chopped
¼ tsp Turmeric Powder
1 tsp Mustard Seeds
1 tsp Jeera/Cumin Seeds
Few Curry Leaves
3 Cardamoms, crushed
2 Cloves
½ tsp Black Pepper Powder (Optional)
2 tbsp Oil/Ghee
3 tbsp Coriander Leaves, chopped finely
Salt to taste
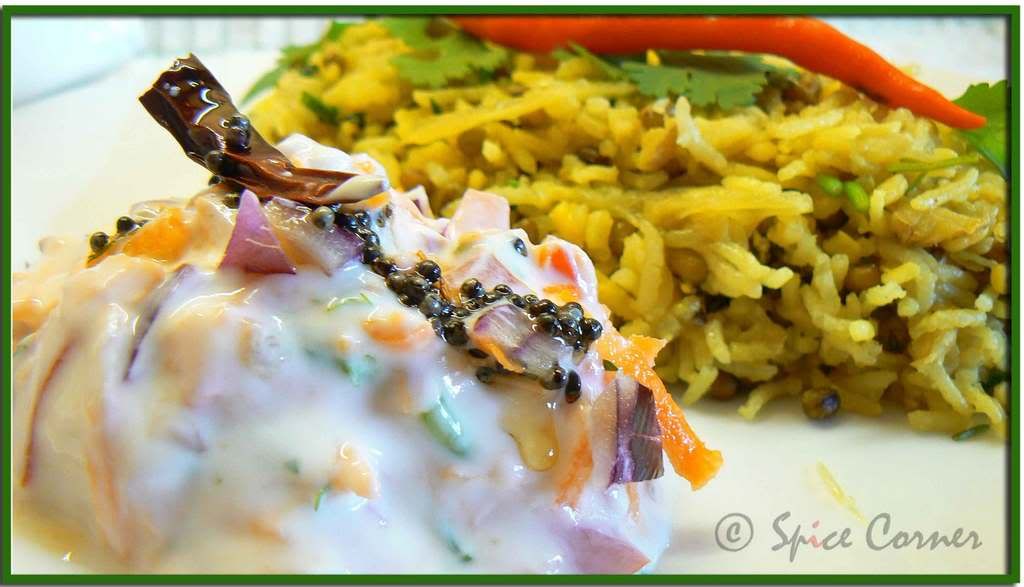
Photo Sharing and Video Hosting at Photobucket
Moong Kichidi with Carrot Raita


Carrot Raita
Prep Time: 5 mins
Cooking Time: 1-2 mins (Tempering)
Serves: 3-4

Ingredients:
2 cups Yogurt, beaten
1 big Carrot, grated
1 small Red Onion, finely chopped
1 large Tomato, finely chopped
1 green chilli, finely chopped
1 tsp Mustard Seeds
1 Dry Red Chilli
1 tsp Oil
Few Curry Leaves
Salt to taste
Photo Sharing and Video Hosting at Photobucket
Moong Kichidi with Carrot Raita

Method:
0 to 8 minutes:
Wash rice and lentils and soak them in water for 5-10 minutes till required.
Chop onions (one for raita and one for kichidi), coriander leaves and ginger finely.
Slit green chillies in center.
Lightly crush the cardamom and clove in pestle and mortar.
Heat oil/ghee in pressure cooker.
~Take a small break and refresh the Food Blog Desam and your Blogroll for new posts.~

8-15 minutes:
Add mustard, jeera and curry leaves and sauté.
When mustard starts to pop, usually with in 30-40 seconds, add finely chopped onion, ginger and green chilli and sauté it for 1 to 1½ minutes.
Now add the crushed spices and sauté it for another minute or so till onions turn translucent.
Drain water from rice and dal and add them with sautéed onion and spices.
To this add turmeric powder, salt to taste and about 6 to 6 ½ cups of water and mix well(add more water if you like it more mushy and soft).
Close the pressure cooker lid and put its weight on and reduce the gas flame to medium.

15-22 minutes:
Peel and grate carrot.
Chop a tomato very finely.
Take yogurt in a mixing bowl and beat it with a whisk for around 30 seconds.
Mix grated carrot, coriander leaves, chopped onions and tomatoes to the yogurt.
Add salt to taste and mix well.
Heat oil in a tadka pan and add mustard, curry leaves and halved dry red chilli.
When mustard starts to pop n splutter transfer the tadka/tempering to raita and mix well.
Keep the raita in fridge to chill.

22-25 minutes:
~Hit refresh button again on your laptop and flick the TV channels~
~Drag your hubby from couch to clean the cutting board and knife and to clear the worktop~
~Meanwhile, set the dinner table~

25-30 minutes:
Switch off the gas after 10-15 minutes or 3-4 whistles.
Don’t rush to open the pressure cooker right away or you will end up with modern art in your kitchen with few nasty burns on your body.
Let it cool down for few minutes before releasing the pressure and open the lid.

After 30 minutes:
Add finely chopped coriander leaves and mix well.
Serve hot Kichidi immediately with super cool Carrot Raita and enjoy this wholesome meal. (Err… Taking picture and eating time is excluded in this Summer Express Cooking right???? ;)
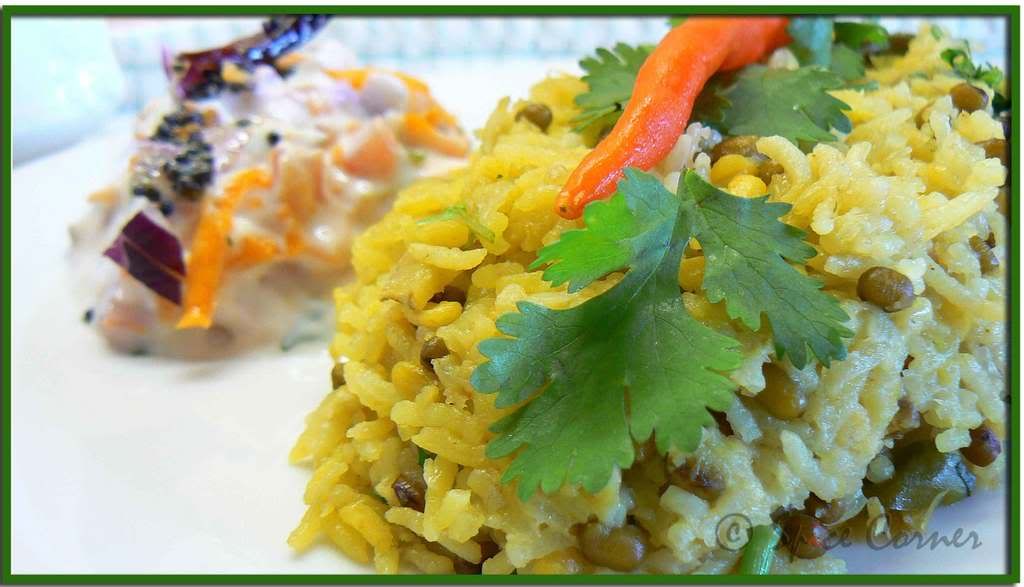

Photo Sharing and Video Hosting at Photobucket
Moong Kichidi with Carrot Raita