This is a day to rejoice and celebrate our independence. At the same time take few minutes of your time to pray for the freedom fighters who dreamt of freedom and made their dreams into reality for us. Wishing all proud Indians
The land India is like a Thali, a platter containing selection of sumptuous dishes in different bowls. Each food tastes different, and does not necessarily mix with the next. Still they belong together on the same plate and complement each other in making the total satisfying meal. The very finest of Indian cuisine is as rich and diverse as its civilization. They say in India the language differs for every two hundred miles travelled and food is no exception.
Lakshmi’s RCI, Regional Cuisines of India, is one event which I look forward to. The instructions are quite simple and straight forward; cook any dish of particular Indian state every month. While browsing through
Spice Corner Archives I realised most of the times I have been cooking and posting recipes which I have learned from my Amma, Grandma, MIL or friends and they are very limited to something which I am used to eating since long time. I am not very experimental or adventurous when it comes to cooking and eating different food. RCI is not just a great reason for me to cook completely new recipe from different states of India but also gives me the opportunity to learn little more about the culture, people, food etc of that region. This month lovely Swapna, of beautiful blog called
Swad is guest hosting
RCI-Oriya Cuisine. And also Anita of
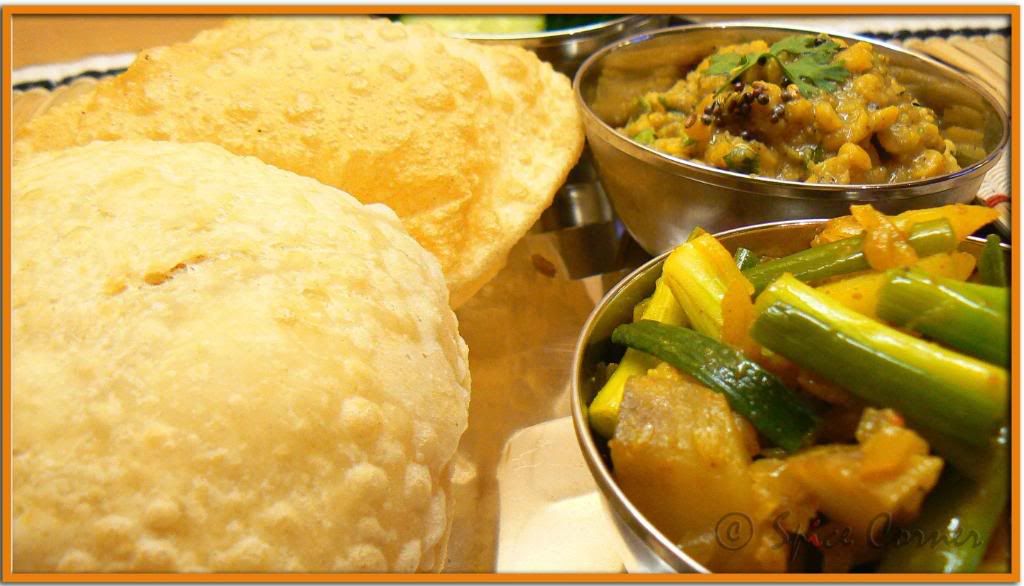
A Mad Tea Party is throwing a great Independence Day party to celebrate 60th year of independence. How can I stay away from this mad party where we are asked to bring deep fried Poories with Potato Bhaji. Here I come Anita...
Panch-Phutana: Fennel, Nigella (Kalonji), Fenugreek, Mustard & Cumin
Orissa or Kalinga, as it was then called, is a eastern Indian state with an ethnic past that is still vibrant. It was here that the famous Battle of Kalinga was fought which made King Ashoka forsake war and to become a follower of Buddhism and spread the spirit of ahimsa and peace. This rich state of architectural splendour and magnificent coastline teaches how simple food cooked using local ingredients can bring out the rich and heavenly flavour. Unlike the fiery spiced curries associated with Indian food, the Oriya food is usually subtle and delicately spiced using Panch-Phutana, a mix of five spices- Cumin, Mustard, Fennel, Fenugreek and Nigella (Kalonji) seeds.
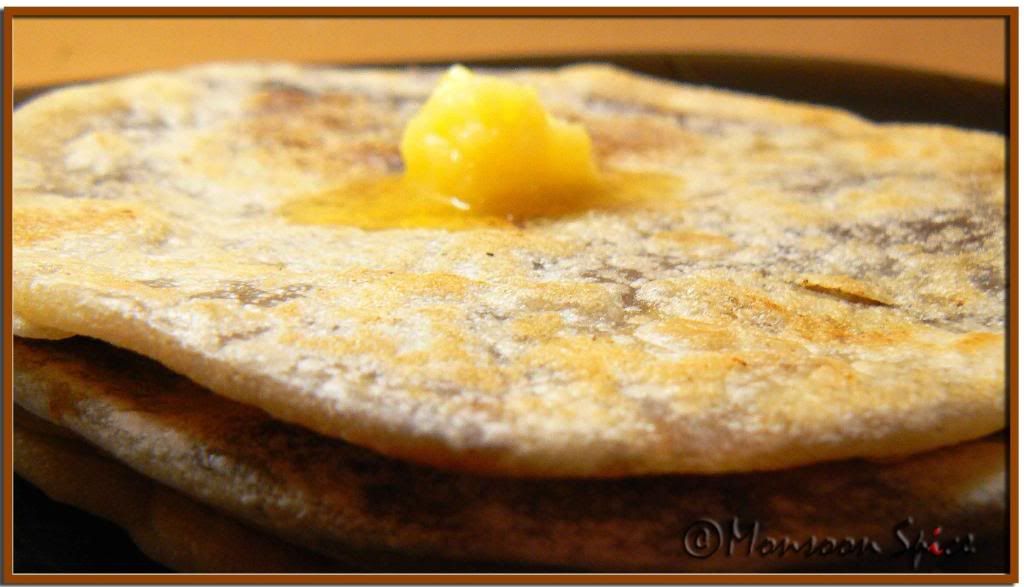
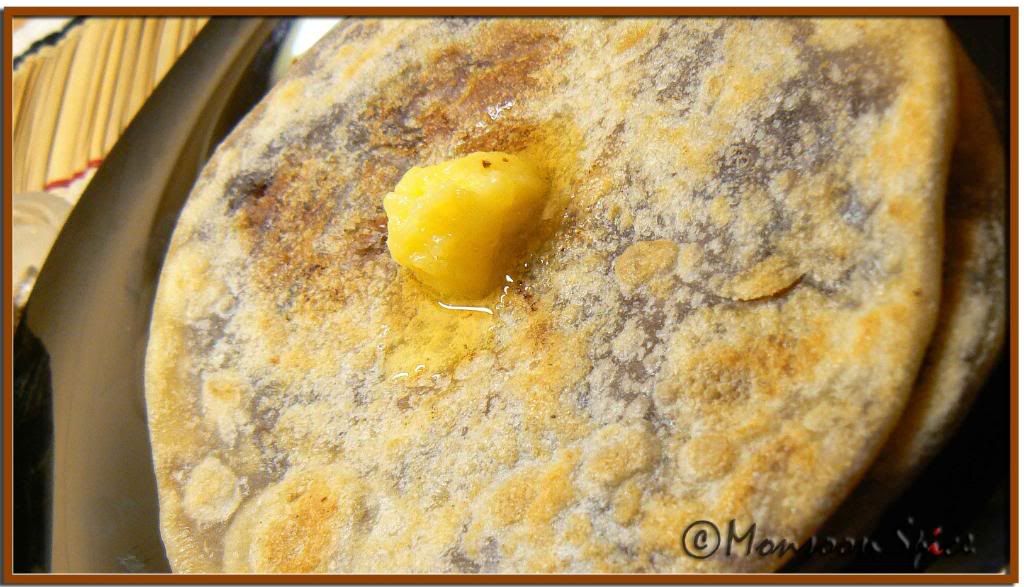
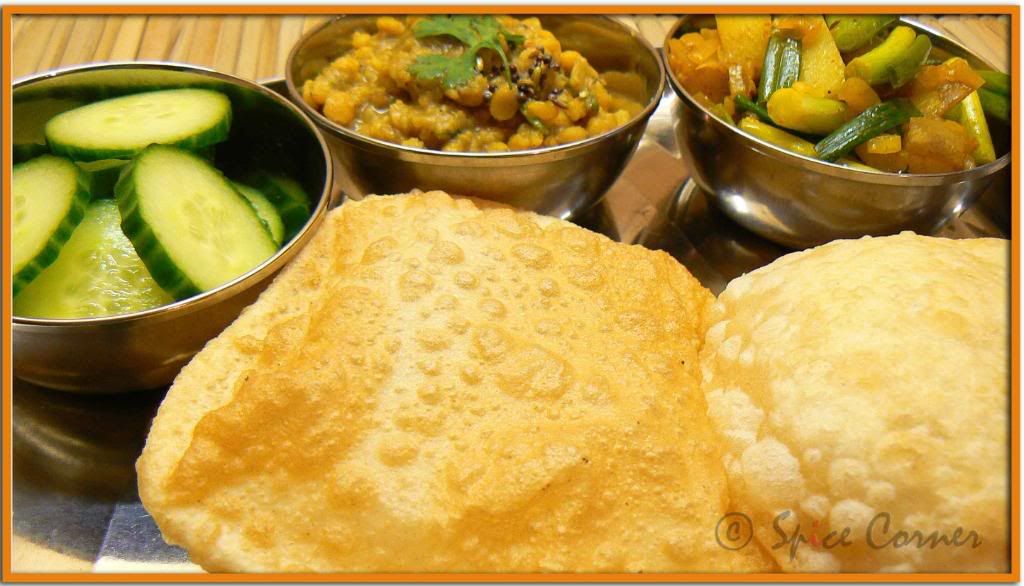
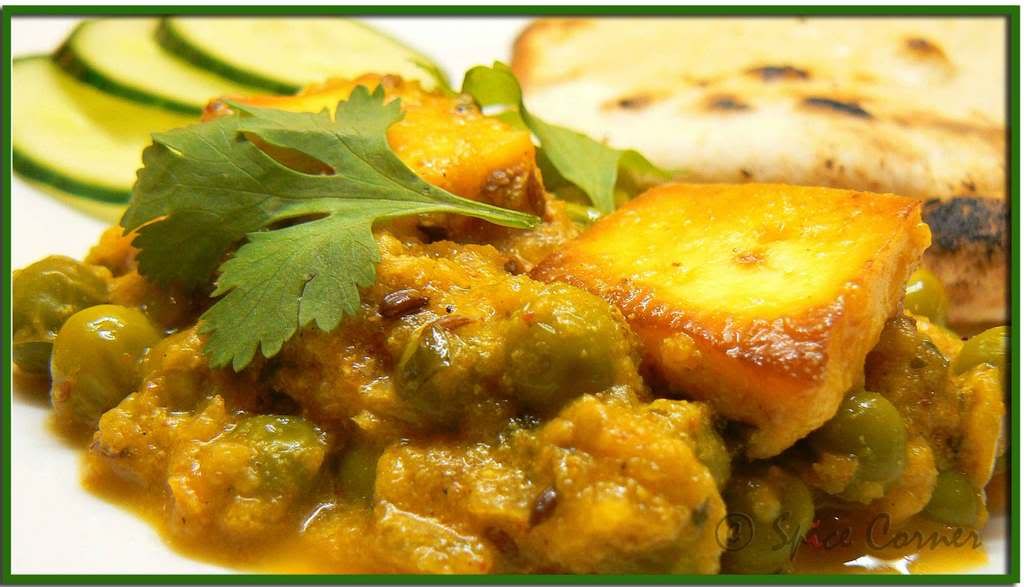
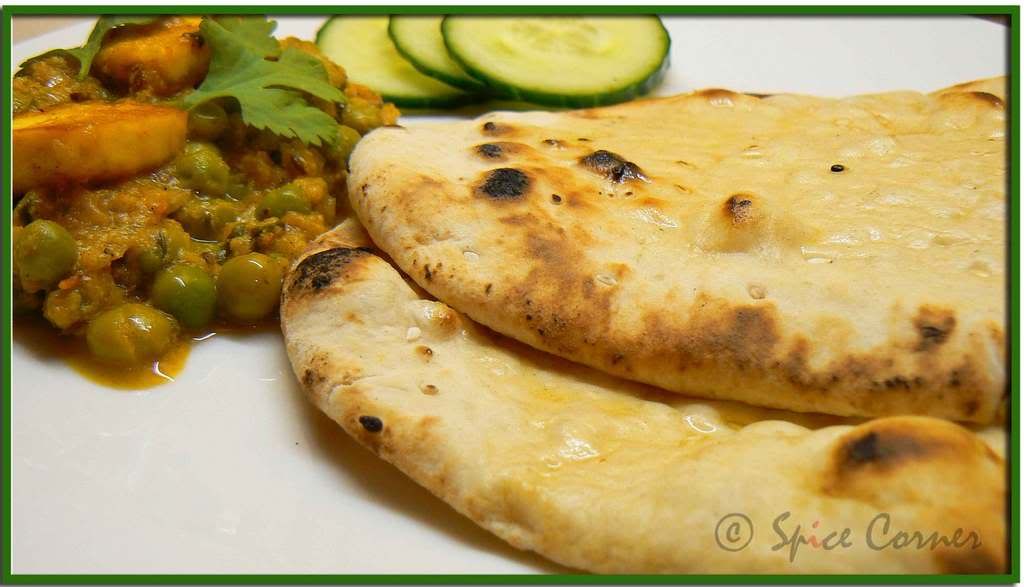
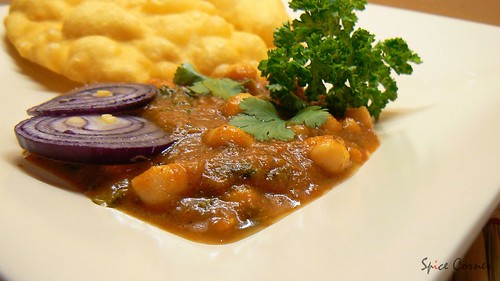
Chana Dali & Piaj Sag Bhaja with Luchi
After searching the internet for vegetarian dishes from Orissa I ended up making not just one Dish but two. I tweaked recips from
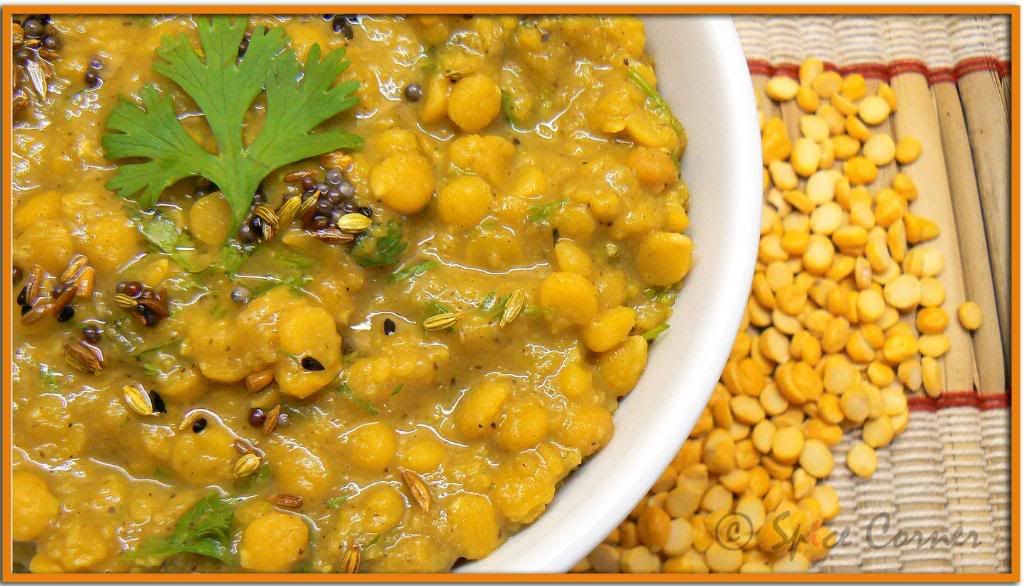
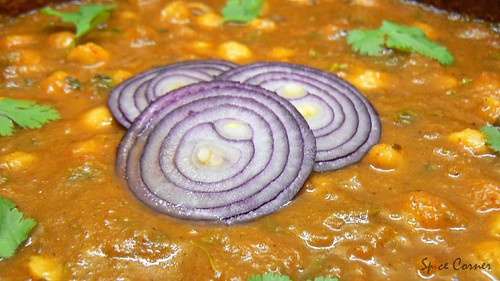
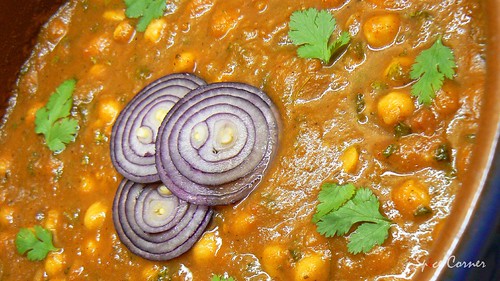
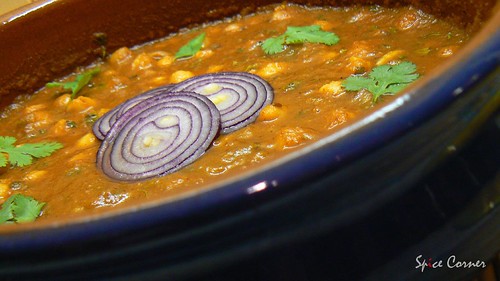
Oriya Kitchen which showcases wonderful array of dishes. The simple Chana Dali of Puri Jagannath Temple where the spilt Chana Dal is simmered in lightly spiced creamy coconut gravy tastes as good as it sounds. The creamy dal has got light nutty taste from channa and the tempering of aromatic Chari-Phutna defines the new dimension of taste.
Chana Dali of Puri Jagannath Temple
Prep Time: 10-15 mins (excluding soaking time)
Cooking Time: 30-40 mins
Serves: 3-4
Ingredients:
1½ cups of Chana dal
¼ cup grated Coconut, fresh/frozen
1 inch Cinnamon Stick
4 Green Cardamoms (original recipe called for black cardamom)
3 Cloves
1 tsp Black Pepper seeds
1 tsp Cumin Seeds
1 tsp Coriander Seeds
¼ tsp Turmeric Powder
½ tsp Sugar
Salt to taste
For Tempering:
1 tsp Ghee
1 tsp Chari-Phutana Seeds (Cumin, Mustard, Fennel, Fenugreek)
Chana Dali of Puri Jagannath Temple
Method:
Wash and clean chana dal in water
Cook this cleaned chana dal in pressure cooker with turmeric, salt and sugar for 10-15 minutes till the it’s cooked well. Cool the pressure cooker till it releases its pressure before opening the lid.
Grind all coconut, cinnamon, cardamom, cloves, black pepper, cumin and coriander seeds to smooth paste adding little water at a time.
Add this ground paste and ¼-½ cup of water, if needed, to the cooked dal. Simmer and cook for another 20 minutes till the dal thickens.
Heat ghee in a tadka pan and add chari-phutna. When the spices start to pop and splutter, transfer the tempering to cooked dal and mix well.
Serve this delicious Chana Dali with rice or roties.
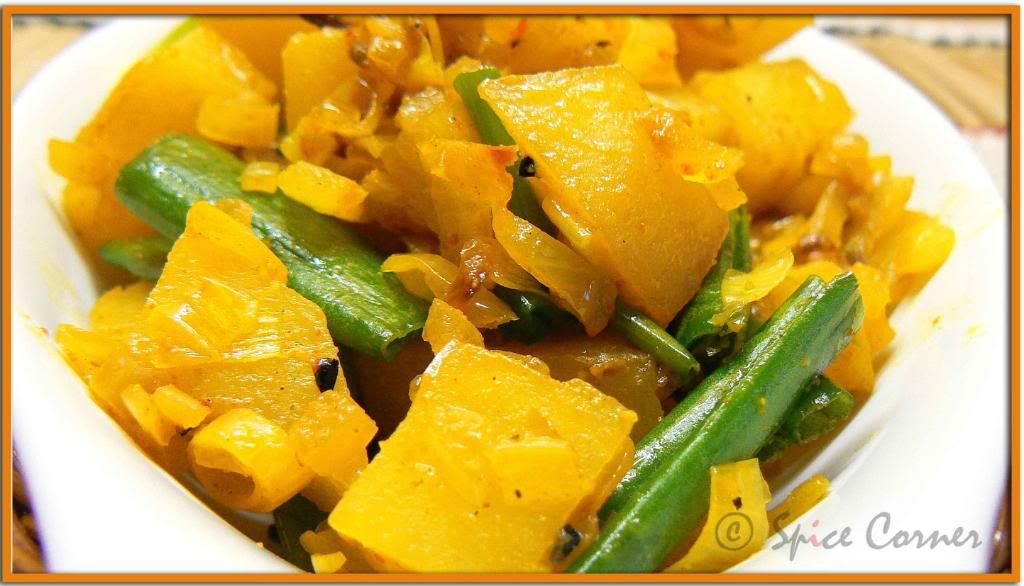
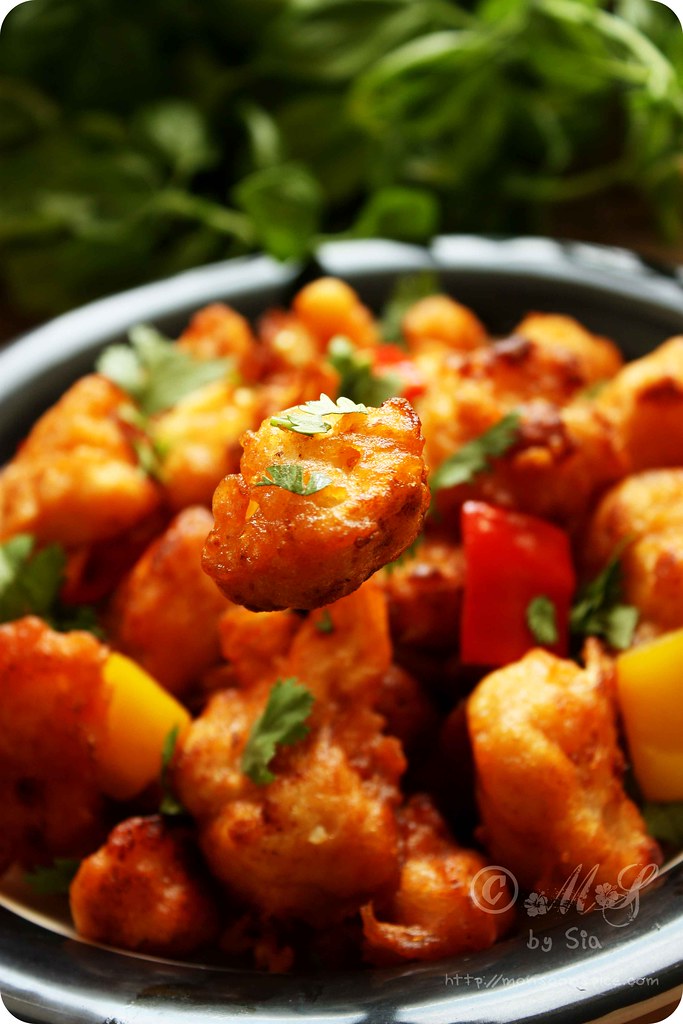
Piaj Sag Bhaja or Green/Spring Onion stir fry is another dish I couldn’t resist from trying. This simple stir fry of spring onion with diced potato in a simple tempering of punch-phutana brings out the true tastes of vegetables without any spices overpowering the fresh taste of vegetables.
Piaj Sag Bhaja
Prep Time: 10 mins
Cooking Time: 15-20 mins
Serves: 2-3
Ingredients:
1 bunch Spring Onion (approx 1½ cups)
1 large Potato, peeled and diced into small pieces
1 small Onion, finely chopped
1 Green Chilli, minced
1/2 tsp Panch-Phutana (Cumin, Fenugreek, Nigella(Kalonji), Fennel, Mustard)
1 tbsp Oil
½ tsp Turmeric Powder
½ tsp Coriander Powder
½ tsp Red Chilli Powder
Salt to taste
Piaj Sag Bhaja
Method:
Wash the spring onion and then cut its green part into 1 inch pieces. Chop the white part into very thin slices and keep them separate.
Heat oil and add panch-phutana seeds and sauté till they start to pop and splutter.
Now add finely chopped onion and spring onion slices and minced green chilli. Sauté these onions till they turn golden brown.
Now add diced potato, turmeric powder, chilli powder, coriander powder, salt and sauté until potato is almost cooked. You can sprinkle little water in between so that the vegetables don’t stick to the bottom of pan.
Then add spring onion and cook for another 5-6 minutes over a medium flame.
Serve hot Piaj Sag Bhaja with rice or any Indian bread.
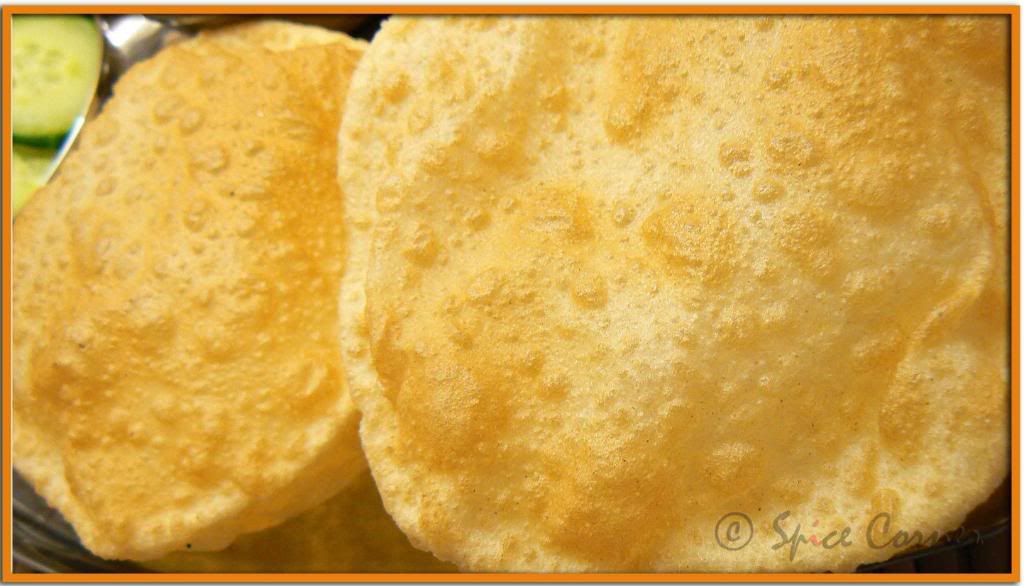
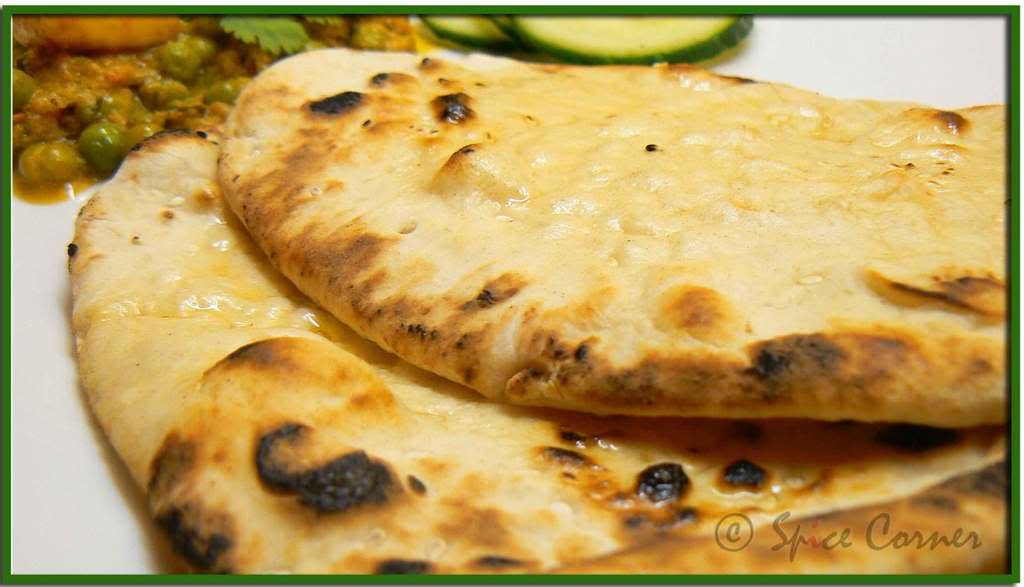
Here is the recipe for soft and white puffed luchies served with delicious Piaj Sag Bhaja and Chana Dali.
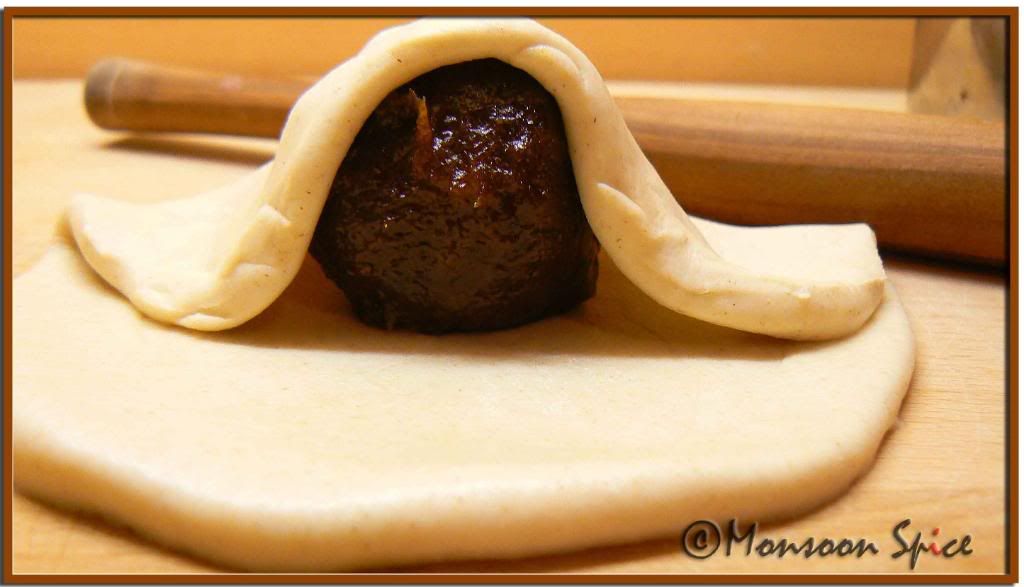
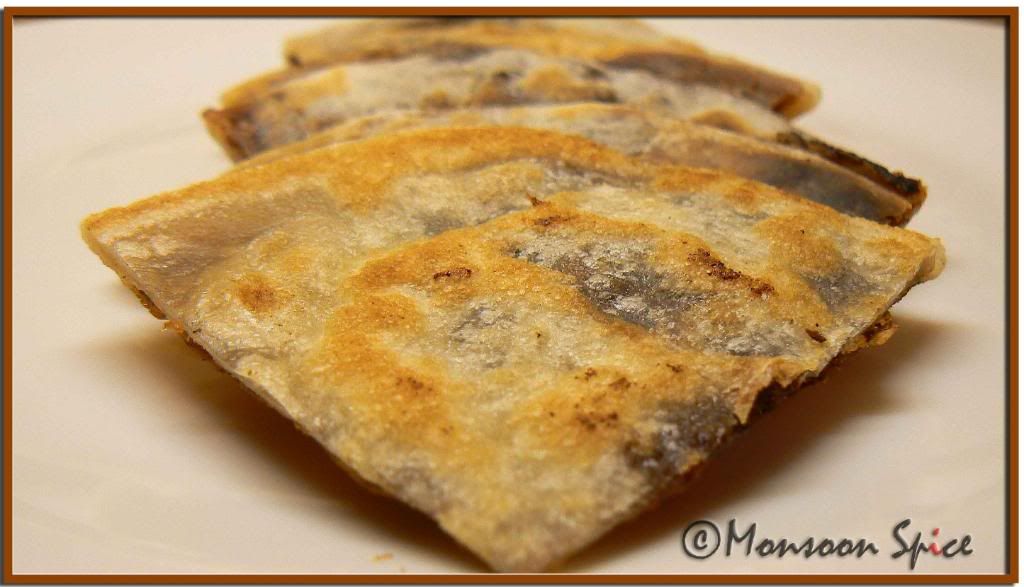
Luchi
Prep Time: 10-15 mins
Cooking Time: 10-15 mins
Serves: 3-4
Ingredients:
2 cups Maida/All Purpose Flour
2 tbsp Oil
Salt to taste(approx ½ tsp)
Oil for deep frying
Puffed Luchi
Method:
Mix oil and salt with all purpose flour. Add water little at a time to make soft pliable dough. Careful while adding water as maida needs less water and tends to become too soft and sticky if more water is added.
Make small ball and roll it into small roties. Make sure that u doesn’t roll them into very thin roties.
Heat oil in a deep frying pan at medium heat and fry one luchi at a time.
When luchies puffs and cooks well which should not take more than 30-45 seconds transfer them on paper towel.
Serve hot puffed white beauties with any curry of your choice.
Chana Dali & Piaj Sag Bhaja with Luchi
Lovely Cynthia of
Tastes Like Home has kindly given me The Power of Schmooze Award. I feel very humble and grateful and am not sure if I deserve this award. Thank you Cynth for your kind gesture.
 The Power of Schmooze Award is for bloggers who “effortlessly weave their way in and out of the blogosphere, leaving friendly trails and smiles, happily making new friends along the way. They don’t limit their visits to only the rich and successful, but spend some time to say hello to new blogs as well. They are the ones who engage others in meaningful conversations, refusing to let it end at a mere hello - all the while fostering a sense of closeness and friendship.”
Given a choice I would gladly send it to all lovely bloggers here and I had great difficulty in choosing few from my long list of buddies. So here I would like to pass this award to lovely friends who aptly deserve this award more than I do. You all are schmoozers :)
Archana of
Tried & Tested Recipes
Coffee of
The Spice Café
Jyothsna of
Curry Bazaar
Latha of
Masala Magic
Linda of
Out of The Garden
Sandeepa of
Bong Mom’s Cookbook
Shn of
Kitchen Mishmash
Sra of
When my Soup Came Alive
Trupti of
The Spice Who Loved Me
Vani of
Mysoorian
Update: Time for more bragging;) Baking Fairy Sunita of
Sunita's World and thoughtful writer Santi of
Writing on the Mirror thinks I rock! Boy! I do feel like I am back in school days on annual day celebration;) Thanks Suni and Santi for this award and right now my cheeks matches the pretty pink of this cute button.


 Print This Recipe