Showing posts with label Dosa Rice. Show all posts

27 October, 2008

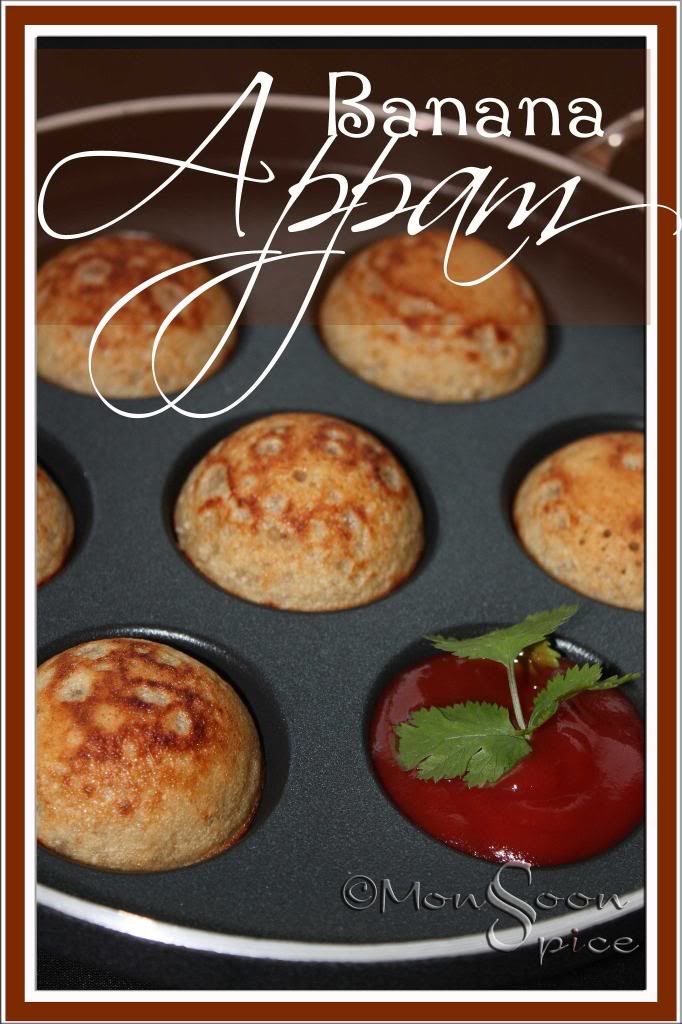
Banana Appam: Sweet Treats for Festival of Lights

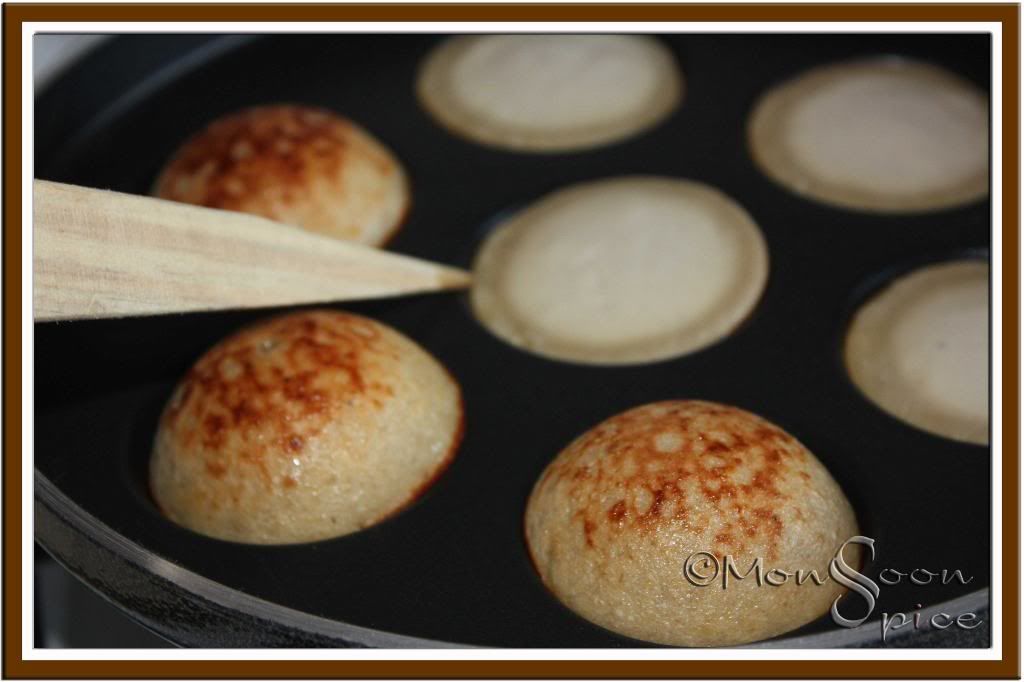
Sweet Banana Appams
First and foremost,
Wishing you all a very happy Deepavali.
May this festival of lights bring happiness and prosperity to you and your loved ones.

I hope you all are having a wonderful time celebrating Diwali with your friends and family. As for us, it’s another working day with deadlines to meet and usual grind. So we are enjoying quite Diwali with long day at office and simple dal and rice for lunch and dinner :) These days by the time I reach home I feel physically and emotionally drained after staring long and hard at the jumble of codes on screen and breaking my head in trying to figure out that small bit of code responsible for creating havoc in the main system. No wonder I prefer to snuggle under the blanket with warm bowl of soup and toast than actually stand in front of stove for hours together cooking an elaborate meals for the festival. Ahem, it’s not like I used to cook elaborate meals before ;) No wonder weekends have become real luxuries for us and are spent either reading books or watching some movies and sleeping till noon. When it comes to kitchen part, we have been cooking very simple food these days and we have been cooking everything in bulk which lasts for 3-4 days. It helps a lot when you come home exhausted and want to eat some home cooked food immediately.

I had no plans of cooking anything for Diwali this time. But somehow I got caught with the festival spirit while I talked to my Amma, Atte and sister who were busy making their menu for this festival of lights. I made up my mind to make something as long as it doesn’t exceed half an hour of cooking time and first thing that came to my mind was the sweet Appams that my mother makes. Last summer during our short trip to India, I had purchased the non-stick Appam pan which I had tucked on top shelf and it has been acquiring dust since then. With in a minute I washed and soaked two cups of rice in water for an hour and went on to finish few chapters from the novel I was reading. Then it was just the matter of using two poor looking bananas which were on the last stage of their life, a cup of powdered jaggery, few pinches of cardamoms to ground rice paste and voila, the smooth batter for Banana Appams was ready with in few minutes. With small ladle of batter poured on every hole of appam pan with a touch of Ghee for flavour, I was left with two dozens of small, sweet Banana Appams to enjoy for this Diwali. The aroma of sweet jaggery, bananas and cardamom wafting from my kitchen sure made me feel festive and transported me back to my home back in India. And off this goes to four events, Sweet Vegan hosted by Vaishali where Ghee can be substituted with oil, JFI-Festival Treats guest hosted by dear Valli, Sweet Celebrations at Aparna’s space where she is celebrating her first blog anniversary and WYF-Party Foods hosted by EC.

Sweet Banana Appams

Photobucket Print This Recipe
Banana Appams (Sweet Rice Cakes with Banana, Jaggery and Cardamom)
Prep Time: 5-10 mins
Cooking Time: 15-20 mins
Makes: 20-25 small Appams
Ingredients:
2 cups Rice, washed and soaked in water for 1-2 hours
1 cup Jaggery (Adjust acc to taste)
½ cup fresh/frozen Coconut
½ tsp Green Cardamom Powder
2 very ripe Bananas, peeled and roughly chopped
A pinch of Salt
Little Oil or Ghee
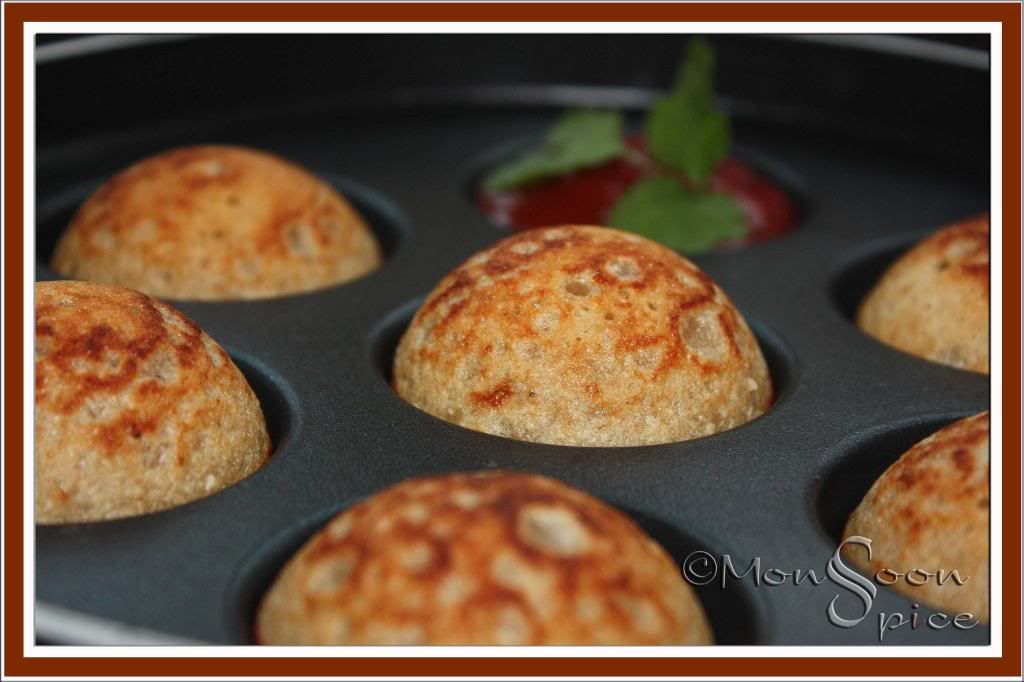
Sweet Banana Appams

Method:
Grind rice to smooth paste adding very little water in which it is soaked. Now add jaggery, grated coconut, bananas and cardamom powder, pinch of salt and pulse the mixer till all the ingredients blend well.
Let this batter rest for at least 15 minutes for all the flavours to blend well before you proceed to next step.
Now either you can deep fry or use Appam pan to make these Banana Appams. If using Appam pan, grease the Appam pan with little ghee and heat it on medium flame.
Pour the batter into each hole and cover the pan with a lid and let it cook on low-medium heat on both sides till it turns golden brown and cooked through.
Serve it hot with any spicy Chutney or hot Tomato Ketchup or as it is and enjoy.

Sweet Banana Appams


Notes:
If deep frying, make sure the paste is thicker. And if using Appam pan, the batter can be little thinner, of pancake consistency.
I used non-stick Appam pan and it hardly required any oil of ghee due to coconut used which releases its natural oil when cooked. If using iron pan, make sure that you grease it properly.

16 September, 2008

Banana Blossom Patrode: Try Something New and Delicious!

Photobucket
Banana Blossom Patrode

Mangaloreans love two things, one coconut and another curry leaves. Between these two there is another vegetable/fruit which is indispensable to us and it's plantain or banana. Most of the houses in South Canara, even with small garden, will have one coconut tree and a banana tree along with wildly grown Curry plant swinging to cool evening breeze. I grew up with three banana plants in the backyard and hundreds of them in our estate. So it is no surprise that I have tasted almost everything cooked from its stem, fruit and even its flower/blossom using banana leaves as organic and bio-degradable plates.

I have had tasted many recipes using Banana Blossoms ranging from simple stir-fries to delicious Chutneys cooked by my Amma, aunts and Ajji. Our recent summer trip to India I was first time introduced one very novel dish by my mother in law and that dish is Banana Blossom Patrode. Last year during casual chat with my MIL she mentioned about making Patrode/Patra using Banana Blossom and like any foodie I was totally intrigued and couldn’t wait to try it. In spite of being really busy with the last minute wedding preparation of my BIL’s, my Atte managed to cook this for me. And to my surprise it turned out to be one of the very best foods I have ever tasted. I have been craving for this Patrode ever since we came back from India but never got around to make this as Banana Blossom is not easily available at my neck of woods and I was not very sure if I will be able to manage chop them in a right way and cook without any problem.

During our recent trip to down under (nope, not Aussie ;) I couldn’t resist from buying two banana blossoms in hope of making patrode. And boy, did I manage to cook it beautifully or what!!! Traditionally Patrode is made using Taro/Colacasia Leaves by spreading spicy paste on their surface, rolling and then cooked to perfection using a steamer. Same spicy batter is used here but banana blossom is used in place of taro leaves and no rolling is involved. This was the first time I have ever used Banana Blossom in cooking without any help from my mother or MIL and I was really proud with the end result. Except for laborious cleaning and chopping of banana blossom, this is really a very simple recipe and can be cooked very quickly. To top it all, it can be simply stored in a freezer for months together. Banana Blossom Patrode is spicy with mild note of sweet and tanginess from dry red chillies, tamarind, coconut and jaggery used; a taste which is hard to resist and even harder to forget. Without further delay let me give you step by step instructions on how to make Banana Blossom Patrode and please make sure that you go through the instructions carefully before cooking it. I am sening it to this week's Weekend Herb Blogging guest hosted by Zorra & initiated by dear Kalyn.

Photobucket
Banana Blossom & Florets

Photobucket Print This Recipe
Banana Blossom Patrode (Steam cooked & Pan fried Spicy Rice Cakes made using Banana Blossoms)
Prep Time: 15-20 mins
Cooing Time: 20-30 mins
Serves: 4-6
Recipe Source: MIL
Ingredients:
1 Banana Blossom
1 large Onion, finely chopped
2-3 tbsp Oil, preferably Coconut Oil
1 tsp Turmeric Powder
10-12 Curry Leaves, finely chopped

Grind to thick Batter (Dosa batter consistency):
2 cups Rice, washed and soaked overnight for about 8-10 hrs
½ packed cup Coconut, fresh/frozen/dried
1 tbsp Coriander Seeds
½ -¾ tbsp Jeera/Cumin Seeds
Medium lime sized Tamarind Pulp (Adjust acc to taste)
6-8 Dry Red Chillies (Adjust acc to taste)
1 inch cube Jaggery
Salt to taste
Photobucket
Banana Blossom Patrode- Before Steaming

Method:
Drain water from rice and grind it to smooth batter by adding water and all the ingredients listed above. Make sure that you have little thick batter than that of dosa batter consistency. Adjust tamarind, chillies and jaggery according to your preference.
Now comes the little tricky bit of chopping the banana flower. First apply 1 tbsp of coconut oil to your palm and rub well. Applying oil to your palms help in preventing the sticky sap oozing from banana blossom to your hand which leaves nasty black colour for few days. Remove the outer tougher covering and discard, around 2-4 outer tough skins. In my case I had to remove two outer skins. Don’t discard the florets. Now chop this banana flower and florets into very fine pieces.
Usually these chopped pieces are soaked in very sour butter milk to prevent from discolouring. In spite of doing so it discolours to some extent. So you can simply skip this step as we will be mixing them in the prepared batter.
Add 2-3 tbsp of Coconut oil and mix them well. This way you can easily separate layers which otherwise would be sticking to one another.
Now add this chopped banana flower, finely chopped onion, turmeric and chopped curry leaves to the ground batter and mix well.
Here comes the important step of steaming. You can either use usual Idli stand or flat bottomed vessel and steam cook them in a streamer or pressure cooker without putting its weight. Or another best way is to wrap it in banana leaves and steam cook it, same way as Genasale. I have used Tatte-Idli Stand. Grease the plates with oil and pour the batter with ladle into each plate. Place each plate back in the stand and steam cook in pressure cook or Idli steamer or Steamer for about 20-30 minutes till cooked properly.
Let it cool for 5 minutes before opening the lid. Remove cooked Patrode from plates and cut them into desired shapes. You can serve it with Ghee/Coconut oil or proceed to next step.
Heat tawa/griddle and place cut Patrode pieces on it. Add a tsp of Oil/Ghee for each piece and cook on both the sides for about 2 minutes till nice brown spots starts to appear on the surface.
Serve it immediately with or without any chutney or plain tomato ketchup and enjoy. It tastes best when roasted with Ghee/Coconut Oil.

Photobucket
Banana Blossom Patrode- After Steam cooked and Pan fried


Notes:
Banana Blossom or Banana Heart grows on the end of long stem holding cluster of Bananas and this deep cherry red blossom is id considered as one of the delicacy in southern Indian states, both when cooked or eaten raw. Banana blossom has layers of tightly packed reddish flaps which wrap around rows of creamy florets with black stigma. Usually this black, hard stigma and transparent covering on every floret is removed as they are difficult to cook. I skipped this step as the steaming process helps in cooking them thoroughly. You can go ahead and remove them or just leave them as they are.
Try to stick to the amount of Tamarind and Jaggery used as they helps in mellowing the bitter taste of Banana Blossoms and spicy red chillies. If using old tamarind, reduce the quantity by ¾ th of the original quantity.
To steam cook, add about water depending on the size of pressure cooker you use. In my case I had to add about 2½ cups of water (about 1½-2 inches). Place the Idli stand and cover the lid without putting its weight and steam cook for about 20-30 mins.
The left over Patrode pieces can be stored in zip lock bag once they are completely cooled and can be frozen for about 1-2 months in freezer. When needed heat then in microwave (don’t thaw) and then roast them on tawa with ghee/oil and serve.

05 September, 2007

Akki Shavige with Rasayana & Menthe Chutney

Photo Sharing and Video Hosting at Photobucket
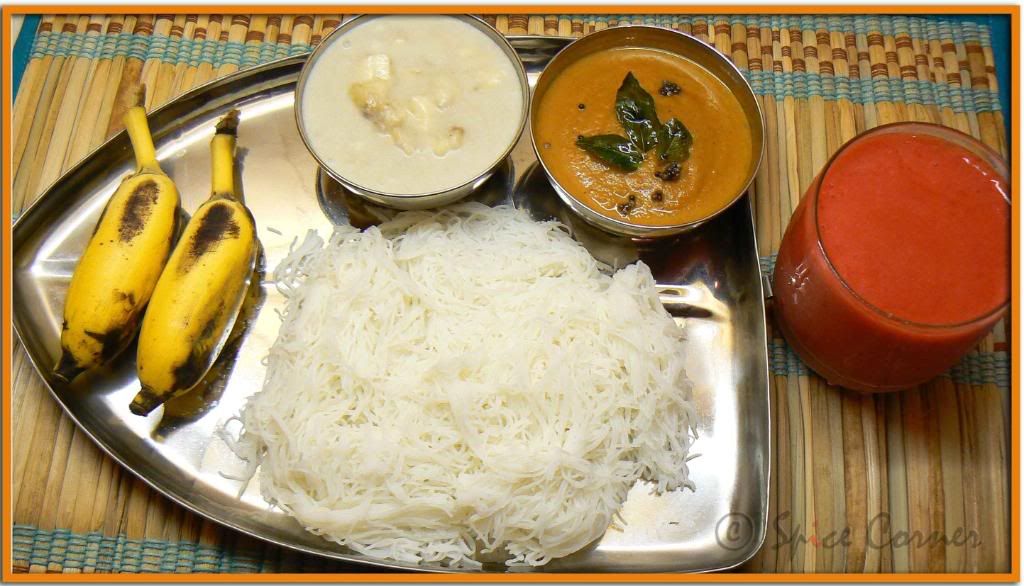
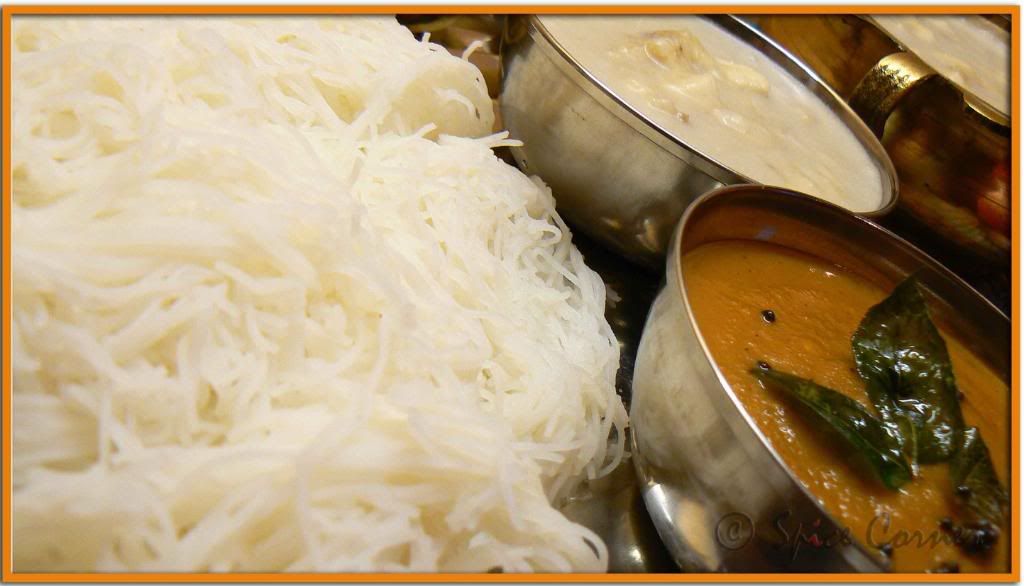
Akki Shavige with Rasayana & Menthe Chutney

She was sleeping soundly, smiling in her sleep while she dreamt of chasing colourful butterflies in garden. When the persistent sun shone brightly on her face, little girl with pigtails sighed and snuggled back under the covers, blissfully embracing slumber. The mild caress of heavenly aroma coming from kitchen nudged her gently to open her heavy eyelids. Dragging her feet on cool marble floor with her favourite doll tucked under one arm and blinking her eyes to the golden glow of sunshine streaming from high ventilator and windows, she blissfully inhaled the wonderful aroma of ground coffee beans and spices. The sight of her mother with long hair tied in a loose knot adorned with pearls of water, standing in kitchen stirred the feeling of love and happiness. She ran and hugged her mother inhaling the heady perfume of her herbal soap and shampoo. Mother gently lifted her daughter planting kisses on her daughter’s blushed chubby cheeks and placed her away from heat, close to window where she could see the world waking up to the glorious sunshine. As her mother churned delicious food in lightening speed, little girl watched her dad entering the kitchen with special device to make one of her favourite food. As her dad and mom smiled at each other knowingly, little girl sat on the floor cross legged with a twinkle in her eyes as she watched her dad rotate the noodles presser which turned the steaming rice dough into thin, stringy white noodles. She smiled brightly at her parents looking over the food, simple home food, food that made her happy and content.


Yes, I am talking about my favourite breakfast item, Rice Semige/Shavige. Also known as Sevai or Santhakai in Tamil and Idiappam or Noolappam in Malayalam, Shavige is made from rice and coconut in my native Mangalore and it is usually served with sweetened coconut milk and spicy chutney or sambar. This was the only time when my mother would allow my dad to help her in kitchen as it required an extra pair of helping hand to make these stringy rice noodles. While my mom inserted the steaming balls of rice dough in the Sevai container and rotated the plate kept under the container collecting Shavige, dad would quickly rotate the sturdy handle in clock-wise direction. This Shavige Presser although might look like something out of medieval torture device to some people is a must device in every house-hold in Mangalore. Back in my Ajji’s house she had wooden Shavige Presser which looks quite different to what we have now. Instead of rotating the handle, the wooden one would press down the dough like hand water pumps in rural India. Unlike my Ajji and Amma, I use simple Chakkli Presser to make Shavige. Chakkli presser works fine for two growling tummies and moreover it’s quite easy to clean. But I must add that rotating Shavige Presser is equlivalent to working out those muscles in gym, so will not get enough of arm exercise when using Chakkli press ;)


Akki Shavige with Menthe/Methi Chutney and Baale Hannu Rasayana is my contribution to this month’s RCI-Karnataka hosted by our blog queen Asha of Foodie’s Hope and also to this month’s JFI-Banana hosted by lovely Mandira of Ahaar.


Akki Shavige (Rice Noodles)
Prep Time: 30 mins (excluding soaking time)
Cooking Time: 20 mins
Serves: 2-3

Ingredients:
1 cup Rice
1 cup Fresh/Frozen Coconut
2 tbsp Oil, preferably Coconut Oil
Salt to taste
Photo Sharing and Video Hosting at Photobucket
Akki Shavige

Method:
Wash and soak rice in 2 cups of water for 4-5 hours or overnight.
Drain and grind this rice with grated coconut and salt to taste adding little water at a time to very smooth paste. Note that there shouldn’t be any lumps and the paste should be silky smooth. Usually my Ajji and Amma make very thin batter of buttermilk consistency but I grind it to Dosa batter consistency which works fine for me.
Apply coconut oil to heavy bottomed kadai/wok covering it well. Pour the batter in this wok and keep mixing this batter in medium flame till all the water evaporates and it turns to a thick lump of dough.
Switch off the gas and start making big lemon sized balls by applying little cold water to stop it from sticking to your hand.
Steam cook these rice balls in a steamer or pressure cooker without putting its weight for about 10 minutes.
Place two steaming rice balls in Shavige presser or Chakkli maker and press the noodles. Place these noodles in a banana leaf or wet cloth and let it cool. This noodle needs to be cooled down to hold their shape. Serve these noodles with Chutney, sweetened Coconut Milk or Sambar. You can also make Tamarind or Lemon Rice Noodles with the leftovers.
Check Shilpa or Aayi's Recipes and Manjula of Dalitoy's recipes for Shavige where they use Shavige Press here and here. And also check here for Viji of Vcuisine's recipe for Vella, Lemon and Ulundhu Sevai using Chakkli Press.

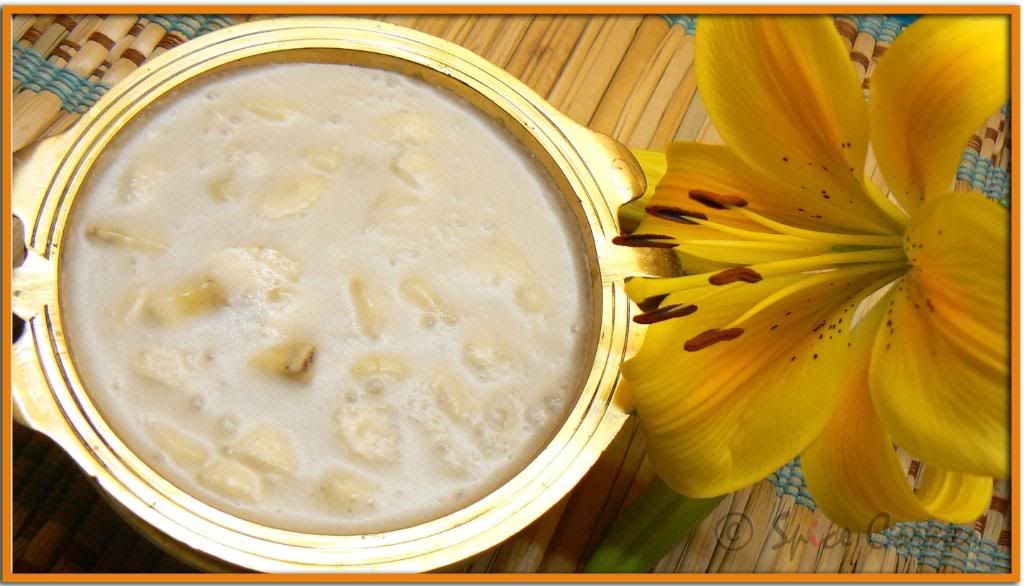
My Ajji and Amma usually served Akki Shavige with Sweetened Coconut Milk or Rasayana and Menthe Chutney. Rasayana (Rasa means Juice/essence/flavour/taste in Sanskrit) is basically a sweetened coconut milk mixed with chopped Bananas or Mangoes depending on seasonal availability of fruits. Freshly extracted Coconut milk is flavoured with Jaggery and pinch of Cardamom and made wholesome by adding chopped bananas or mangoes.


Rasayana (Banana in Sweetened Coconut Milk)
Prep Time: 20-25 mins
Cooking Time: -
Serves: 2-3

Ingredients:
1 cup Bananas, quartered and sliced
1½ cup freshly extracted Coconut Milk (big no-no to Canned Coconut milk)
1-2 tbsp grated Jaggery, adjust according to taste
2 Green Cardamoms, skins removed and seeds crushed
1 tsp roasted Sesame Seeds (Optional)
Small pinch of Salt


Photo Sharing and Video Hosting at Photobucket
Rasayana

Method:
Dissolve grated Jaggery in coconut milk and mix all the ingredients.
Serve cold with Akki Shavige or drink as it is.


Variation:
You can use ripe sweet mango in place of bananas.
Replace coconut milk with milk and add 2-3 tbsp of banana or mango puree to give it thick base.


Photo Sharing and Video Hosting at Photobucket
Akki Shavige with Rasayana & Menthe Chutney

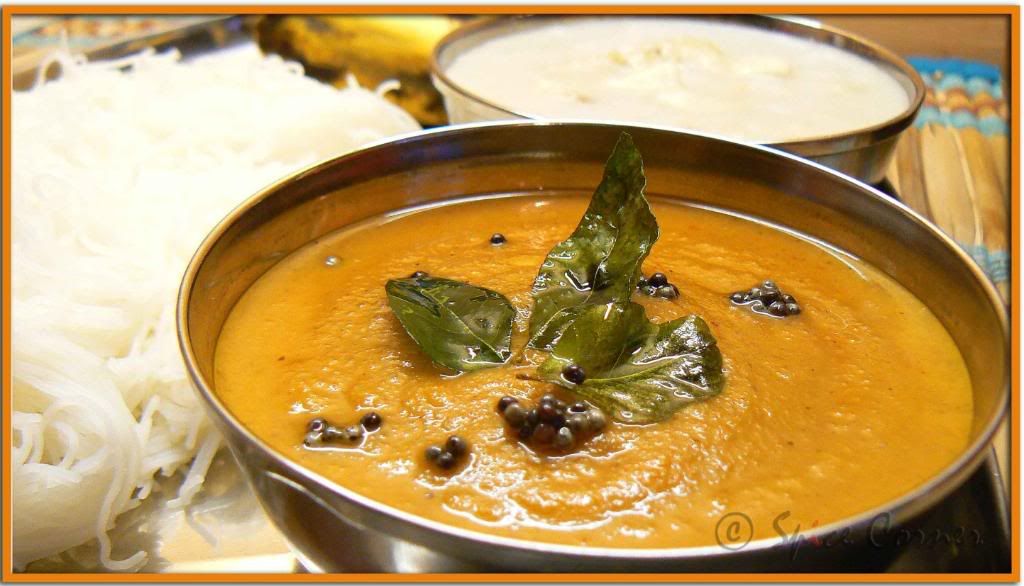
Methi/Fenugreek seeds are one of the most importance spices in Mangalorean cuisine. My Ajji would soak few methi seeds in buttermilk and make us drink after heavy meals as methi is good for digestion. Read more about benefits of Methi here and here. Menthe Chutney is one dish which is full of different flavours. Bitter methi is ground with creamy coconut and spicy chilli and then cooked with dash of jaggery to give it little sweet flavour.


Menthe Chuteny (Methi Seeds Chuteny)
Prep Time: 10 mins
Cooking Time: 10-15 mins
Serves: 2-3

Ingredients:
1 tsp Methi/Fenugreek Seeds
1 cup grated Fresh/Frozen Coconut
3-4 Dry Red Chillies
1-2 tbsp Jaggery, adjust acc to taste
1 tsp Oil
1 tsp Mustard Seeds
Few Curry Leaves
Pinch of Hing/Asafoetida
Salt to taste
Photo Sharing and Video Hosting at Photobucket
Menthe Chutney

Method:
Dry roast methi and broken red chillies in a pan for around 1 minute till you get nice aroma of roasted methi.
Grind sautéed spices with coconut adding little water at a time to smooth paste.
Heat oil in a pan and add mustard, hing and curry leaves.
Once mustard starts to pop and sputter, add ground paste, jaggery, salt to taste and ½ cup of water.
Cook it on a low flame for 10-15 minutes stirring in between. Serve hot with steamed rice or akki shavige.

16 July, 2007

Watermelon Rind Dosa with Ginger-Coconut Chuteny

Watermelon, watermelon,
On the vine, on the vine,

Green and ripe and juicy,

Green and ripe and juicy

Please be mine,

Please be mine.


Summer and watermelons… Like many (grown up;) kids, I too have fond memories of eating a big crescent of watermelon greedily after playing outside in blazing hot sun, just plain or sprinkled with little salt or dipped in honey. It was dad’s department when it came to buying a huuuuuuuuge watermelon and cut it into big equal sized slices so that we kids don’t get any chance to argue as who got the big chunk of watermelon :) Red and juicy watermelon dotted with slippery and oval black seeds covered with green and white striped skin was one among favourite fruits of mine. Who can forget seed-spitting competition as who would spit the seeds as far as we could and the fear and panic when our elders would tease us saying swallowing these seeds would result in a watermelon plant growing in our tummy:)
When it comes to food, I have one more fond watermelon memory. Once we kids had our fill of watermelon my dad would cut the watermelon into small pieces and store it in refrigerator for late morning snacking and mom would collect all thick skin to make delicious Dosa. My sister and brother preferred sweet watermelon dosa prepared adding grated jaggery ground with rice and white part of watermelon pieces. The spicy version of dosa prepared adding dry red chillies and aromatic cumin and coriander seeds were my and my dad’s favourite.
When Bee and Jai chose Watermelon for this month’s AFAM which is a brainchild of Maheshwari, I knew what I wanted to contribute without any hitch and hesitation or confusion which I usually have whenever I participate in food events. Watermelon Dosa might sound bit unusual to most of readers but you have to try it to know how tasty and delicious it is and how quick and simple it is to make. Unlike many dosa recipes, water melon dosa doesn’t need any fermentation process. Addition of coriander and cumin seeds with dry red chillies takes it to another level of taste. The peel left after eating the red part of watermelon is used to make this dosa. The outermost green part is peeled and only the remaining white part is used to make this dosa. Cut these white parts into small pieces and grind them with rice and other spices to make batter.


Photo Sharing and Video Hosting at Photobucket
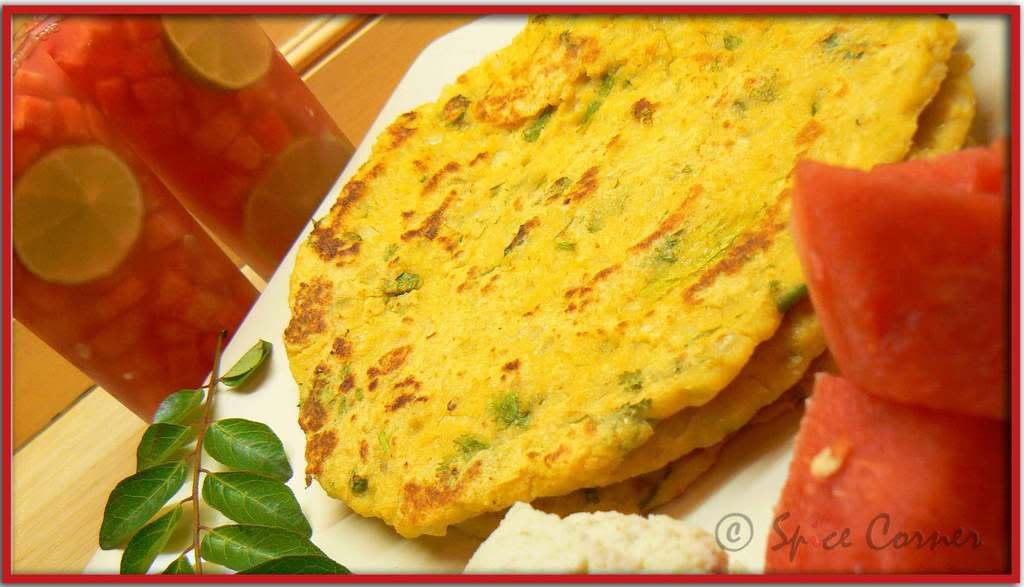
Watermelon Rind Dosa with Ginger-Coconut Chuteny and Watermelon Lemonade


Watermelon Rind Dosa
Prep Time: 10-15 mins (excluding soaking time)
Cooking Time: 15-20 mins
Serves: 3-4
Ingredients:
1 cup Rice
3-4 cups Watermelon rind, chopped-only the white part as mentioned above
½ cup Fresh/frozen Coconut
3-4 Dry Red Chillies, according to taste
½ tbsp Coriander Seeds
1 tsp Jeera/Cumin Seeds
1 small Onion, chopped finely
2 Green Chillies, chopped finely
2-3 tbsp Coriander Leaves, chopped
Few Curry Leaves, chopped
Salt to taste

Photo Sharing and Video Hosting at Photobucket
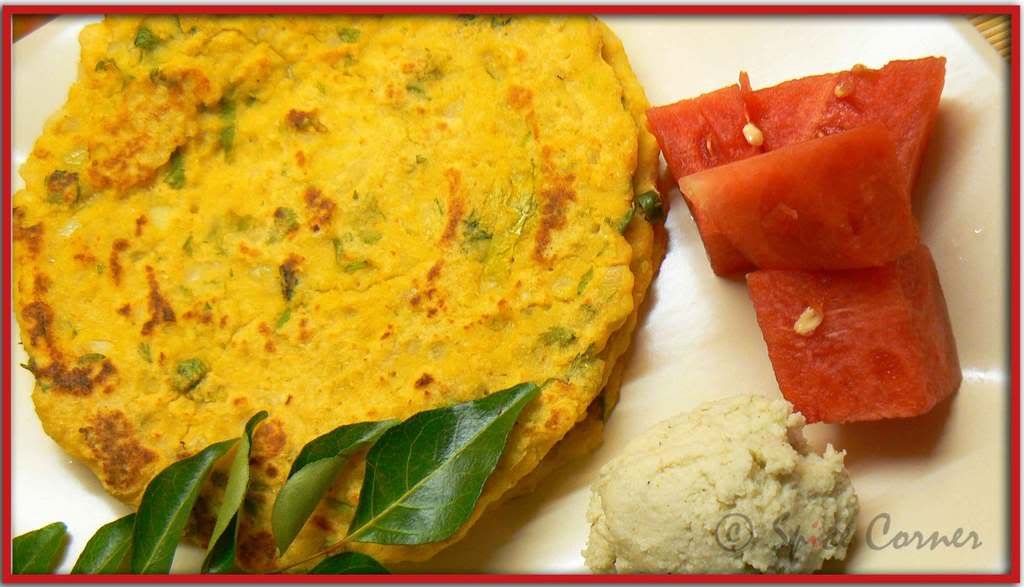
Watermelon Rind Dosa with Ginger-Coconut Chuteny

Method:
Soak rice in warm water for at least 2 hours and drain water completely.
Grind coconut, rice, red chillies, coriander seeds, cumin seeds, salt to taste and about 3 cups of chopped watermelon rinds without adding any water. If the batter is too thick add little more watermelon rinds and grind. The batter should be little thinner than Idli batter consistency.
Now add finely chopped onion, green chilli, coriander and curry leaves to the batter and mix well. Keep this aside for about 15 minutes so that all the flavours blend well.
Heat tawa/griddle and pour a ladle full of batter in the centre. Using back of ladle spread this into thick circle.
Cook both the sides in medium-low heat till they turn golden brown by applying little oil or ghee if desired.
Serve hot with Chutney or Sambar or with honey.

I love my plate of watermelon dosa with honey and Ginger-Coconut Chutney. Here is the simple recipe for making Ginger-Coconut Chutney.


Ginger-Coconut Chutney
Prep Time: 5 mins
Cooking Time: -
Serves: 3-4
Ingredients:
1 cup Fresh/Frozen Coconut
¾ inch Ginger
2 Green Chillies
1 marble sized Tamarind
Salt to taste

Method:
Grind all the above ingredients adding little water (about ¾ cups of water) at a time to a smooth paste and serve with Dosas or Idlies.

Photo Sharing and Video Hosting at Photobucket
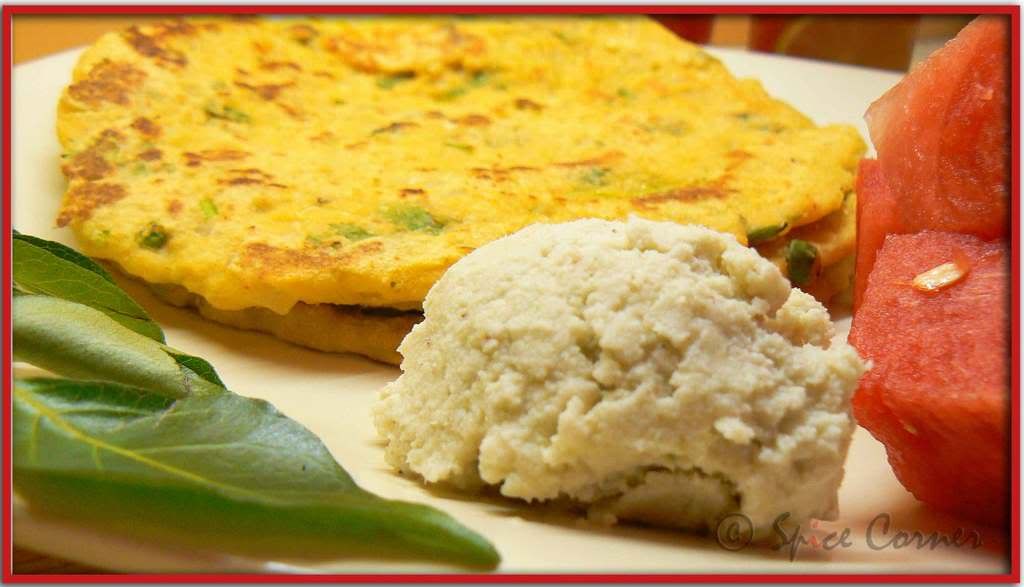
Watermelon Rind Dosa with Ginger-Coconut Chuteny


Did You Know?
Every part of a watermelon is edible, even the seeds and rinds.
Watermelon is grown in over 96 countries worldwide.
In China and Japan watermelon is a popular gift to bring a host.
In Israel and Egypt, the sweet taste of watermelon is often paired with the salty taste of feta cheese.
Watermelon is 92% water.
Watermelon's official name is Citrullus lanatus of the botanical family Curcurbitacae and it is a vegetable! It is related to cucumbers, pumpkins and squash.
A watermelon was once thrown at Roman Governor Demosthenes during a political debate. Placing the watermelon upon his head, he thanked the thrower for providing him with a helmet to wear as he fought Philip of Macedonia.
Watermelon is an ideal health food because it doesn't contain any fat or cholesterol, is an excellent source of vitamins A, B6 and C, and contains fiber and potassium.
The first recorded watermelon harvest occurred nearly 5,000 years ago in Egypt.
The word "watermelon" first appeared in the English dictionary in 1615.
(Source: www.mrspohlmeyerskinderpage.com)


Photo Sharing and Video Hosting at Photobucket
Watermelon Rind Dosa

30 January, 2007

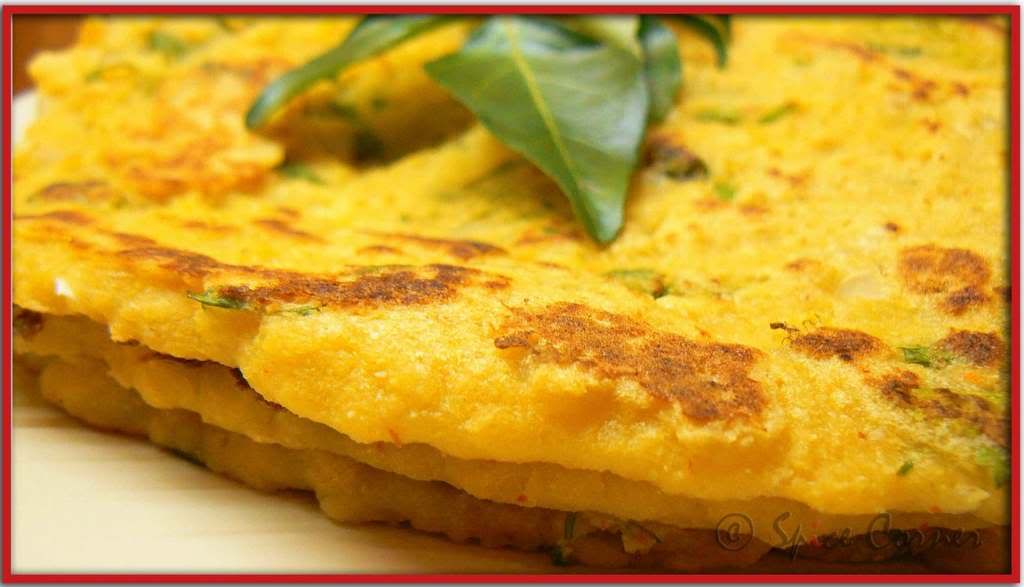
Uppu Menasu Dosa (Spicy Dosa)

I love dosas and like it more when you can right away make them with out fermentation process. This is very old recipe from my Atte and Amma’s kitchen. They learnt it from their mothers. I am not sure as why it’s called as Uppu Menasu Dosa (Uppu means Salt and Menasu means Chilly in Kannada). Well what’s in name? It’s been my favourite dosa since as long as I can remember having it for the first name. Some what after coming here I had forgotten its existence. Yes… not anymore… Not for long time….

Uppu Menasu Dosa

Ingredients:
2 cups Rice
2 medium Onions
1 tsp Jeera/Cumin Seeds
1 tbsp Coriander Seeds
5-6 Dry Red Chillies (acc to taste)
Handful of Poha
Salt to taste

Uppu Menasu Dosa

Method:
Soak rice in water for 1-2 hours.
Add all the ingredients and grind them to smooth paste adding enough water.
Heat the tava and pour a spoonful of batter and spread them evenly.
Cook till it turns golden brown and crisp and turn it over.
Serve hot with any chutney/yogurt or it can be eaten as it is.

Uppu Menasu Dosa

Variation:
You can also add ½ cup of grated coconut while grinding.


Uppu Menasu Dosa
How my blog buddies look like MEME:
I’m tagged by Pooja for the MEME How my blog buddies look like. Well… it was rather difficult one as here I have to write about blog buddies whom I have never seen. I have my own vision of some blog friends with whom I interact on this virtual world of internet on almost daily basis. Although I have not met anyone of them (may never meet face to face), I have developed a very strong emotional bond with them. I think of them in terms of colours as every individual has some stong colour which portraits them. I have had never thought that I will be making so many friends here in food blogging and this is my tribute to all my blog buddies.
Everything I have written here is purely based on my imagination. So please correct me if I am wrong and do let me know as how far I am right in this guessing game. And also I could write about people with whom I have known since long time. So here we go…

POOJA:
She is mischievous and naughty to the core with streak of moodiness. She has 100 watts smile and light any place with her good sense of humour. One thing she can’t stand is sitting idle for long. Always up to something or the other.

SANDEEPA:
She is one pretty girl with short and silky hair. She is adventurous and fun loving person. I don’t know why I always imagine her in jeans and t-shirts.
LAKSHMI:
She is one busy mom with big dreams for her two little darlings. She has beautiful smile and dimple chin.
LAKSHMIK:
I feel she is much organised and also vivacious reader. I imagine her in kid’s park playing with her little one. She is passionate about everything she does and she is a terrific cook.
VIJI:
She can beat everyone’s record of cooking and blogging. One enthu person who has so much to give it to the world. If anyone deserves an award for enthusiastic food blogger, then I will definitely vote for her.

ROOMA:
I always visualise her as a leader rather than a follower. Intellectual person with brick sized book in her hand and her spectacles fixed on tip of her nose. She knows what she wants from her life and she is on the way of making it happen.

ASHA:
One busy mom working in her white kitchen creating mouth watering delicacies for her family and friends. I think that she has her camera around her neck while cooking (looking at her step by step shots of cooking). She is humble and kind. It is very difficult to imagine her as she has so many ‘avtars’.

USHA:
Ahhh… she is one sensitive soul who cares deeply for her family and friends especially her better half. She loves to make friends and can easily mingle with any crowd. She is the one who has gone through many difficulties in her life and has emerged as a role model for others. I imagine her as a person with beautiful eyes which reflects her lovely heart.

VINI:
She is a doting mother who loves to bake goodies for her little princess. Her world revolves around her daughter. I feel she is a person with big dream which she has tucked away for now, but I don’t have any doubt about her achieving it one day. And one more thing, I think she has long beautiful hair.
Although I have seen Seema, Soumya, Trupti, Dilip, Vani, Supriya, Manjula and Nidhi, I have not met most of them. So here is the picture I have of them.

SEEMA:
One creative lady blessed with magic touch. She can turn shambles into palace and give complex to any top interior decorator. Talkative who can talk for hours without taking any break.
SOUMYA:
She has a heart of gold and a face to match. Kind hearted doctor who can never think of harming even an ant.
TRUPTI:
She is a multi-tasker, able to juggle many things at once. She’d be cooking dinner and helping the kids with homework and answering the phone and keeping an ear on the radio, all at the same time. Her world revolves around her family.
VANI:
Proud mommy and wonderful wife cooking in her kitchen with her ‘Ginger’. She is gorgeous yet so simple.

DILIP:
He is a lover of everything ‘hot’ and ‘spicy’. He is a doting husband who loves to cook and experiment.
SUPRIYA:
She is a fun loving, bindas girl who lives her life to the fullest. She has got the attitude to match her personality. Bubby and friendly and also no nonsense girl.

NIDHI:
Here comes our little master chef for whom we all are proud of. She is born with silver spoon in her ‘hand’ to create magic with food. She is a lover of everything elegant and elegance is her second name.
MANJULA:
She is an attractive girl with flawless skin and beautiful eyes. Quiet,kind hearted and fun loving.
Uff... That was really difficult but it was real fun.... I quite enjoyed thinking about it.

25 January, 2007

Navaratna Dosa with Coriander Chuteny

Lentils/beans are important part of diet in India. Be it plain rasam, sambar or dal lentils/beans are the main ingredients. I try to include lentils as much as possible as they are not only nutritious but also taste good. My hubby prefers dosa/pancakes for breakfast. Dosa can be made using just one ingredient. But here I am posting a recipe of dosa where I have used 9 different lentils/beans, so the name Navaratna which means 9 precious gems. The recipe source is of course my mother.

Ingredients:
1 cup Rice
1 tbsp Methi/Fenugreek Seeds
½ cup Grated Coconut
Handful of Poha
4-6 Dry Red Chillies (adjust acc to taste)
Salt to Taste
Lentils/Beans used:
2 tbsp Whole Green Gram
2 tbsp Split Green Gram
2 tbsp Toor Dal
1/4 cup Urad Dal
2 tbsp Split Chana Dal
2 tbsp Chana Dal/Chickpeas
2 tbsp Kidney Beans/Rajma
2 tbsp Whole Wheat
2 tbsp Black Eyed Beans

Navaratna Dosa with Coriander Chuteny & Soppu Sambar
Method:
  1. Soak rice, fenugreek seeds and all lentils/beans in water for at least 4-5 hours or preferably overnight.
  2. Add poha, chillies and coconut and grind them to smooth paste adding enough water and salt to taste.
  3. Keep it over night to ferment the batter in warm place.
  4. Next day prepare dosa and serve hot with any Chutney or Honey or Sambar

Navaratna Dosa
I served this dosa with Coriander Chutney. Here is the ingredient and method for making fresh coriander chutney.
Ingredients:
Small bunch/handful of Fresh Coriander Leaves
½ inch Ginger
1 cup Grated Coconut
2-3 Green Chillies
½ tsp Cumin/Jeera Seeds
1 tsp Tamarind Paste
Salt to taste
Navaratna Dosa with Coriander Chuteny & Soppu Sambar
Method:
  1. Grind all the ingredients adding little water at a time to smooth paste.
  2. You can also season it with mustard and curry leaves.

19 November, 2006

Veg Uttappa

I remember the days of my childhood when my Amma tried to feed us veggies. I was very picky with vegetables. Hated one for its colour and another for its shape; disliked one for its texture and another for its taste; oh… so many reasons not to eat vegetables. But Amma was too smart to leave us just like that. She had so many secret weapons in her treasure chest which she used whenever required. She made us fruit juice and ice creams when we were not ready to eat fruits, made veggie cutlets and colourful dosas when were ran away from vegetables, made healthy rice dishes with wide array of vegetables chopped into so small pieces so that it will be difficult to pick them and pile in the corner of plates, mixed fresh fruits and raw vegetables in yogurt to mix with rice and roties, mixed vegetable purees with chappati atta to make them colourful and attractive… and not to forget different varieties of dosas with smiley faces cheering us…
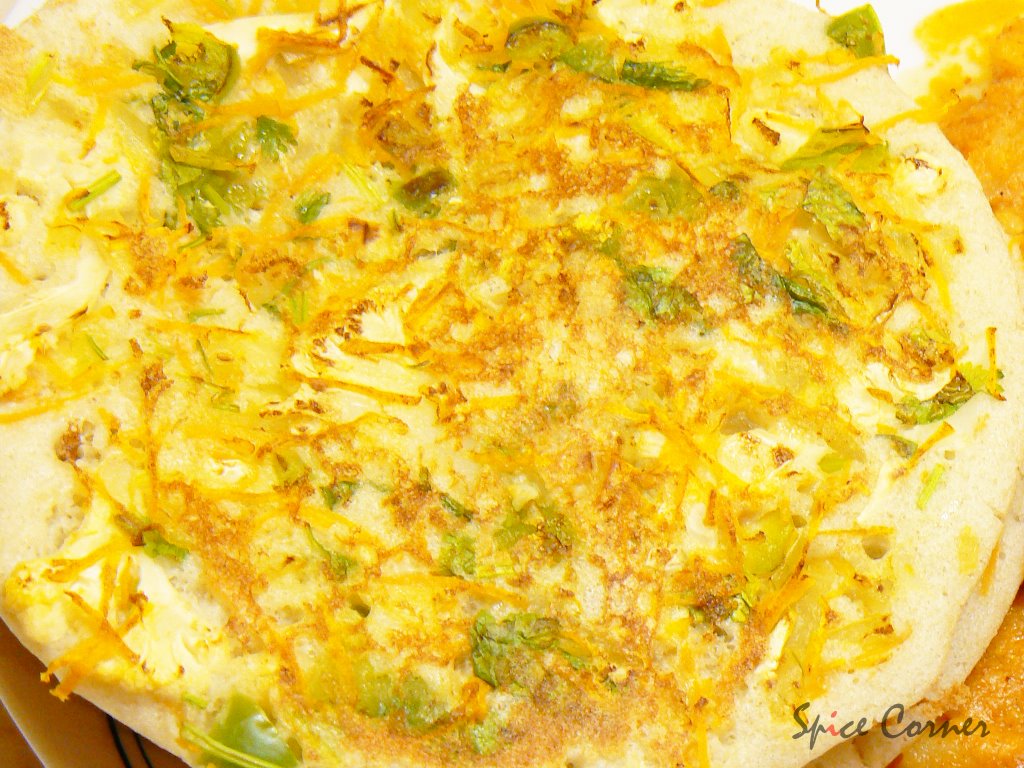
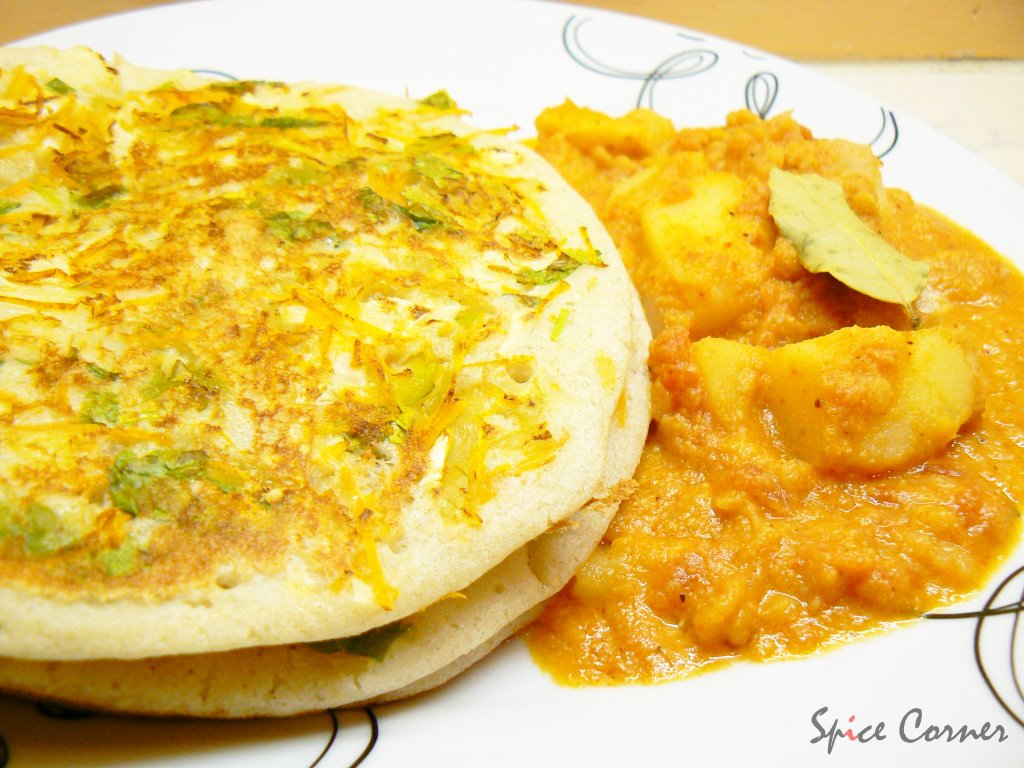
Memories…lovely memories… Well, let me come back to present…. If anyone were to ask me which I dislike the most my answer would be none… Yes Amma, you heard it right:) Thanks to my hubby dear who made me fall in love with all the vegetables. I love using as many different varieties of vegetables as possible in any dish which I feel gives 'kick' to it. As my hubby prefers dosas for breakfast on weekdays than breakfast cereals, I’m always on a search for as many recipes as possible. The one which works perfect for us is Uttappa. I usually make Uttappa batter for 2-3 days and add different types of vegetables on different days. Here is a recipe for making Veg Uttappa.


Veg Uttappa

Ingredients:
1 cup Raw Rice
1 cup Par Boiled Rice
1/4 cup Dehusked Black gram
1 tbsp Red gram Dal
1/2 tbsp Fenugreek/Methi seeds
Salt to Taste.

Indian Healthy Pizza, Veg Uttappa

Vegetables used:
Grated Carrot
Finely chopped Capsicum
Finely chopped Onion
Grated Cauliflower
Finely chopped Green Chillies(Acc to taste)
Finely chopped Coriander Leaves

Indian Healthy version of Pizza

Method:
Soak all ingredients in water for 3-4 hours.
Grind then to smooth paste adding salt and enough water.
Allow to ferment till next day.
Heat a tawa/pan and spread a laddle full of batter into thick circle.
Sprinkle finely chopped vegetables on top evenly.
Cook both sides in medim flame till they turn golden brown.
Serve hot with sambhar/chutney/pickle.

Veg Uttappa served with Potato Sambar


Note:
Add as many or as little vegetables you want.
With the same batter you can make Onion, Cauliflower, Tomato, Carrot, Capsicum Uttappa.

Veg Uttappa served with Potato Sambar

18 October, 2006

Masala Dosa

One thing which I missed the most during my hostel days was Big M...Yup, its my Mom's speciality dish...the crispy, tasty, wonderful Masala Dosa. My mom is the best cook(better than MTR:) when it comes to masala dosa. Everytime I went home on short leave from hostel, I was always embraced with big hug from mom and big plate of Masala dosas. For me its a King of all Dosas. I can never match the special taste of mom's cooking but I'm getting used to cooking well for my standards:) Here is my humble recipe for preparing quick and easy and also tasty masala dosa. Oh...I got the big thumbs-up from my Hubby too;)


Masala Dosa with Red Chutney


Ingredients:
For Dosa:
2 cups Rice
3/4 cup Urad Dal
1/4 cup Moong Dal(Green Gram)
2 tbsp Methi Seeds
1/2 cup Poha
Salt to taste

For Poato Curry/Bhaji:
1 big Onion, sliced thinly
3 medium Potatoes, peeled, cooked and mashed
1 inch chopped Ginger
1 tsp Termaric Powder
2 Green Chillies, slit
Fresh chopped Coriander leaves
Salt to taste
For Seasoning:
1 tbsp Mustard
1 tbsp Urad Dal
2-3 Dry Red Chillies
Few Curry leaves
Pinch of Hing

For Red Chutney:
1/2 cup Coconut
1/2 tsp Jeera/Cumin Seeds
2-3 Dry Red Chillies
1/2 inch Ginger
1/2 tsp Tarmarind Paste
Salt to taste

Masala Dosa

Method:
For Red Chutney:
Grind all the ingredients in a mixi/food processor to smooth paste adding enough water and keep it aside.

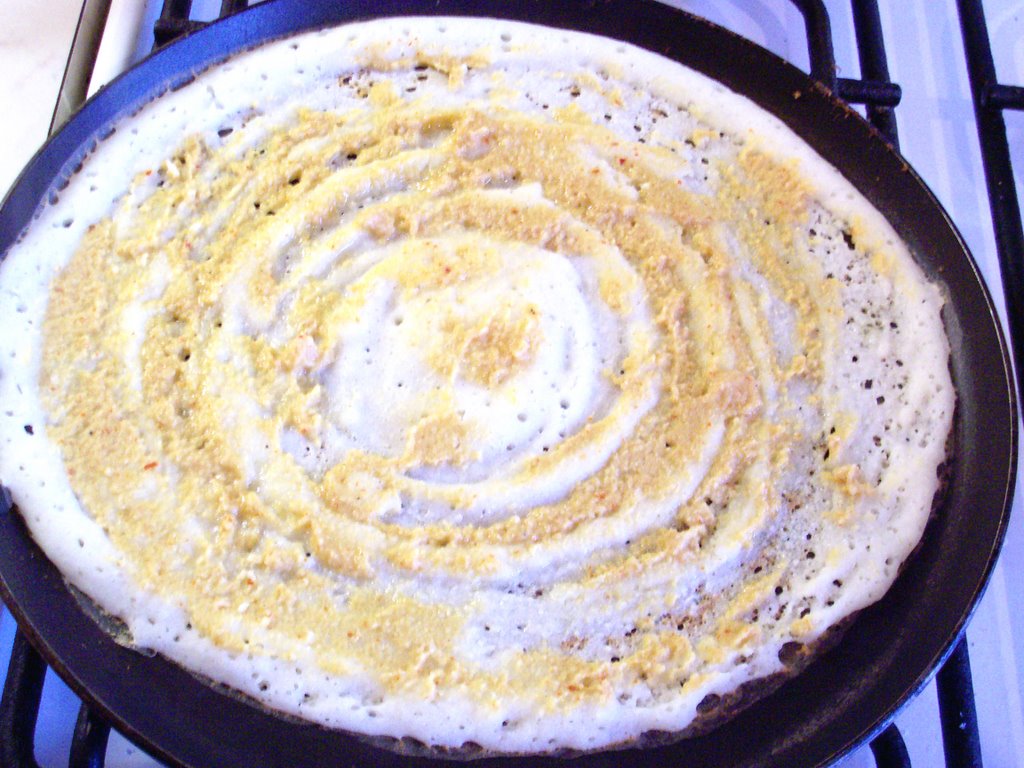
Dosa with Red Chutney


For Potato Bhaji/Curry:
Take little oil in a pan and add all seasoning ingredients and fry till it starts spluttering.
To this add sliced onions and chopped ginger and cook till onions turn translucent.
Add slit chillies, mashed potatoes, salt and little water and mix them well.
To this add termaric powder and chopped coriander leaves and cook for 2-3 minutes mixing well.
Remove the pan from gas and keep it aside.

Dosa with Potato Bhaji


For Dosa:
Soak rice, urad dal, moong dal and methi in water for 4-5 hours or over night.
Grind all the ingredients with Poha, salt and enough water to smooth paste.
Its recommended to keep this batter to stand overnight.
Next day heat the tava/pan and put little ghee/cooking oil.
Spread the batter on tava and spread the red chutney evenly.
Cook it till the dosa turns brown and crispy.
Add a tsp of Ghee on top of it and a 2 tbsp of Potato bhaji/curry.
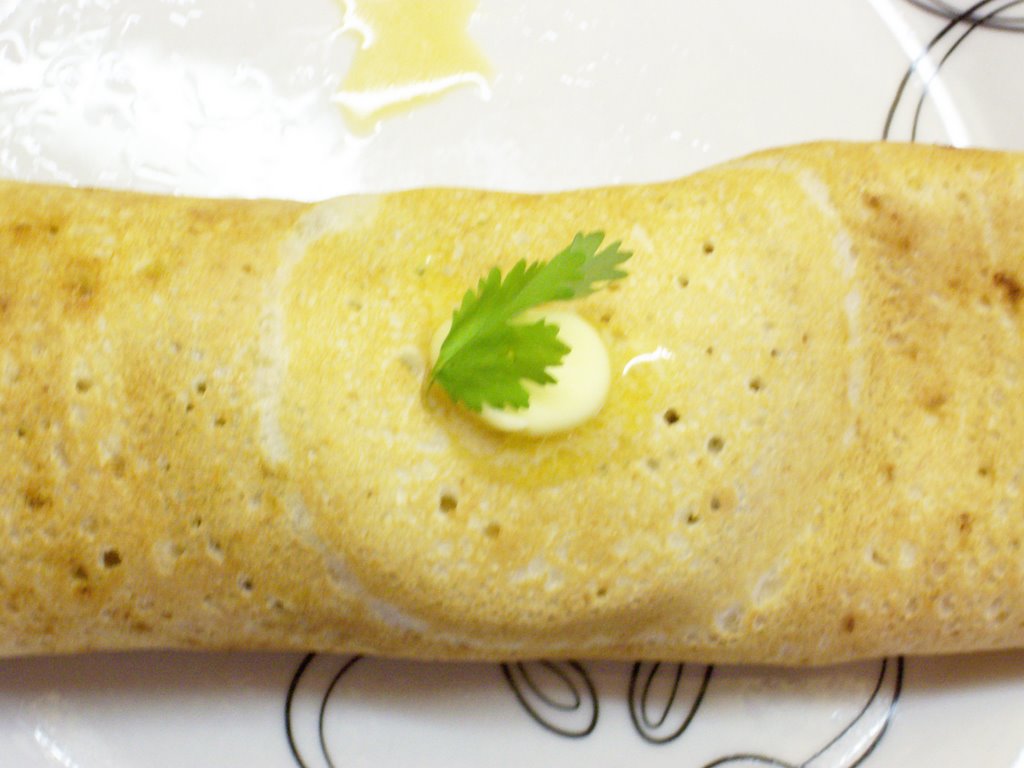
Fold the dosa in middle and serve hot.

Crispy Masala Dosa ready to serve


13 October, 2006

Onion Uttappa

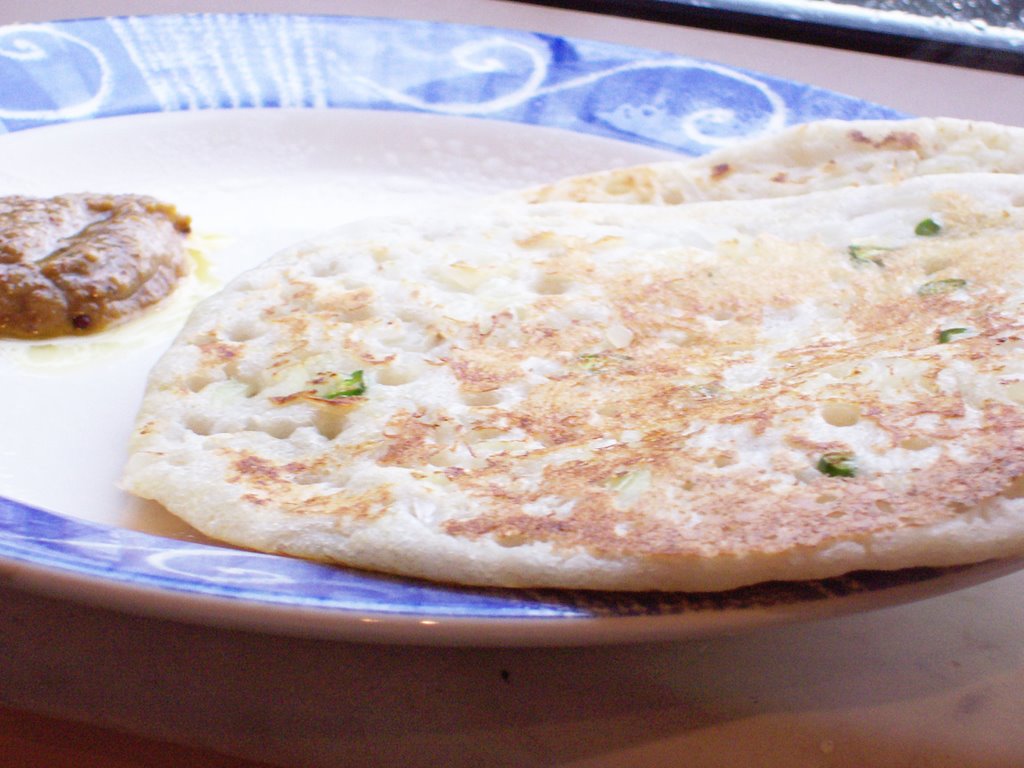
Here is another way of making uttappam with urad and moong dal. I have used onion for Topping. You can also try using grated carrots, cauliflower, tomatoes etc.


Onion Uttappa served with Green Tarmarind Pickle
Ingredients:
2 cups Rice
1 cup Urad dal
3 tbsp Moong dal (yellow dal)
2 tbsp grated Coconut
1" ginger
1 small onion, chopped finely
1 green chilli, chopped finely
salt to taste

Onion Uttappa
Method:
Soak rice, urad dal and half ground moong dal in water overnight or in warm water for 2 hours.
Grind the soaked rice and daal with grated coconut, ginger, salt and water to smooth batter.
Let the batter ferment overnight or for 7-8 hours.
Heat the tava/pan and put little ghee/cooking oil.
Spread the batter on tava and add chopped onion and chillies on top of uttappa immediately.
Cook it till brown on bothsides applying oil.
Serve hot with any chutneys or pickles of your choice.